The First Time I Made These
I remember the first batch I pulled out of the oven. I was so nervous they’d be ruined.
But when I flipped that first ramekin onto a plate, the center just started to ooze. I actually squeaked a little.
Have you ever made something that felt way too fancy for how easy it actually was? This is one of those recipes.
What You’re Really Working With
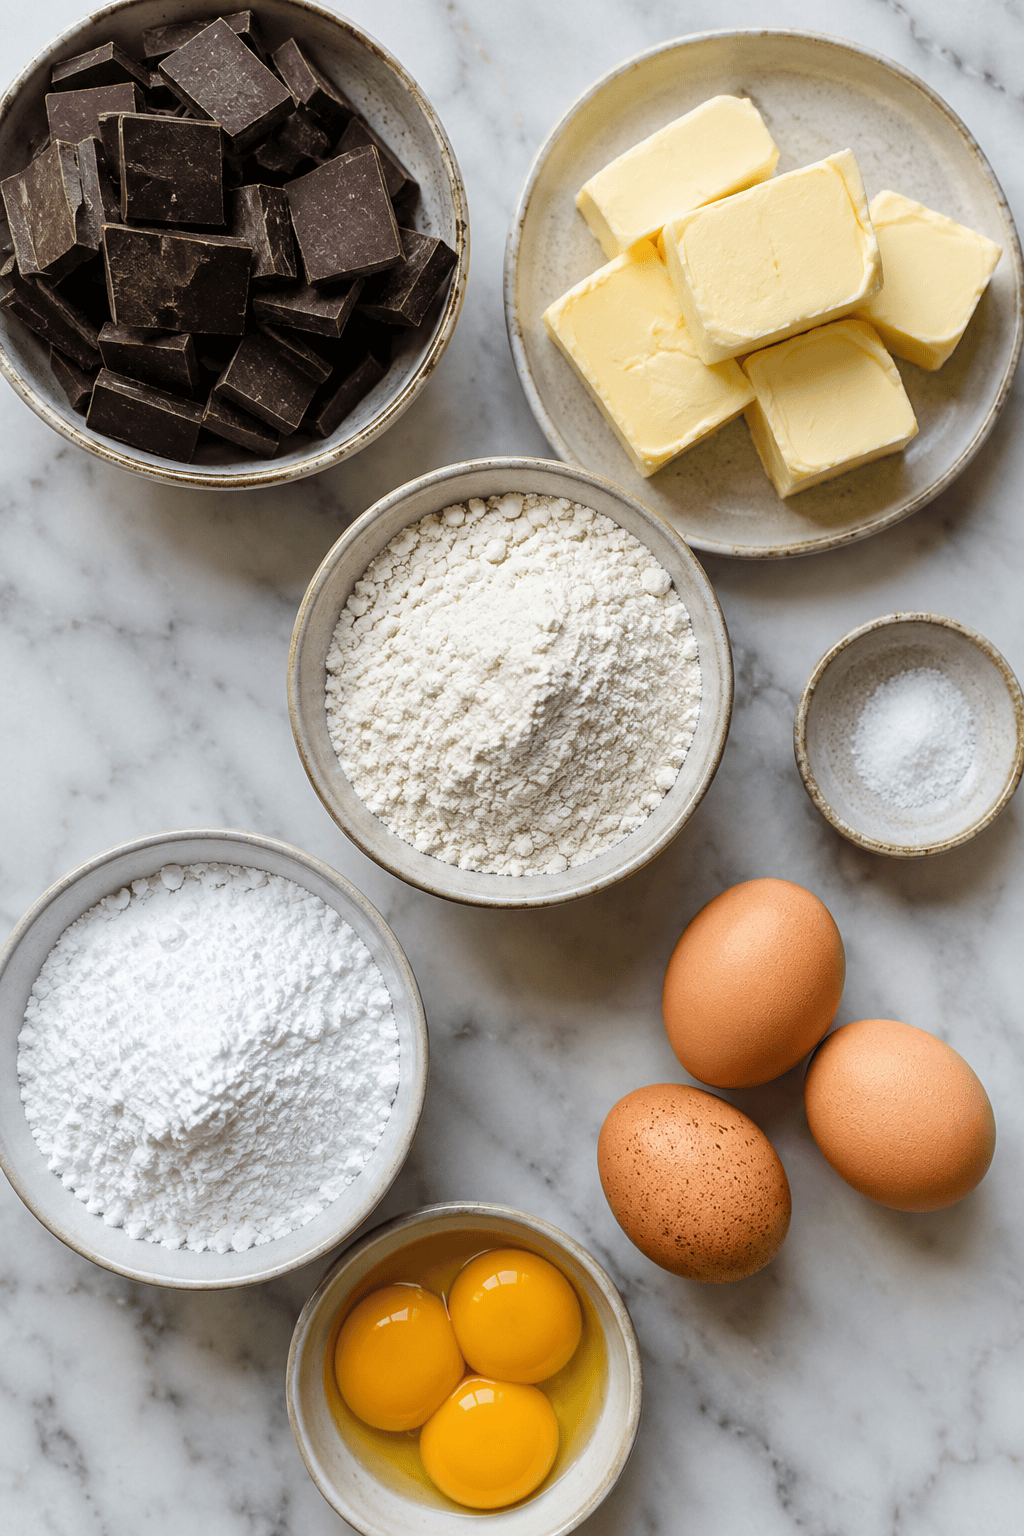
You only need seven ingredients here. That’s it.
The butter and chocolate do all the heavy lifting for that rich, silky texture. And honestly?
The powdered sugar is a happy accident. It dissolves faster than granulated sugar, so your batter stays smooth.
The Quick Tip You’ll Want to Remember
Don’t overmix the batter once the eggs go in. Just fold until it comes together.
I learned this the hard way. Overmixing makes them tough, and nobody wants a tough molten cake.
So here’s your trick: measure your eggs first, then crack the extra yolks into the same cup. It keeps everything easy and mess-free.
Why Powdered Sugar Is the Secret
I know it seems weird to skip regular sugar here. But trust me on this one.
Powdered sugar has a tiny bit of cornstarch in it. That cornstarch helps the cake hold its shape just enough while the center stays liquid.
It’s a small detail that makes a huge difference. Do you ever notice how the smallest ingredient swap can change everything?
That Moment in the Oven
You’ll bake these for about twelve minutes. The edges need to look set and firm.
But the center? It should still look soft and a little jiggly, like it’s not quite done. That’s exactly what you want.
I always peek through the oven door like a kid waiting for cookies. It never gets old.
Serving Them Like You Mean It
Let them sit for exactly one minute after baking. No longer, or the lava sets.
Then run a knife around the edge, flip them onto a plate, and watch that chocolate spill out. It’s pure magic.
A scoop of vanilla ice cream on top is non-negotiable in my house. What would you put on yours?
Instructions
Step 1: Grease your ramekins well, then dust them with cocoa powder instead of flour. I always forget this part and end up with cakes that stick. Preheat your oven to 425F. (Pro tip: use a pastry brush for the butter—your fingers will thank you.) Step 2: Chop your semi-sweet chocolate and cut the butter into small pieces, then melt them together in the microwave in 20-second bursts. Stir between each burst until it’s smooth and glossy. I’ve burned chocolate more times than I want to admit, so go slow here. Step 3: In one bowl, whisk the flour, powdered sugar, and salt. In another bowl, whisk the eggs and egg yolks until they’re uniform and slightly frothy. Do you know what happens if you over-whisk the eggs? … Share below! Step 4: Pour both the dry mix and the egg mixture into the melted chocolate, then stir gently until just combined. A few streaks of flour are fine, don’t beat it to death. That always works for me—overmixing makes the cakes tough. Step 5: Divide the batter evenly among your four ramekins, filling them about three-quarters full. You can use a muffin pan if you don’t have ramekins, just adjust the time. I didn’t expect the batter to be that thick, but that’s normal. Step 6: Bake for 12 to 14 minutes, or 8 to 10 minutes if you’re using a muffin pan. The sides should be set and pulling away slightly, but the center will still jiggle when you tap the pan. (Hard-learned tip: don’t peek too early—opening the oven lets out heat and ruins the lava effect.) Step 7: Let the cakes rest for exactly one minute, then run a knife around the edge and invert them onto plates. They’ll slide out easily if you greased properly. Serve immediately with ice cream or berries, because that warm chocolate center waits for no one.Creative Twists
… Swap the semi-sweet chocolate for dark chocolate and add a teaspoon of orange zest to the batter. The bitterness and citrus cut through the richness perfectly. … Stir a tablespoon of creamy peanut butter into the center of each ramekin before baking. You get a gooey peanut core inside the molten chocolate. … Add a pinch of cayenne pepper and a dash of cinnamon to the dry ingredients. It’s a little spicy and a little warm, like a Mexican hot chocolate. Which one would you try first? Comment below!Serving & Pairing Ideas
Serve these little cakes with a scoop of vanilla bean ice cream, letting it melt into the sauce. That’s my go-to, honestly, it’s simple and never fails. You could also pile on some fresh raspberries and a dusting of powdered sugar for color and tartness. If you’re feeling cozy, pair the molten cake with a mug of strong black coffee or a cold glass of milk. The bitterness of the coffee balances the sweetness, and the milk is just a childhood comfort. Which would you choose tonight?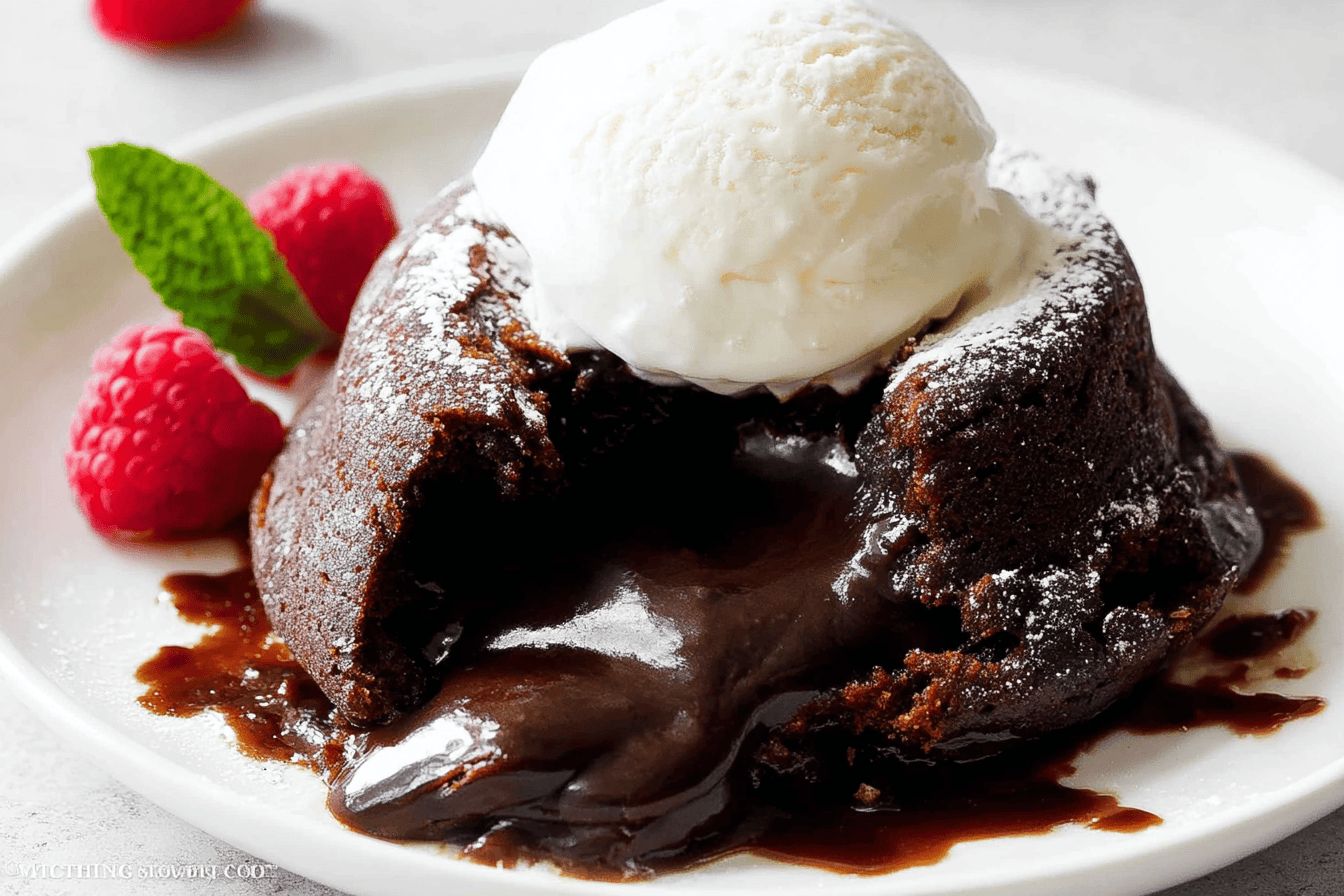
Storage & Make-Ahead Tips
These little cakes are best fresh from the oven, but I know life gets busy. You can make the batter ahead and keep it in the fridge, covered, for up to two days. Just spoon it into the ramekins right before baking, and add a minute or two to the bake time since it’s cold. I once stored the batter overnight and forgot to let it come to room temperature. The edges set fine, but the center stayed a bit too runny. Lesson learned: pull it out ten minutes before you bake.
Freezer? Absolutely. Bake the cakes, let them cool completely, then wrap each one tightly in plastic wrap and foil. They’ll keep for a month. To reheat, unwrap and pop them in a 350°F oven for about 8 minutes, or microwave for 20 seconds. The top will lose that crackly crust, but the inside stays fudgy. Batch cooking like this means you’ve got dessert ready for a last-minute craving or a surprise guest. It saves time, and it saves good chocolate from going to waste. Have you ever saved leftovers like this? Tell me below!
Common Mistakes & Easy Fixes
Mistake number one: overbaking. You want the sides set and the center still jiggly. I once left mine in an extra two minutes because I was chopping berries, and the tops turned into dry little pucks. Fix: start checking at the shorter time. The cake should wobble like a soft pudding, not a sponge cake. That little jiggle is your friend.
Second: not greasing the ramekins well enough. If you skip coating them with cocoa powder after the butter, the cakes stick. I learned that the hard way when my first beautiful invert turned into a messy crumble. Fix: use a pastry brush to get butter into every nook, then tap in the cocoa powder and shake out the excess.
Third: overmixing the batter. You don’t want to whisk aggressively once the flour and eggs go in. Stir just until you don’t see white streaks. Overmixing builds too much gluten and makes the cake tough instead of tender. Why does this matter? Because a tough lava cake is just a sad brownie. Getting these simple fixes right gives you a dessert that feels fancy, even though it’s dead simple. Did this ever happen to you?
You Asked, I Answer
Can I use milk chocolate instead of semi-sweet? Yes, but it changes things. Milk chocolate has more sugar and less cocoa butter, so the cake will be sweeter and the center might run a little thinner. If that’s what you’ve got, go ahead, but cut the powdered sugar by a tablespoon or two to balance it. I’ve done it when my pantry was bare, and it still tasted good, just different.
What if I don’t have ramekins? No problem. A standard muffin pan works perfectly. Just grease and dust the cups like you would ramekins. The bake time drops to about 8 to 10 minutes. The cakes will be smaller and a bit wider, but they flip out just as nicely. I’ve used a silicone muffin pan once, and the cakes slid right out. You can also use small oven-safe bowls, but watch the depth.
Can I make these gluten-free? Yes. Swap the all-purpose flour with a good 1-to-1 gluten-free blend. I recommend one that contains xanthan gum, which helps with structure. The texture will be slightly more crumbly, but the molten center hides that. I’ve tested this with a friend who’s celiac, and she said it was the best gluten-free dessert she’d had in months.
Why do I need both whole eggs and extra yolks? The yolks add richness and help create that gooey center. The whole eggs give enough structure to hold the cake together. If you use only whole eggs, the batter gets too firm and you lose the lava effect. If you use only yolks, the cake won’t rise properly. It’s a delicate balance, and this recipe nails it.
Can I substitute butter with oil? Not directly. Butter adds flavor and the right amount of fat for a tender crumb. Oil makes the cake greasy and the flavor flat. If you need dairy-free, use a high-quality vegan butter stick. I’ve tried coconut oil, and the cakes turned out a bit greasy and had a coconut aftertaste that clashed with the chocolate. Stick with butter, or go vegan butter.
How do I know when it’s done without cutting into it? The best sign is the top: it should look puffed and slightly cracked at the edges, but still soft and a little shiny in the center. Gently poke the side of the cake with your finger. It should spring back, while the middle still wobbles when you shake the pan. That’s your sweet spot. If the top is matte and firm all over, you’ve gone too far.
Final Thoughts
There’s something magical about cracking open a little chocolate cake and watching that warm lava spill out. It feels like a celebration, even on a Tuesday night. I love that this recipe doesn’t need any fancy equipment or hours of patience. Just a few bowls, some good chocolate, and twelve minutes in a hot oven. You don’t have to be a pastry chef to pull it off.
If you try it, let me know how it goes. Did the centers flow? Did you serve it with ice cream or berries? I’d honestly love to hear. Sometimes I think the best part of cooking is the stories we share about the little victories — and the little messes too. Will you make this soon?
Fun fact: Semi-sweet chocolate is also called bittersweet. It has less sugar than milk chocolate, which helps these cakes stay rich without being cloying.
Happy cooking!
—Marina Caldwell
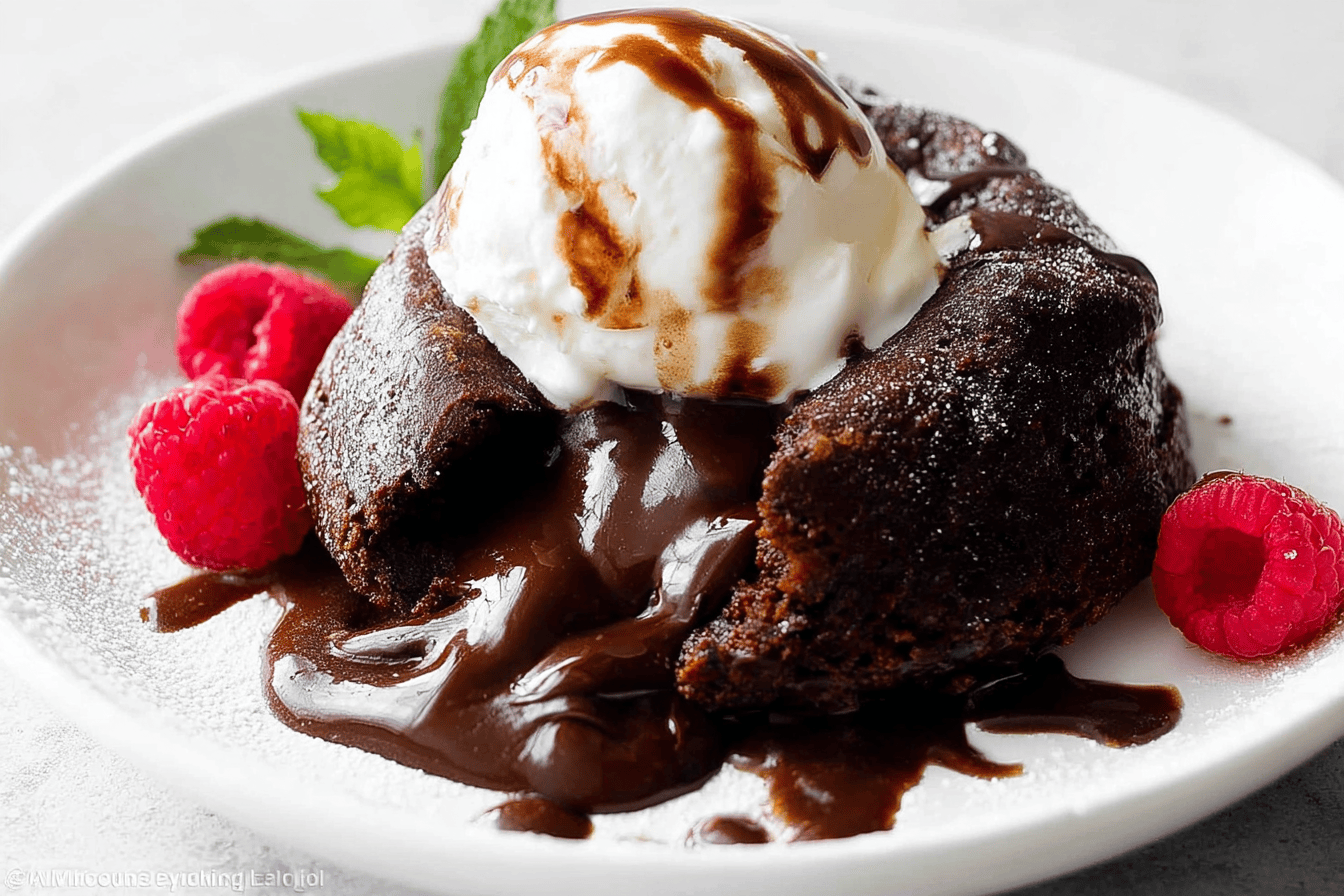
Easy Mini Molten Chocolate Cake Recipe
Description
Rich, gooey mini molten chocolate cakes with a soft center, ready in under 30 minutes.
Ingredients
Instructions
- Grease 4 ramekins (or half a muffin pan) and dust with cocoa powder. Preheat oven to 425°F.
- Melt chocolate and butter together in the microwave in short bursts, stirring until smooth.
- Whisk flour, powdered sugar, and salt together in one bowl; whisk eggs and egg yolks together in another.
- Stir the dry mix and egg mixture into the melted chocolate until just combined.
- Divide batter among ramekins.
- Bake 12-14 minutes (8-10 minutes if using a muffin pan) until the sides are set but the tops still look soft.
- Let rest 1 minute, then invert onto plates. Serve immediately with ice cream or berries.
Notes
- Serve with vanilla ice cream or fresh berries for a perfect finish.