The Cookie That Steals the Show
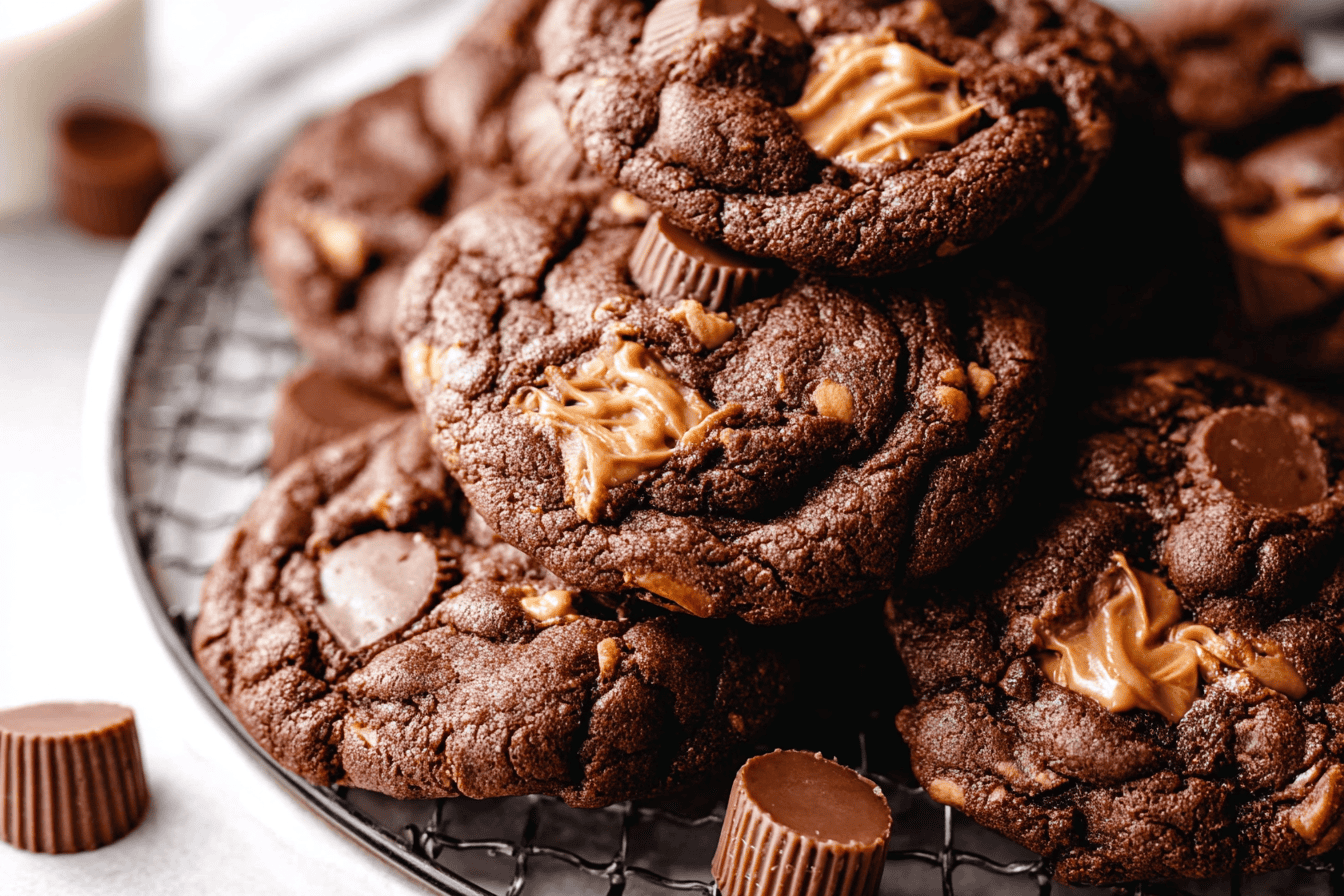
I have a confession. I have never met a peanut butter cup I did not like. But when you stuff them inside a soft, dark chocolate cookie? That is a whole other level of love.
This recipe reminds me of the ones my mom would make on rainy afternoons. She always let me sneak a little ball of raw dough when she wasn’t looking. What is your favorite thing to pair with peanut butter?
The Secret is in the Creaming
Do not skip the part where you beat the butter and sugar together. You want it light and fluffy, like a little cloud. That air is what gives the cookie its tender bite.
It takes about two or three minutes. That is all. Just stand there with your mixer and let it do the work. Here is the quick tip: scrape the bowl halfway through so everything gets even.
The Right Chocolate Changes Everything
I used to grab any cocoa powder off the shelf. Then I tried Dutch process, and honestly, I cannot go back. It makes the cookie taste deeper, richer, almost fudgy.
That deep chocolate flavor is important. It stands up to the sweet peanut butter cups without getting lost. Have you ever tried Dutch process cocoa before?
The Peanut Butter Cup Situation
Chop the mini peanut butter cups into smaller chunks. I know it is tempting to leave them whole, but the little bits spread out better. You get a surprise in every single bite.
I once tried to chop them while they were still cold from the fridge. Huge mistake. Room temperature is the way to go, or your knife will just squish them.
The Hardest Part is the Waiting
You have to chill the dough. I know, I know. You just want a cookie right now. But that hour in the fridge keeps the cookies from turning into flat pancakes.
Trust me on this one. The edges set up perfectly while the centers stay soft and chewy. It is that simple. Let me know how yours turn out when you make them.
Instructions
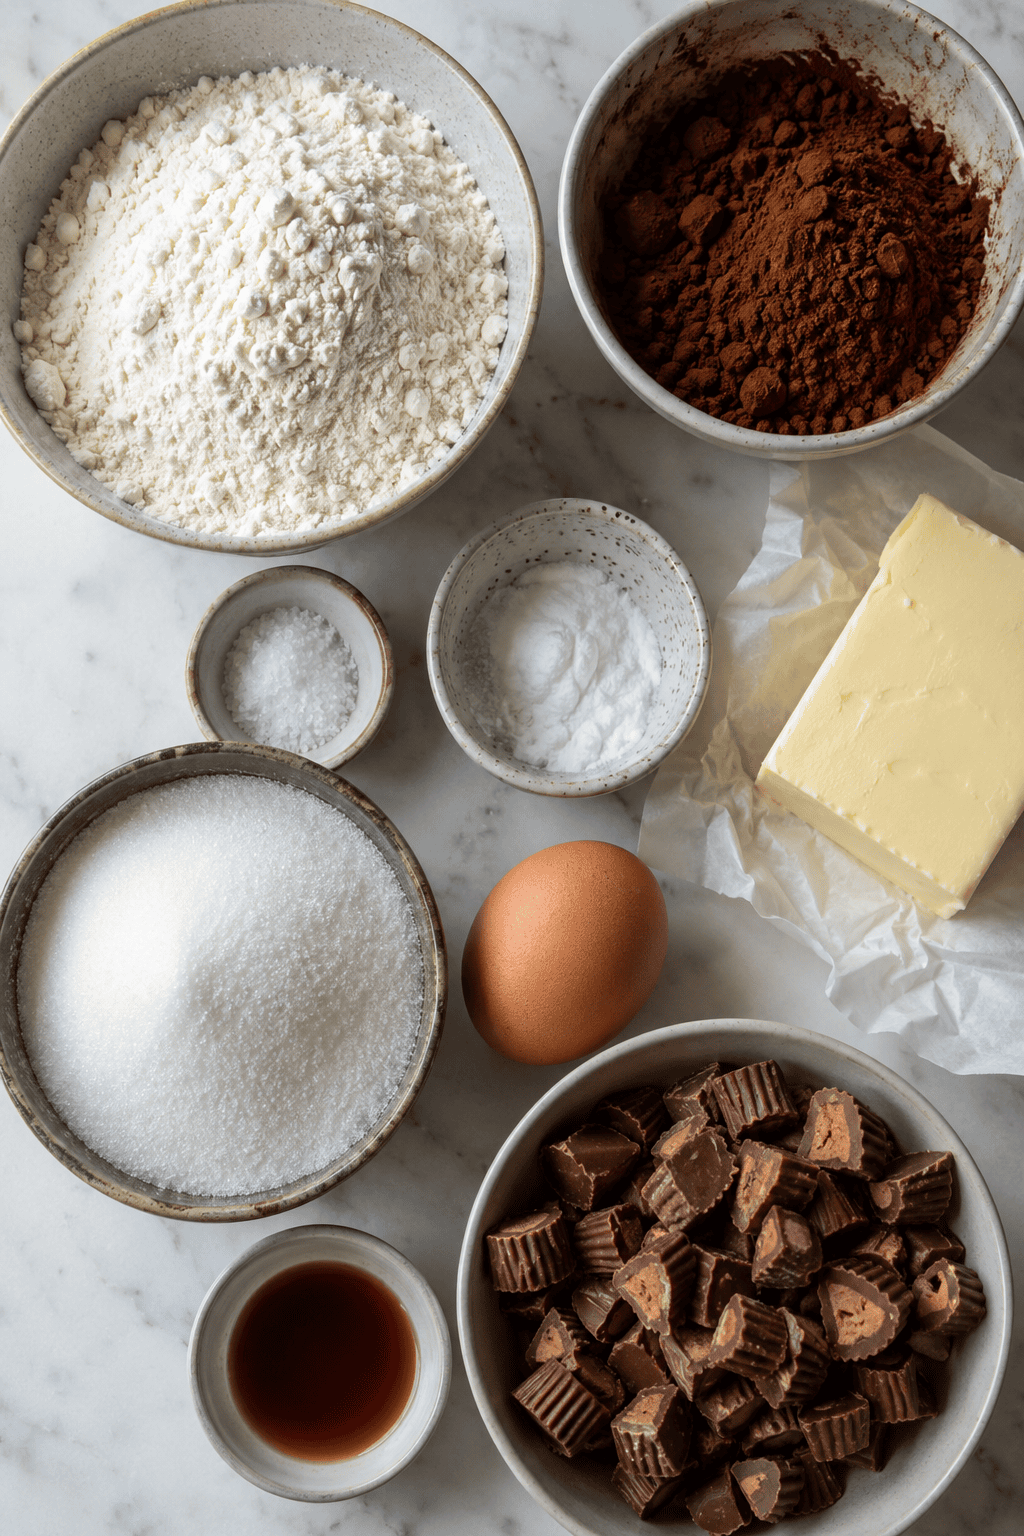
Step 1: Whisk the flour, cocoa powder, baking soda, and salt together in a bowl. Don’t skip this—it’s how you spread the leavening evenly. I always hold my breath a little when sifting cocoa because it poofs everywhere. (Pro tip: if your cocoa is lumpy, sift it into the bowl, don’t just whisk.) What’s your go-to cookie base… flour, or something else? Share below! Step 2: Cream the butter and sugar until light and fluffy, about 2-3 minutes. Use a hand mixer or stand mixer, but get your arm ready if you’re doing it by hand. I always scrape the bowl halfway through because the butter likes to hide. You’ll know it’s ready when it looks pale and almost doubled in volume. Step 3: Beat in the egg and vanilla until just combined, then add the flour mixture on low speed. Stop the mixer the second you don’t see white streaks anymore—overmixing makes tough cookies. Fold in the chopped peanut butter cups gently with a spatula. I always sneak a piece or two at this point, can you blame me? Step 4: Cover the dough and chill it for at least one hour, or up to three days. This is the step I used to skip, and my cookies always spread into sad pancakes. The chill solidifies the butter so the cookies stay thick and chewy. (Hard-learned tip: even 30 minutes makes a difference if you’re in a rush.) Do you ever chill your cookie dough overnight? Share below! Step 5: Preheat the oven to 350°F and line your baking sheets with parchment paper. I use parchment instead of a silpat here because the cookies slide off easier. While the oven heats, scoop the dough into balls about 1.5 tablespoons each. Space them two inches apart—they’ll spread more than you think. Step 6: Bake for 8-10 minutes, until the edges look set and the centers are no longer shiny. Pull them out when they still look a little underdone in the middle—that’s the secret to a soft cookie. I always set the timer for 8 minutes and check with my eyes before trusting the bell. (Never open the oven door during the first 6 minutes or you’ll lose the heat puff.) Step 7: Let the cookies cool on the baking sheet for exactly five minutes, then move them to a wire rack. This rest time lets them finish setting up without breaking apart. If you try to move them too soon, they’ll crumble in your hands. Trust me, I’ve learned that one the hard way.Creative Twists
… Swap 2 tablespoons of the flour for malted milk powder—it adds a toasty, almost caramel note that plays off the chocolate. My kids say it tastes like a grown-up milkshake cookie.… Press a flaky sea salt and a tiny pinch of cayenne pepper on top before baking. That spicy-sweet thing really wakes up the peanut butter, and you won’t believe how good it is until you try it.
… Replace the vanilla extract with 1/2 teaspoon of almond extract. It sounds weird, but almond and chocolate are secret best friends. I was nervous the first time, but now I do it half the time.
Which one would you try first? Comment below!
Serving & Pairing Ideas
Serve these cookies with a tall glass of cold milk—it’s classic for a reason. The richness of the chocolate and peanut butter needs something clean and icy to balance it out. Plus, dunking is half the fun. Crumble one or two cookies over a bowl of vanilla ice cream for a lazy sundae. I do this when I want dessert but don’t feel like making a whole production. A little warm fudge sauce on top doesn’t hurt either. Pair them with a mug of black coffee or an espresso for a grown-up afternoon treat. The bitterness of the coffee cuts through the sweetness perfectly, and it’s my favorite way to enjoy them after dinner. Which would you choose tonight?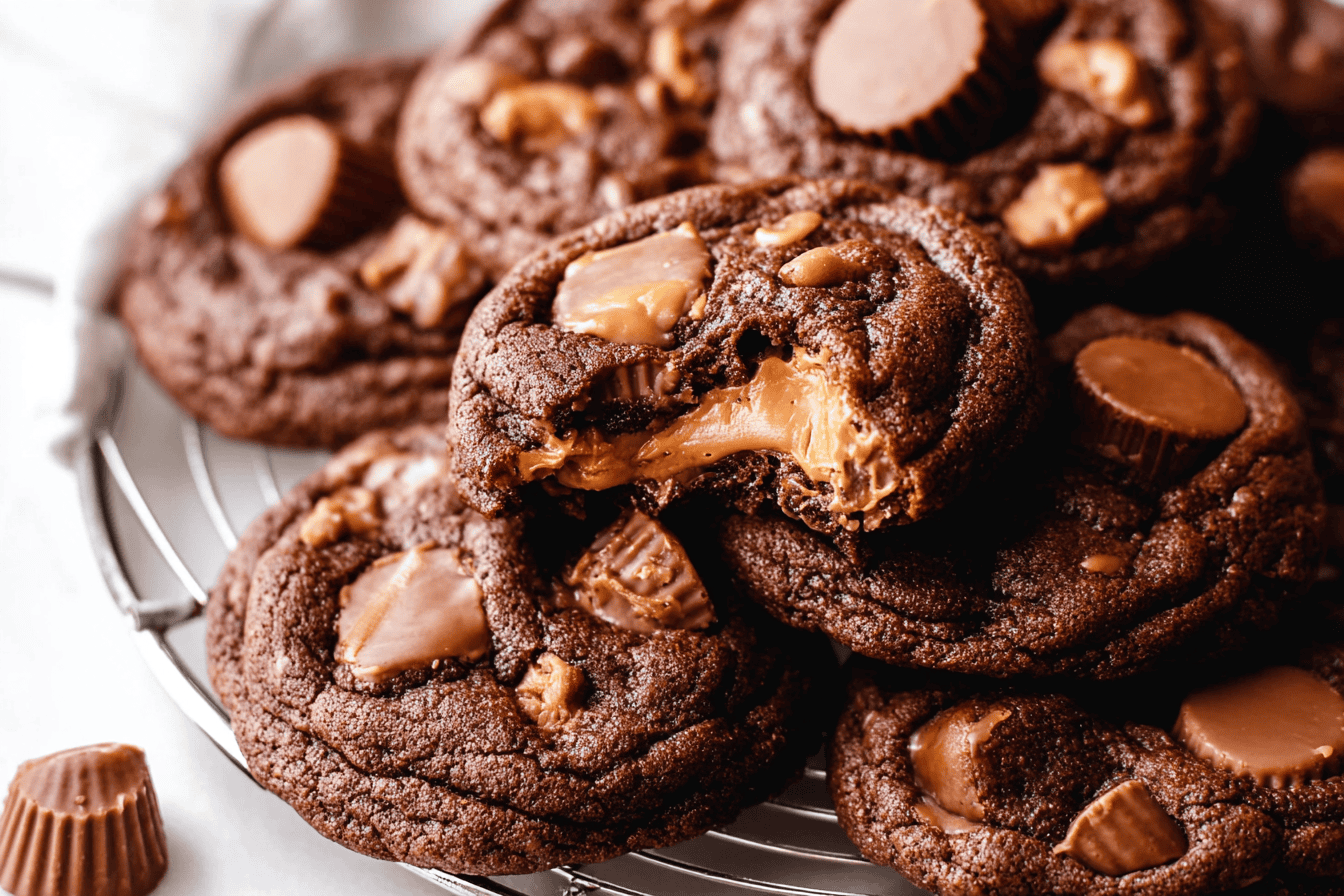
Storage & Make-Ahead Tips
You can keep these cookies in a sealed container at room temp for about four days. But honestly, they never last that long in my house. If you want them to stay super soft, toss a slice of bread into the container — it’ll soak up extra air and keep the cookies chewy. For the freezer, just layer them between parchment in a zip-top bag. They’ll be good for three months. When you’re ready, let them thaw on the counter or pop one in the microwave for ten seconds. I once forgot about a batch in the freezer and found them six months later — still tasty, but a little dry. So mark your bag! Batch cooking is perfect here: double the dough, bake half, and freeze the rest in pre-scooped balls. Then you can bake fresh cookies anytime without the mess. That’s a huge time-saver, and it stops you from wasting ingredients too. Have you ever saved leftovers like this? Tell me below!
Common Mistakes & Easy Fixes
First up: overmixing the dough. I used to beat the flour in like I was angry at it. That gives you tough, cakey cookies instead of tender ones. Stop mixing as soon as you don’t see white streaks. Second mistake — skipping the chill. I once forgot to chill the dough and baked it right away. The cookies spread into flat, greasy pancakes. That hour in the fridge firms up the butter and lets the flavors blend. Don’t skip it. Third, pulling them out too late. The recipe says bake until edges are set and centers aren’t shiny. They’ll look underdone, but that’s right. They keep cooking on the hot pan. Waiting for them to look fully done gives you dry, crumbly cookies. Did this ever happen to you? Fixing these little things really boosts your confidence in the kitchen and makes the cookies taste way better — like the difference between a good cookie and a “wow, you made these?” cookie.
Your Peanut Butter Cup Cookie Questions, Answered
Can I use natural peanut butter in the dough?
No, I wouldn’t. Natural peanut butter is oily and separate. It’ll make the dough greasy and the cookies spread too much. Stick with creamy, processed peanut butter for baking — it’s more stable and gives a smoother texture. If you’re set on natural, you can try draining off the excess oil, but the results aren’t the same. I learned this the hard way when my cookies turned into sad little puddles.
Can I substitute the Dutch process cocoa powder with regular cocoa?
Yes, but the flavor will be a little less rich. Dutch process cocoa is darker and smoother because it’s been treated to reduce acidity. Regular cocoa powder works fine, just expect a more “classic” chocolate taste. The cookie will still be delicious, promise. If you only have regular, add a pinch more sugar to balance the bitterness.
Why do I have to chill the dough for at least an hour?
Chilling is a game-changer. It solidifies the butter, so the cookies don’t flatten into thin crisps. It also lets the flour absorb moisture, which gives a chewier texture. And here’s the real trick: chilling deepens the flavor. The dough gets a chance to meld together. If you’re in a rush, even 30 minutes helps, but an hour is the sweet spot.
Can I freeze the cookie dough instead of baking it all at once?
Absolutely. That’s my favorite make-ahead move. Scoop the dough into balls, place them on a tray, and freeze until solid. Then toss them in a freezer bag. When you want cookies, just bake them straight from frozen — add two extra minutes to the bake time. No thawing needed. Fresh cookies anytime without washing a single bowl.
How do I make these cookies gluten-free?
Easy swap — use a good 1-to-1 gluten-free flour blend. I’ve tried it with a brand that has xanthan gum already mixed in, and they turned out almost identical. Just don’t overmix, because gluten-free dough can get gummy. Also, let the dough chill a little longer, maybe 90 minutes. The extra time helps the flours hydrate properly. Your gluten-free friends will thank you.
Can I use regular-sized peanut butter cups instead of mini ones?
You can, but chop them into smaller pieces. Full-sized cups create big pockets of candy that make the cookies fall apart. Mini cups are already bite-sized, so they mix in evenly without wrecking the structure. If you only have full-size, give them a rough chop into six to eight chunks each. That’s what I did one Christmas when the store was out of minis. Worked fine.
Which answer helped you most?
One Last Bite
There’s something special about a chocolate peanut butter cup cookie. It’s like a little hug in dessert form. When I bake these, the smell fills the whole house, and suddenly everyone wanders into the kitchen asking what’s happening. That moment — pulling the tray out, seeing the shiny centers, waiting that painful five minutes before you can touch one — it’s pure comfort. I hope you give this recipe a try. Don’t worry if your first batch isn’t perfect. Mine wasn’t either. Just pay attention to the chill time and don’t overbake. Then share a few with someone you like. Or don’t. I won’t judge. Will you make this soon? Let me know how they turn out. Happy cooking! —Marina Caldwell
Ultimate Guide to Chocolate Peanut Butter Cup Cookies
Ingredients
- 1 1/4 cups all-purpose flour
- 1/4 cup + 2 tbsp Dutch process cocoa powder
- 1/2 tsp baking soda
- 1/4 tsp salt
- 1/2 cup unsalted butter, room temperature
- 1 cup granulated sugar
- 1 large egg
- 1 tsp vanilla extract
- 1 cup chopped mini peanut butter cups
Instructions
- 1Whisk flour, cocoa powder, baking soda, and salt together in a bowl.
- 2Cream butter and sugar until light and fluffy, about 2-3 minutes. Beat in the egg and vanilla.
- 3On low speed, mix in the flour mixture until just combined, then fold in the chopped peanut butter cups.
- 4Cover and chill the dough at least 1 hour (up to 3 days).
- 5Preheat oven to 350°F and line baking sheets with parchment.
- 6Scoop dough into balls and space on the sheets. Bake 8-10 minutes, until the edges are set and the centers are no longer shiny.
- 7Cool on the pan 5 minutes, then transfer to a rack to finish cooling.
Notes
For best texture, do not skip chilling the dough. Store cookies in an airtight container at room temperature for up to 5 days.