The Skillet That Changed My Weeknights
I have a confession. I bake this cookie skillet at least once a month, usually on a random Tuesday. It’s not even a special occasion.
There’s something about pulling a hot cast iron out of the oven that feels like a hug. The edges get all crispy and caramelized, but the middle stays soft and almost underdone. You know that perfect bite where it’s still a little doughy? That’s the goal.
Plus, it takes maybe 10 minutes to throw together. No chilling, no scooping, no waiting around. Just stir, press, bake, and you’re done.
Why Brown Sugar Matters More Than You Think
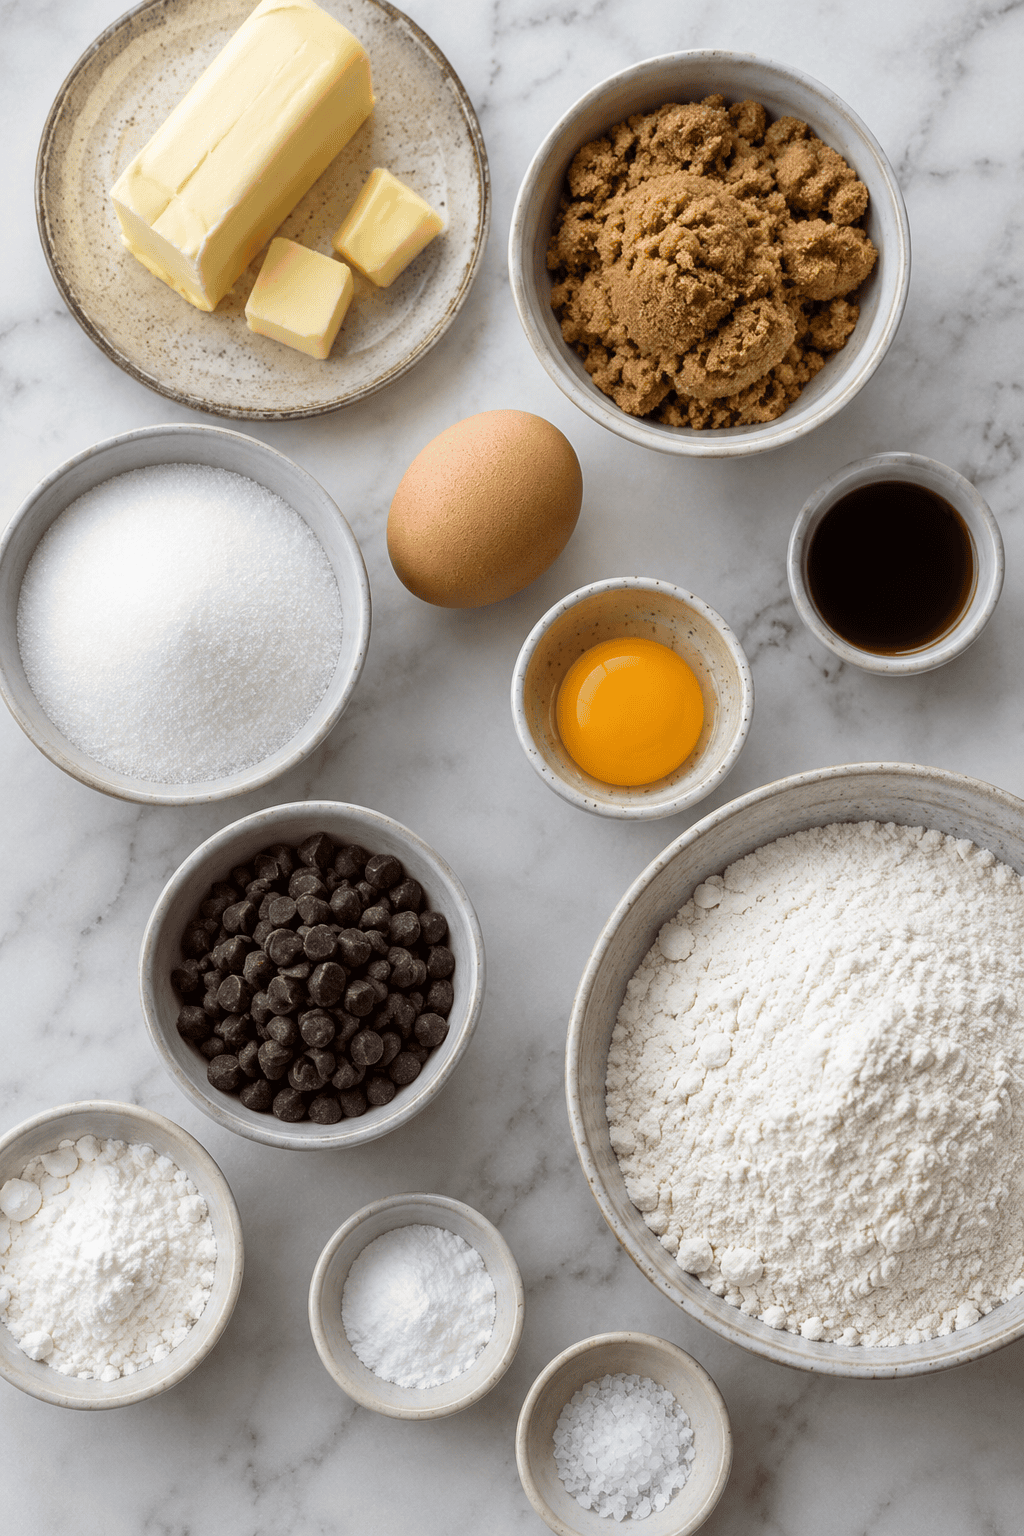
Look at the ingredients. A full cup of brown sugar and only half a cup of white. That’s intentional.
Brown sugar has molasses in it, which makes cookies softer and chewier. It also gives that deep, almost butterscotch flavor that pairs perfectly with vanilla. Honestly, I’ve tried swapping the ratios, and it’s never as good.
So trust the brown sugar here. It’s doing the heavy lifting. Have you ever noticed how some cookies taste flat? That’s usually too much white sugar and not enough brown.
The Little Trick That Keeps It Gooey
Here’s my favorite part. This recipe uses one whole egg plus an extra yolk. That extra yolk adds richness and tenderness without making the dough too wet.
Quick tip: If you want an even softer center, let the dough rest in the skillet for 10 minutes before baking. It lets the flour hydrate a bit more, and you’ll get that perfect chewy-gooey balance.
I learned that trick from a bakery friend, and now I never skip it. Try it next time and tell me if you notice the difference.
This Is Not a Cake. Don’t Bake It Like One.
My first time making a skillet cookie, I left it in too long because I wanted it “done.” Big mistake. It came out dry and crumbly, more like a scone.
You want to pull it when the edges are golden brown and the center still looks a little puffy and soft. A toothpick will not come out clean, and that’s exactly right.
Let it rest on the counter for 10 to 15 minutes before you slice. That gives it time to set up just enough so you get clean wedges, but it’s still warm and melty inside.
What Goes on Top (Besides Ice Cream, Obviously)
Vanilla ice cream is the classic move, and honestly, I’m not here to argue with that. But have you tried a scoop of coffee or caramel swirl? That’s next-level.
The flaky sea salt on top is non-negotiable. It cuts through the sweetness and makes every bite more interesting. I use Maldon, but any flaky salt works. Just don’t skip it.
I also love drizzling a little warm honey over the ice cream right before serving. It’s extra, but sometimes you need extra. What’s your favorite ice cream flavor with warm cookies?
One Skillet, Zero Fuss, All the Joy
This is the kind of dessert that makes people lean in and grab a spoon before you even finish slicing. It’s messy, it’s shareable, and it feels like a celebration even if it’s just a Tuesday.
I love that it feeds a crowd without a ton of effort. No frosting, no layering, no fancy equipment. Just a bowl, a whisk, and one skillet.
So next time you need a quick win in the kitchen, make this. Invite someone over, scoop some ice cream, and eat it straight from the pan. That’s the whole point.
Instructions
Step 1: Preheat the oven to 350°F. Grease a 12-inch cast iron skillet with a good layer of butter—don’t just spray it. I use a paper towel to get into every corner, because stuck-on cookie is a pain. (That’s the hard-learned tip: butter, not oil, for flavor and easy release.) Step 2: Stir the melted butter with both sugars until it’s smooth and glossy. The brown sugar smell always hits me—like caramel before it’s even born. You’ll think it’s too runny, but don’t worry, it thickens up later. Step 3: Mix in the egg, the extra yolk, and the vanilla until everything is one color. A fork works fine, just beat it well. The dough gets this silky look that makes me want to eat it raw. What’s your go-to vanilla extract brand? Share below! (Tip: once the flour goes in, stop mixing fast, but here you can really go for it.) Step 4: Stir in the flour, cornstarch, baking soda, and salt until no white streaks remain. Then fold in the chocolate chips—I reserve a handful to press into the top later. The dough should be thick and scoopable, not sticky. I always sneak a little taste; raw dough is my weakness. Step 5: Press the dough evenly into the skillet with your fingertips—it’s the best tool for the job. Sprinkle flaky sea salt all over the top, don’t be shy. That salt against the sweet chocolate is what makes it taste like a bakery cookie, I swear. Step 6: Bake for 20 to 22 minutes, until the edges are golden but the center still looks a little soft. I set a timer for 18 and then stare at it through the oven door. Overbaking ruins the whole point—you want that gooey middle that jiggles when you shake the pan. Step 7: Cool the skillet on a rack for 10 to 15 minutes before slicing. Waiting is the hardest part, but it sets the cookie just enough to hold a scoop of ice cream. Vanilla is classic, but if you’ve got salted caramel in the freezer, that’s my pick.Creative Twists
…Toss in a handful of crushed pretzels for a salty crunch that plays off the chocolate—like a sweet-and-salty party. …Swap half the chocolate chips for white chocolate and add dried cranberries; it’s tart, sweet, and a little fancy without trying. …Press small dollops of peanut butter onto the raw dough, then swirl them in with a knife before baking—creamy pockets of surprise. Which one would you try first? Comment below!Serving & Pairing Ideas
…Scoop vanilla bean ice cream right on top while the cookie is still warm—the melt factor is everything. …Drizzle with warm caramel sauce and a pinch more flaky salt for a sundae vibe that feels like a diner treat. …Serve with a simple pile of fresh berries on the side—strawberries and a squeeze of lemon cut the richness perfectly. Which would you choose tonight?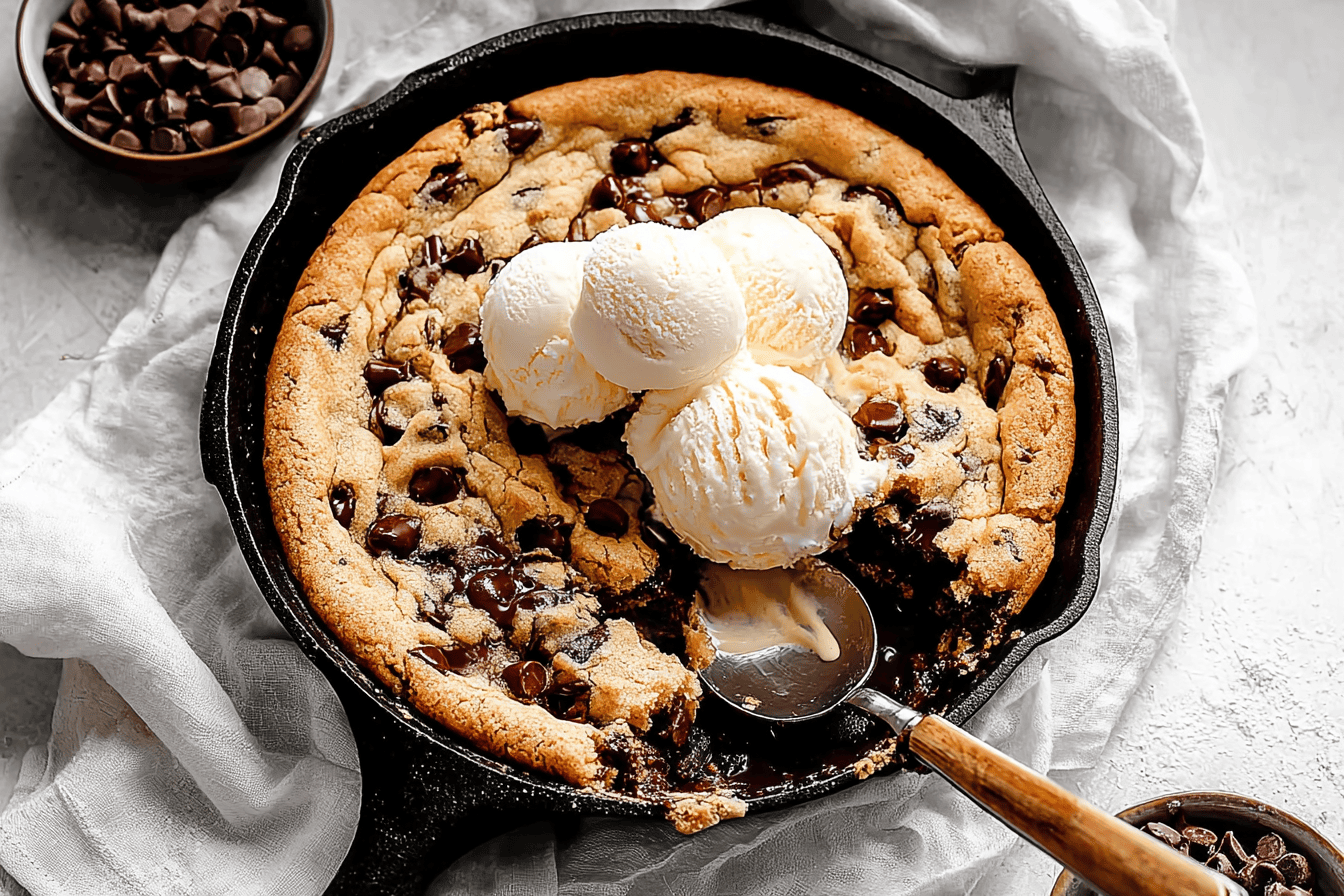
Storage & Make-Ahead Tips
This skillet is best the day you make it, I won’t lie. But leftovers still save the day. Let the skillet cool completely, then cover it tightly with foil or plastic wrap. It’ll keep in the fridge for up to three days. To reheat, pop it in a 300°F oven for about 10 minutes. The edges get crisp again and the center turns soft. You can even microwave a single slice for 15 seconds — just don’t overdo it or the chocolate gets weird. I once stored one in the fridge and forgot about it for a week. That was a sad discovery. For batch cooking, make the dough ahead and press it into a smaller pan. Bake it fresh when company shows up. It only takes a few more minutes. This saves time and keeps you from eating an entire skillet by yourself. Plus, less waste means you feel better about dessert.
Have you ever saved leftovers like this? Tell me below!
Common Mistakes & Easy Fixes
First mistake is overbaking. You see those golden edges and think “just one more minute.” Don’t. Pull it out when the center still wobbles a little. It keeps cooking as it cools. Second mistake is using cold butter. Melted butter is key here — it makes the cookie dense and chewy. If you use cold, you get a stiff dough that bakes unevenly. I once forgot to melt the butter and wondered why my skillet looked like a hockey puck. Third mistake is skipping the flaky salt on top. It’s not fancy, it’s necessary. That little crunch balances all the sweet. These fixes matter because a gooey center and salty-sweet bite are what make this skillet unforgettable. Get those right, and you’ll feel like a pro.
Did this ever happen to you?
Your Questions, Answered Simply
Can I use a regular baking dish instead of a cast iron skillet?
You bet. Cast iron holds heat great and gives those crispy edges. But a 9-inch pie plate or an 8×8 square pan works fine too. Just adjust the bake time a little. Start checking at 18 minutes. The dough spreads differently in a smaller dish, so watch it closely. No one wants a burnt bottom.
Can I make this with dark chocolate chips?
Absolutely. Dark chocolate chips are actually my favorite. They’re less sweet and they stand up to all that brown sugar and butter. Just use a good quality chip that melts well. Cheap dark chocolate can taste waxy. Go for something with 60% cocoa or so. You’ll get a richer, more grown-up cookie.
Is the cornstarch really necessary?
It really is. I almost skipped this step once and I’m glad I didn’t. Cornstarch keeps the cookie soft and tender in the middle. Without it, you get a flatter, crunchier cookie. That’s not bad, but it’s different. If you don’t have cornstarch, you can leave it out — just know the texture will change. The skillet will still taste good, just less pillow-y.
Can I halve the recipe for a smaller skillet?
Yes, and it’s easy. Cut everything in half, including the egg. For half an egg, just beat one egg in a bowl and use about half of it. You can do this by eye. The bake time will drop too. Start checking a 6-inch skillet at 13 minutes. It’s a great way to make a smaller treat without a giant pan of cookies staring at you.
How do I keep the cookie from sticking to the pan?
Grease it well. Use butter or a nonstick spray, and get into the corners. A well-seasoned cast iron skillet is naturally nonstick, but a little extra grease never hurts. Wait for the skillet to cool for a full 15 minutes before you try to scoop out slices. That rest time lets the cookie set so it slides out cleanly. Rushing it means a messy, crumbly situation.
Can I bake this in a glass dish?
You can, but watch the temperature. Glass heats up slower and holds heat longer. Lower your oven temp by 25 degrees and check the cookie a few minutes early. You might need a bit more time overall. The main thing is to not let the bottom burn while the middle stays raw. It’s a balancing act, but doable.
Which answer helped you most?
One Last Spoonful
I love this recipe because it feels like a hug. It’s warm, it’s messy, and it’s meant to be shared. The ice cream melting into the chocolate, the little crunch of salt — it’s simple joy on a plate. I hope you give it a try. Don’t worry if yours isn’t picture-perfect. That gooey center is what matters. Let me know how it turns out. Did you add anything fun, like peanut butter chips or a drizzle of caramel? I’m always curious what home cooks come up with. This skillet has a way of bringing people to the table. That’s the best part.
Will you make this soon?
Fun fact: The chocolate chip cookie was invented by accident in 1938 when Ruth Wakefield ran out of baker’s chocolate.
Happy cooking!
—Marina Caldwell
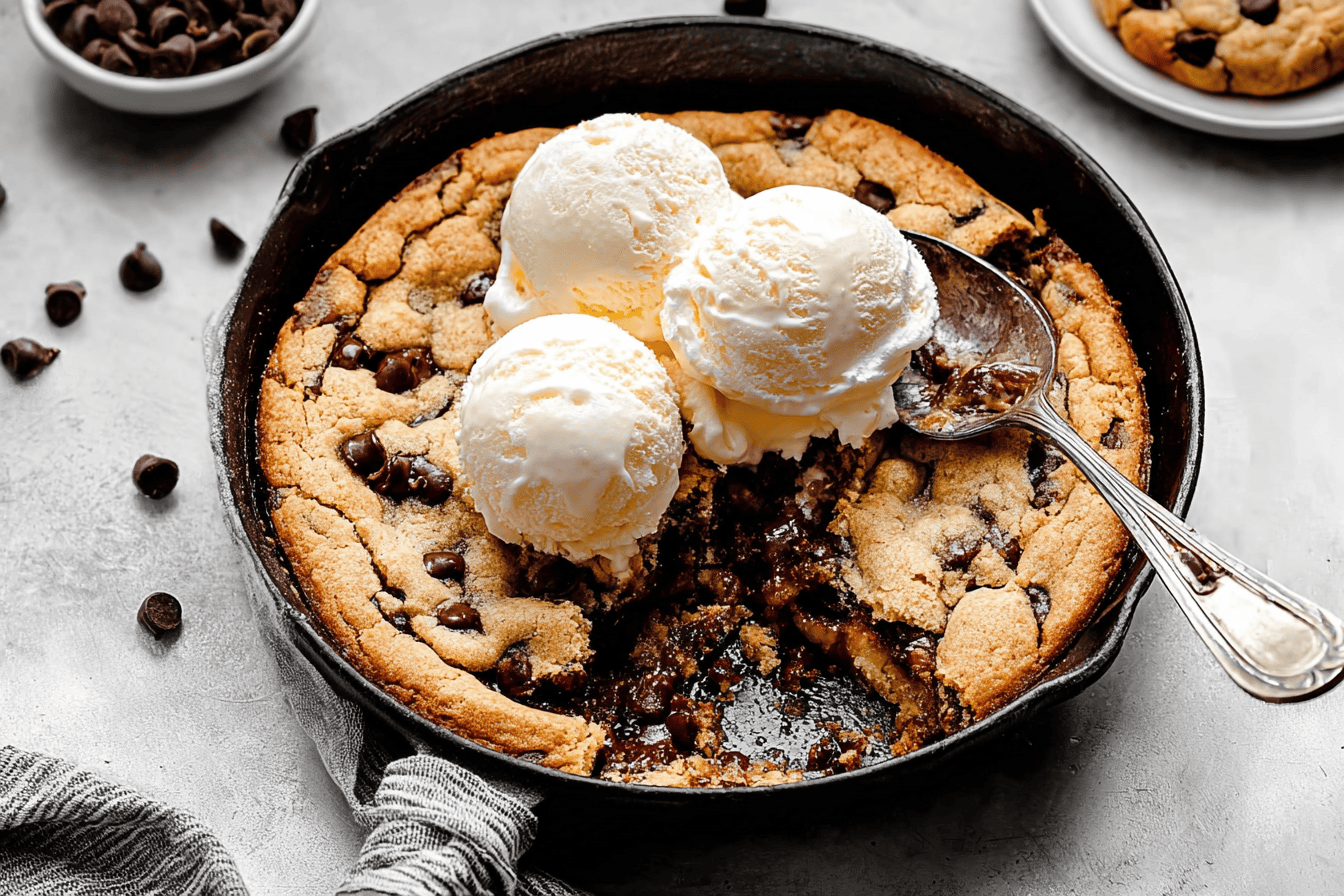
Warm Chocolate Chip Cookie Skillet with Ice Cream
Description
A warm, gooey chocolate chip cookie baked in a cast iron skillet, served with ice cream for the ultimate dessert experience.
Ingredients
Instructions
- Preheat oven to 350°F. Grease a 12-inch cast iron skillet.
- Stir melted butter with both sugars until smooth.
- Mix in the egg, egg yolk, and vanilla until combined.
- Stir in flour, cornstarch, baking soda, and salt until no streaks remain, then fold in chocolate chips.
- Press the dough evenly into the skillet and sprinkle with flaky salt.
- Bake 20-22 minutes, until golden around the edges but still slightly gooey in the center — don’t overbake.
- Cool 10-15 minutes on a rack before slicing. Serve warm with ice cream.
Notes
- For best results, serve immediately with vanilla ice cream. Leftovers can be reheated in the microwave for 15-20 seconds.