

The first batch hit 375°F and came out wrong.
My youngest grabbed one off the rack before it had cooled five minutes, and I watched his face do that thing where he’s trying to be polite.
They were dense. Not fudgy-dense. Brick-dense. I had overmixed the batter by about thirty seconds and didn’t realize it until I tasted one myself.
What actually makes these work.
The fold.
You stop the second you don’t see dry streaks anymore — actually, stop just before that, because the batter keeps mixing itself as you scoop it into the tin.
I thought about adding a teaspoon of espresso powder to deepen the chocolate — actually no, I skipped it, because I wanted to know what the recipe tasted like without anything extra first.
About the milk situation.
Whole milk only.
I tried 2% once and the muffins came out slightly drier, not dramatically, but enough that I noticed around the edges where they pull away from the liner.
Have you ever had a muffin that was dry at the edges but fine in the middle, and couldn’t figure out why?
The butter swap — worth it or not.
Halfway through my third batch, I swapped half the vegetable oil for melted butter and stood there wondering if it would matter.
It did — not in a dramatic way, but the center of each muffin stayed softer at room temperature longer, and the flavor had something underneath it that wasn’t there before.
Quick tip: Melt the butter first and let it cool for two minutes before whisking it with the oil and eggs, or it’ll start cooking the eggs before you even get to the oven.
It looked wrong. It wasn’t.
The batter is thick and dark and kind of gloppy, honestly I wasn’t sure it was right the first time I made it,
and then the muffins came out domed and soft and I ate two before I put the rest away.
What a 20-minute bake actually looks like.
At 18 minutes mine were not done — toothpick came out with wet batter, not crumbs.
The full 20 minutes is what got me a clean pull, and the tops had just started to set and crack slightly at the crown.
My neighbor Rosa says she pulls hers at 19 minutes and swears by it, but my oven runs a little cold so your mileage will vary.
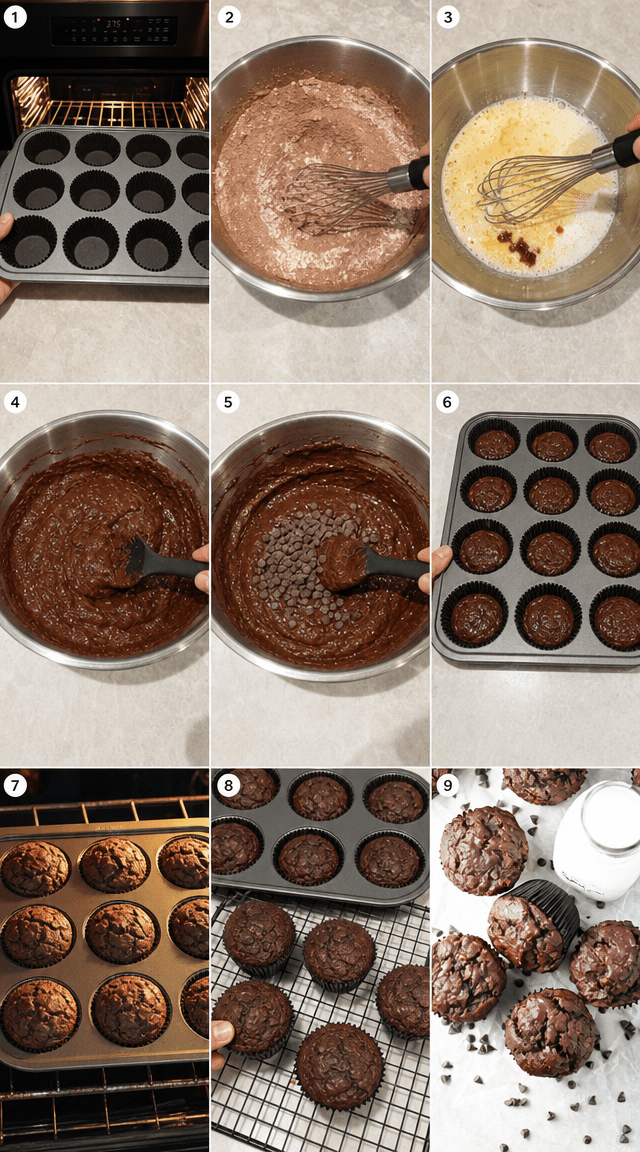
Step 1: Heat your oven to 375°F and line a 12-cup muffin tin with paper liners. Don’t skip the liners — I tried greasing the cups directly once and lost the bottom of three muffins to the pan. Set the tin aside while you work on the batter.
Step 2: Sift the flour, cocoa powder, baking powder, baking soda, and salt into a large bowl. Sifting matters here because cocoa clumps, and those clumps don’t break up during folding the way you’d hope. (I skipped this step on my second batch and ended up with small dry pockets of cocoa in two muffins.)
Step 3: In a separate bowl, whisk the sugar, vegetable oil, eggs, vanilla, and 1 cup of whole milk until the mixture looks smooth and slightly glossy. This took me about 90 seconds of actual vigorous whisking — not a gentle stir. You want the oil fully incorporated before it hits the dry ingredients.
Step 4: Pour the wet mixture into the dry ingredients and fold gently. Stop the moment you can’t see dry streaks. I mean it — the batter will look a little rough and that’s fine. Overmixing is how you get dense muffins, and I learned that the hard way on batch one.
Step 5: Fold in the chocolate chips. Just a few turns with the spatula, distributed evenly. (Don’t dump them all in one spot or half your muffins end up with five chips and half end up with twenty.)
Step 6: Spoon the batter into the lined cups, filling each no more than two-thirds full. I use a large cookie scoop for this and it takes exactly 12 scoops with a little left over, which I eat immediately off the spatula. No regrets.
Step 7: Bake for 18–20 minutes. Test with a toothpick through the center — you want it to come out with a few moist crumbs, not wet batter. My oven needed the full 20 minutes every single time.
Step 8: Let the muffins rest in the pan for 5 minutes before moving them to a cooling rack. Pull them too early and the bottoms are soft enough to collapse slightly when you lift them. Five minutes is not optional.
Step 9: Pour a tall glass of ice-cold whole milk and serve the muffins warm. The contrast between the cold milk and a muffin that’s still holding heat inside is genuinely the whole point of this recipe. Do you eat yours warm or fully cooled? Share below!
Ways to Change It Up
Try this: Swap the chocolate chips for dark chocolate chunks chopped from a bar — they melt unevenly in the best way and leave little pools in the center.
Try this: Stir a heaping tablespoon of peanut butter into the wet mixture before combining with the dry. It doesn’t scream peanut butter — it just adds something underneath the chocolate that you can’t quite name.
Try this: Press three or four mini marshmallows into the top of each muffin right before they go in the oven. They brown and sink slightly and turn into something almost caramelized by the time the muffins come out.
Which would you go for? Drop it in the comments.
How to Serve It
Warm from the rack with a glass of whole milk poured over ice — that’s the move, and it’s the reason the recipe exists.
Cut one open while it’s still warm and add a thin spread of salted butter, which sounds wrong for a chocolate muffin and isn’t.
Set them out on a Sunday morning with coffee for the adults and cold milk for everyone else, and don’t bother plating them — just put the rack on the table. What would you pair it with?
Storing It Without Ruining It
Room temperature in an airtight container, up to three days. They stay soft through day two and start getting a little firm by day three, but 10 seconds in the microwave fixes that.
For the freezer, wrap each muffin individually in plastic wrap and then put them all in a zip bag. They hold for a month and thaw at room temperature in about 45 minutes, or you can microwave straight from frozen for 30–40 seconds.
I don’t recommend the fridge. Cold dries them out faster than leaving them on the counter does, and I made that mistake the first time I had leftovers.
Have you ever saved leftovers like this? Tell me below!
Mistakes I Made So You Don’t Have To
Overmixing. Every dense muffin I’ve ever made came down to thirty extra seconds with the spatula. Stop early. It looks underdone in the bowl and that’s correct.
I once filled the cups three-quarters full because I wanted bigger muffins, and six of them overflowed onto the tin and fused together into one sad chocolate mass. Two-thirds. That’s the line.
Pulling them from the pan at two minutes instead of five. The bottoms were still too soft and I crushed one trying to transfer it to the rack. I served it anyway, broken in half on a plate like it was intentional. My kids ate it so I called it a win. Did something like this happen to you?
Things people keep asking me about these muffins.
Can I use a different milk? It depends on what you have. 2% works but the edges come out slightly drier. I tried oat milk once and the texture was fine, though the muffins lost a little of that dense, soft interior. Whole milk is the one I keep coming back to.
How do I know they’re done without a toothpick? Press the top gently — it should spring back instead of leaving a dent. But honestly, get a toothpick. A clean pull with a few moist crumbs at 20 minutes is what you’re looking for.
Can I make these ahead? Yes. Bake them the night before, cool completely, seal in a container. The next morning, 10 seconds in the microwave and they’re close to fresh. And they’re arguably better on day two once everything settles.
What if I don’t have chocolate chips? Chop up a chocolate bar. Any bar you’d eat plain works fine — I used a 70% dark bar once and the muffins came out less sweet and more intense. Not a complaint.
Can I double the recipe? Yes, but bake in two separate tins rather than crowding one rack. I tried both tins on the same rack and the bottom one came out underbaked at 20 minutes. Rotate them or use two oven racks with a 180° rotation at the 10-minute mark.
Do I need a stand mixer? No. A bowl and a whisk for the wet ingredients, a spatula for folding. That’s it. Stand mixers actually make overmixing easier to do by accident.
Which answer helped you most?
Go make them. Seriously.
This is a recipe I make when I want something that actually tastes like chocolate, not chocolate-flavored cardboard.
The cocoa and the chips together. That’s the thing. Neither one alone gets you where you want to go.
Fun fact: Cocoa powder contains flavanols — compounds that are actually being studied for cardiovascular benefits. This does not make these muffins health food. But it’s a fun thing to mention while eating your second one.
Batch one will teach you something. Batch two will be better. Batch three is when you stop thinking about it and just make them.
Will you make this soon?
Happy cooking! —Marina Caldwell
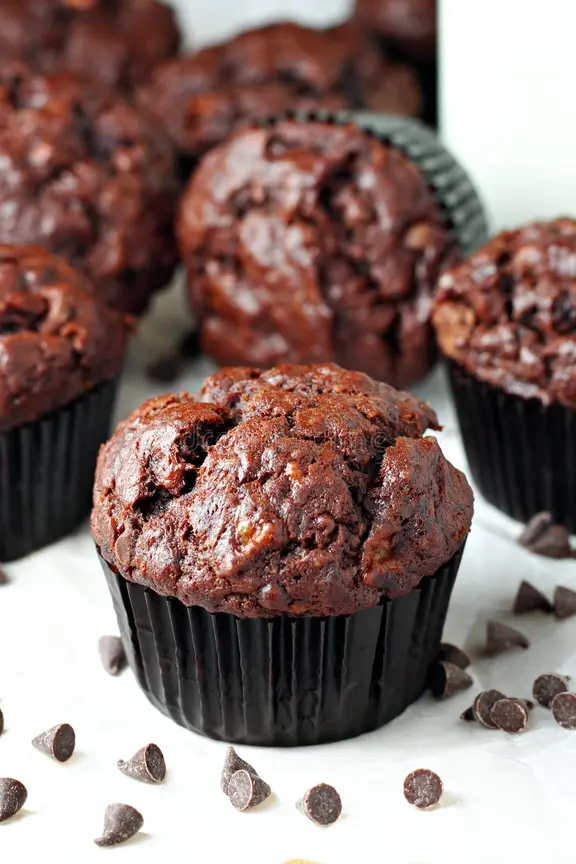
Baking Fudgy Chocolate Muffins for Milk Lovers
Ingredients
- 2 cups all-purpose flour
- 3/4 cup unsweetened cocoa powder
- 2 teaspoons baking powder
- 1/2 teaspoon baking soda
- 1/4 teaspoon salt
- 3/4 cup granulated sugar
- 1/3 cup vegetable oil
- 2 large eggs
- 1 cup whole milk
- 1 teaspoon vanilla extract
- 1 cup chocolate chips
- 1 gallon whole milk, for serving
Instructions
- 1Heat oven to 375°F and fit a 12-cup muffin tin with paper liners.
- 2Sift together flour, cocoa powder, baking powder, baking soda, and salt into a large mixing bowl.
- 3In a separate bowl, vigorously whisk together sugar, oil, eggs, vanilla, and 1 cup of milk until smooth and uniform.
- 4Pour the wet mixture into the dry ingredients, folding gently until just barely combined — do not overmix.
- 5Carefully stir in chocolate chips, distributing them evenly throughout the batter.
- 6Spoon batter into each lined cup, filling no more than two-thirds of the way up.
- 7Bake 18-20 minutes, testing doneness with a clean toothpick through the center.
- 8Rest muffins in the pan for 5 minutes before moving to a cooling rack.
- 9Pour tall glasses of ice-cold milk and serve alongside warm muffins.
Notes
– Avoid overmixing the batter once wet and dry ingredients meet, as this develops gluten and produces dense, tough muffins. – For extra fudgy results, substitute half the vegetable oil with melted butter to deepen the richness and flavor. – Muffins store well in an airtight container for up to three days, or freeze individually for up to one month.


