

I Left Them in the Bowl Too Long
The dough had been sitting for nearly 90 minutes before I noticed. I’d set a timer and then ignored it, because something else needed attention and I told myself another 20 minutes wouldn’t matter.
It mattered, a little. The buns were slightly more dense than the first batch, and the layers in the filling didn’t separate as cleanly when you pulled them apart. Not inedible. Just not what I was going for.
Still, I’ve made this recipe four times now, and even the imperfect batches disappeared by noon.
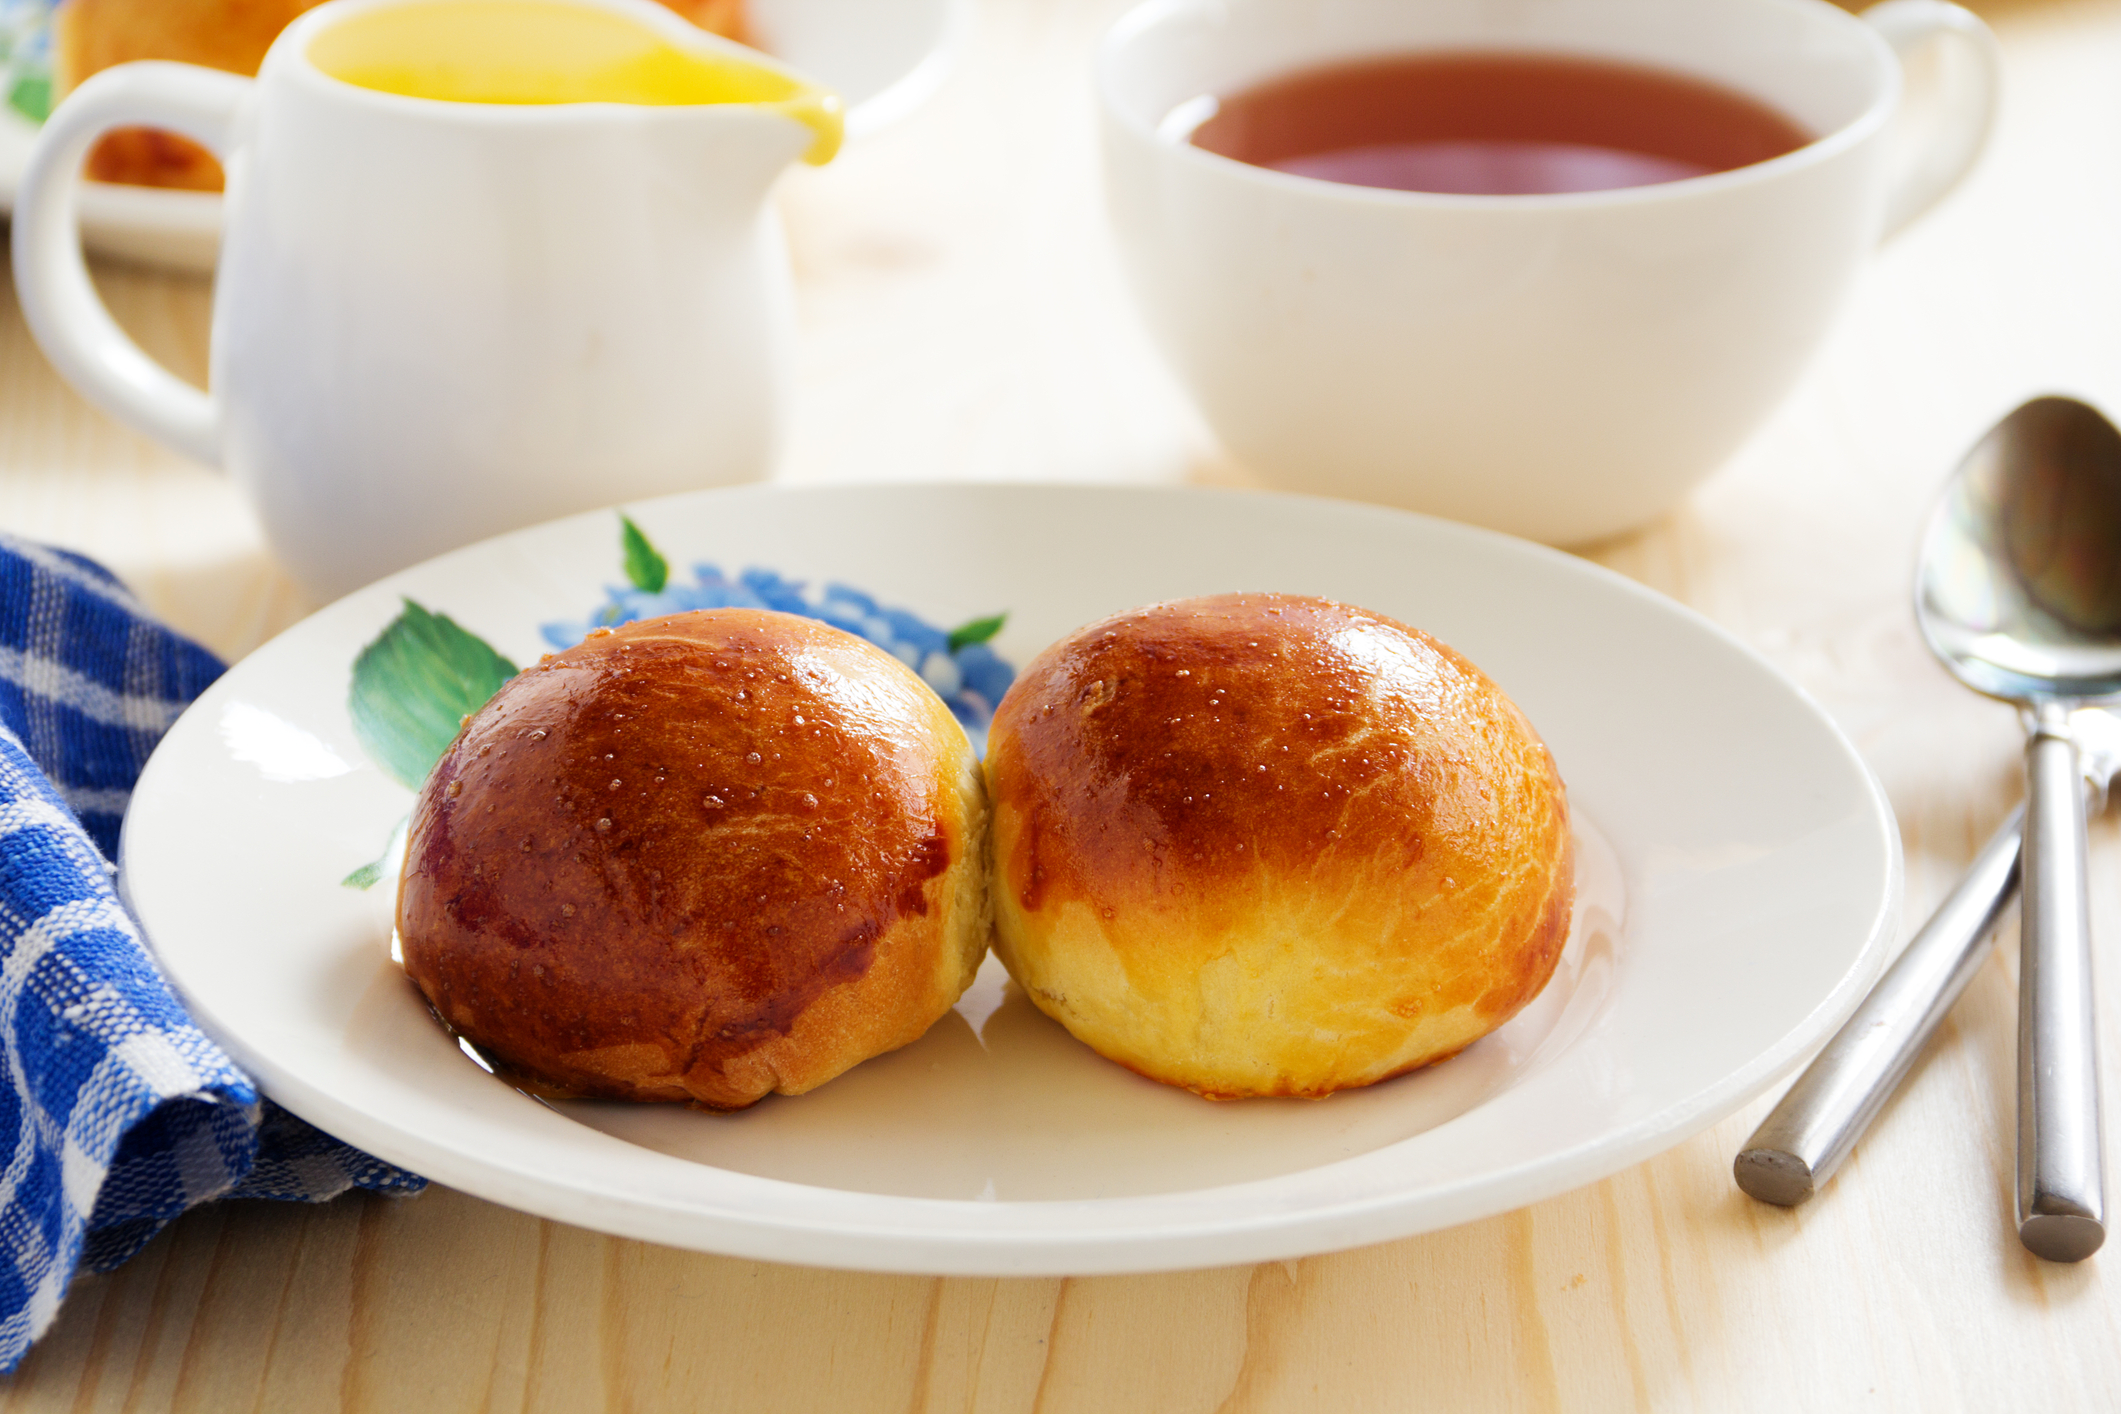
Curious about it, honestly. There’s something about a bun with a dark, seeded filling and a white cloud of cream on top that makes people reach before they’ve even sat down. My neighbor Diane came by to return a dish — she wasn’t even staying — and ended up eating two while standing at the counter.
The poppy seed filling is doing most of the work here. It’s dense and slightly sweet, with a faint bitterness underneath that keeps the whole thing from tipping into dessert territory. And then the vanilla cream on top cuts through it.
Not subtle.
About the Dough.
Enriched doughs make me slow down, which I don’t always love. You can’t rush butter into dough — add it too fast and it just coats everything without incorporating, and you end up with a greasy mess that never quite comes together right.
The process here is deliberate: warm the milk to 40°C first, then mix in the yeast, sugar, and 50g of flour and leave it alone for 10 minutes. You want it foamy and slightly puffed before you continue. If it doesn’t foam, the yeast is dead and there’s no recovering from that — start over.
Once you add the remaining flour, salt, and eggs, knead for 8 full minutes. Not 5. Not “until it feels smooth enough.” Eight minutes.
Then the butter goes in slowly, small pieces, over another 5 minutes of kneading. I thought about using the dough hook on my stand mixer — actually no, I did use it, every time, there’s no reason to do this by hand unless you want to.
The dough should feel slightly tacky when you’re done but not sticky. It pulls away from the bowl cleanly. If it’s still sticking to the sides after the full knead, add flour one tablespoon at a time, not a handful.
Quick tip: Press the dough with one finger — if the indent springs back slowly instead of immediately, it’s ready to go into the bowl for its rise.
It Looked Underdone at 20 Minutes. It Wasn’t.
Most recipes tell you to bake until golden brown and leave it at that. The problem is “golden brown” on a poppy seed bun is confusing because the seeds are already dark. You’re watching the exposed dough around the edges, not the tops.
At 20 minutes in a 190°C oven, the buns look pale in the center of the pan. The ones at the edges are deeper, the middle ones still look soft. I pulled them at 23 minutes and they were exactly right — the center buns had caught up.
The first time I made these, I left them in for 26 minutes. The bottoms were too dark and the filling dried out slightly near the ends. Served them anyway. My kids ate them.
Before baking: brush each bun with melted butter — not egg wash — and add a small pinch of loose poppy seeds on top. They won’t stick perfectly and a few will fall off. That’s fine.
Let them cool on a wire rack for at least 10 minutes before adding the cream.
Hot buns and whipped cream is a bad combination.

The Cream Doesn’t Need Much.
Heavy cream, powdered sugar, vanilla extract. That’s it. Whip to stiff peaks.
I’ve seen versions of this with stabilizers and cream cheese mixed in, and I tried the cream cheese version once — it was thicker, almost frosting-like, and it competed with the filling instead of sitting alongside it. Stick with plain whipped cream here.
The ratio I use: 200ml heavy cream, 2 tablespoons powdered sugar, half a teaspoon of vanilla extract. Whip it cold, in a cold bowl if you can manage it. It takes about 3 minutes with a hand mixer on medium-high.
Stop before you think you need to. Stiff peaks, not butter.
I do a generous dollop on top of each bun rather than slicing the bun open and filling it — the cream sits on the surface and you get it in every bite without it sliding out the sides when you pick the bun up. Did yours hold together when you ate it? I’m genuinely curious whether the open-top approach works for everyone or just me.
No piping bag needed. A large spoon works fine.
The Filling Almost Every Recipe Gets Wrong
Most poppy seed filling recipes call for ground poppy seeds. Some call for whole. They are not the same and the difference is not minor.
Ground poppy seeds absorb moisture differently. They clump, they spread evenly, and they don’t leave crunchy pockets in the finished bun. Whole seeds have more texture but they can feel gritty against the soft dough, and they don’t bond as well when you roll the bun up — you end up with seeds falling out of the seam during baking.
Use ground. If you only have whole, pulse them in a food processor for 20 seconds — not until they’re a paste, just until most of them are cracked.
The filling should be spreadable but not wet. About 12g per bun keeps the ratio right. I know that sounds fussy but I actually weighed it on my third batch because the first two had inconsistent filling distribution and I couldn’t figure out why until I realized I was eyeballing very differently across the 12 pieces.
Spread it down the center of the oval and leave a 1cm border at each end before you roll. The filling expands slightly during proofing and baking — if you go edge to edge, it leaks and burns on the pan.
Burned filling on the pan smells bad and scrapes off unevenly. Not a disaster but not a great start to the cooling process.
The Second Proof Is Not Optional
I skipped the 30-minute proof once — I was in a hurry and the buns looked puffy enough from the first rise. They came out tight and slightly doughy in the center. Not raw. Just dense in a way that wasn’t pleasant.
The second proof is when the buns relax into the shape they’ll bake in. Cover them with a clean towel, not plastic wrap — plastic wrap can stick to the tops if they rise into it, and you’ll deflate half the pan trying to peel it off.
Thirty minutes at room temperature. If your kitchen is cold, give them 40.
They should look noticeably puffier before they go into the oven, not just marginally bigger. If you press one gently — very gently, with one fingertip — the indent should fill back in slowly. That’s ready.
Arrangement on the pan matters too. Leave about 3cm between buns. They’ll grow toward each other during baking, which is fine — those soft touching edges are the best part — but if you crowd them too much they steam rather than bake and you lose the slight crust on the exterior.
Side by side, seam down, some breathing room. That’s it.
—Steps for Poppy Seed Buns with Silky Vanilla Cream
Step 1: Warm the milk to 40°C — use a thermometer if you have one, or test it on your wrist; it should feel warm, not hot. Combine with yeast, sugar, and 50g of the flour in a large bowl. Stir briefly, then leave it undisturbed for 10 minutes. You’re looking for foam and a slightly domed surface. (If nothing happens after 10 minutes, your yeast is done — don’t try to push through it.)
Step 2: Add the remaining flour, salt, and eggs to the yeast mixture. Mix until a shaggy dough forms, then knead for 8 minutes on medium speed with a dough hook, or by hand on a lightly floured surface. The dough will feel rough for the first few minutes — that’s normal, keep going.
Step 3: With the mixer running on low, add the softened butter in small pieces over about 2 minutes, then continue kneading for another 5 minutes. This is the part that tests patience. The dough will look like it’s rejecting the butter at first, and honestly the first time I saw it I thought I’d ruined it — it hadn’t. Keep going until the dough is smooth, slightly tacky, and pulls away from the bowl cleanly. (Butter must be softened, not melted. Melted butter changes the texture of the final bun entirely.)
Step 4: Transfer the dough to a lightly greased bowl, turn it once to coat, and cover with a damp towel. Leave it to rise for 1 hour at room temperature until doubled in size. Don’t rush this with heat — a slow, cool rise gives better flavor than a fast warm one.
Step 5: Punch the dough down gently and divide into 12 equal pieces. Roll each piece into a thin oval on a lightly floured surface — roughly 15cm long. Spread about 12g of poppy seed filling down the center, leaving a 1cm gap at each end. Roll up tightly from one long edge, then pinch the seam closed. Are you rolling from the long side or the short side? The long side gives you more layers — share below!
Step 6: Arrange the buns seam-side down on a greased baking sheet, spacing them about 3cm apart. Cover with a clean kitchen towel and let them proof for 30 minutes until visibly puffed. Preheat your oven to 190°C while they proof.
Step 7: Brush each bun with melted butter and scatter a pinch of poppy seeds on top. Bake for 20–25 minutes until the exposed dough is golden. Start checking at 20 minutes — the center buns always need a little more time than the edge ones, but not by much. Transfer to a wire rack and cool for at least 10 minutes.
Step 8: Whip 200ml cold heavy cream with 2 tablespoons powdered sugar and half a teaspoon of vanilla extract until stiff peaks form. Keep it cold until you’re ready to serve. Spoon a generous dollop onto each bun just before eating — not ahead of time, or it softens into the bun and loses its texture.
Ways to Change It Up
Try this: Swap the vanilla cream for a lemon-scented version — add a teaspoon of lemon zest and a few drops of lemon juice to the cream before whipping. It sharpens everything and works especially well if your filling is on the sweeter side.
Try this: Add a thin layer of marzipan under the poppy seed filling before rolling. About 5g per bun, pressed flat. It adds a dense, almond-forward note that doesn’t overpower the seeds but gives the whole bun a different depth.
Try this: Instead of individual buns, arrange all 12 rolls side by side in a greased 9×13 baking dish and let them bake together as a pull-apart. The soft edges where they touch become almost pillowy, and the cream goes on top of the whole slab rather than each bun individually.
Which would you go for? Drop it in the comments.
How to Serve It
Warm, within 20 minutes of coming out of the oven, with the cream added right before you set them on the table. The contrast between the just-warm bun and the cold cream is doing a lot here — don’t serve them fully cooled if you can help it.
They work well alongside a strong black coffee or unsweetened tea. Something without sugar, because the buns have enough.
If you’re serving these for a group, put the cream in a bowl on the side and let people add their own. Some people want a small amount, some people want a mountain. You don’t need to make that decision for them.
What would you pair it with?
—Storing It Without Ruining It
Store the buns and the cream separately. Always. Cream-topped buns stored in the fridge turn into something sad and soggy within a few hours — the cream seeps in and the bun loses its texture completely.
Buns on their own keep well at room temperature in an airtight container for up to 2 days. After that, they start to dry out and reheating becomes necessary. In the fridge they’ll last about 4 days, but cold buns are dense — always warm them before eating.
To reheat: wrap loosely in foil and put them in a 160°C oven for about 8 minutes. A microwave works in 20-second bursts but softens the exterior more than the oven does.
For freezing: bake them without the cream, cool completely, wrap individually in plastic wrap, then bag them. They freeze well for up to 6 weeks. Thaw at room temperature for an hour or go straight from frozen into a 160°C oven for 12–15 minutes.
The cream doesn’t freeze. Don’t try it. Make it fresh each time — it takes 3 minutes and isn’t worth the disappointment of trying to salvage frozen whipped cream.
Have you ever saved leftovers like this? Tell me below!
Mistakes I Made So You Don’t Have To
I once added all the butter at once in the first batch. The dough never fully incorporated it — there were slick spots throughout, and the finished buns had a slightly greasy pull to them. Not obviously wrong to someone eating it for the first time, but I knew. It bothered me the whole time.
Overfilling the buns is the other common problem. I used nearly double the filling on my second attempt because I thought 12g sounded like nothing. The seams split on four of the twelve buns during baking, the filling bubbled out, and the edges where it burned stuck to the pan. There’s no fix for it mid-bake. Weigh the filling.
Using warm cream in the whipped topping. I’d left the carton on the counter while the buns cooled and forgot about it for 45 minutes. Warm cream whips poorly — it took twice as long, the peaks were soft and collapsed within 10 minutes of going on the buns. It looked fine in photos and tasted fine. But it wasn’t what it should have been.
Did something like this happen to you?
Questions I Actually Get About These Buns
Can I make the dough the night before? Yes. After the first knead, cover the bowl tightly and put it in the fridge. It’ll rise slowly overnight — about 8 hours is right. Pull it out 30 minutes before you want to shape it so it relaxes slightly. Cold dough is stiff and hard to roll thin. But it works well, and I’ve done this on weekday mornings when I wanted fresh buns without the full timeline.
My buns came out dense. What went wrong? Three likely reasons: the yeast wasn’t active, the dough didn’t get enough kneading time, or the second proof was skipped or too short. Dense in the center specifically usually points to under-proofing. And dense throughout is usually the butter going in wrong. It depends on where the texture problem is.
Can I use store-bought poppy seed filling? I tried this once. Jarred filling is usually much sweeter and sometimes has a canned flavor underneath it. It works in a pinch — the buns bake the same — but the taste is noticeably different. About 144g total for 12 buns. But homemade has a cleaner flavor.
How long do they keep once the cream is on them? Not long. Honestly, about 2 hours before the cream starts to soften into the bun. Eat them fresh. If you’re serving later, keep the cream off until the last possible moment — it takes 3 minutes to whip a fresh batch and it makes a visible difference.
Do I need a stand mixer? No. You can knead by hand, but it’s 13 minutes of active work total and the butter incorporation stage is genuinely tiring. A hand mixer with dough hooks also works. But the stand mixer makes the whole thing easier and I won’t pretend otherwise.
Can I halve the recipe? Six buns instead of twelve. Everything halves cleanly except the yeast — I’d use slightly more than half, maybe 60% of the original amount, because smaller quantities of yeast can be unpredictable. Rise time stays the same. Bake time might drop by 2–3 minutes, check at 18.
Which answer helped you most?
Where I’m Still Not Sure I Got It Right
Four batches in and I’m still not settled on the filling sweetness. The version I’ve described is restrained — I like the bitterness of the poppy seeds coming through — but two out of three people who’ve tried these said they’d want it a little sweeter. Diane said nothing, just reached for a second one, so I’m counting that as approval of the current version.
Will you make this soon?
The shaping took me longer than it should on the first few tries. Rolling 12 even ovals sounds simple and is not. My first batch looked like 12 different buns from 12 different bakers. They tasted the same, but the uneven ones had uneven filling distribution, which meant some bites were mostly dough.
I haven’t fully solved that. I’m faster now, and more consistent, but I still get two or three in every batch that are slightly off. If you have a method for keeping the ovals even, I’d actually like to know.
Fun fact: Poppy seeds come from the opium poppy plant, but the seeds themselves contain only trace amounts of the compounds in the rest of the plant. They’ve been used in baking across Central and Eastern Europe for centuries — Polish, Czech, and Hungarian recipes all treat poppy seed filling as a staple, not a specialty ingredient.
The cream is the part that surprises people. They see the poppy seed bun and expect something heavy. The cold, barely-sweetened whipped cream on top shifts the whole experience — it’s lighter than it looks and it’s done in a way most people aren’t expecting from a bun.
I’m still not sure if 20 minutes is the right bake time for every oven. Mine runs slightly hot. If yours doesn’t, start checking at 22 minutes and don’t feel locked into my timing.
Happy cooking! —Marina Caldwell
Poppy Seed Buns with Silky Vanilla Cream
Ingredients
Instructions
Notes
See full recipe for nutritional information.


