

My husband took one bite and didn’t say anything for a full minute.
He just looked at the plate, then looked at me, then looked back at the plate. That’s usually bad. This time it wasn’t.
The berries were the part I almost cut. I’d made a straight chocolate cake the week before — good, no complaints — and when I decided to fold in blueberries and blackberries, I was genuinely unsure it would hold together as anything coherent.
It did. Barely, the first time.
What nobody tells you about berries in batter.
The flour coating. I resisted it the first time because it felt fussy and unnecessary, like something a cookbook would say just to say something. I skipped it. Every single berry sank straight to the bottom of both pans, and I had a chocolate cake with a berry crust on the underside.
I served it anyway.
Two tablespoons of flour tossed with the berries before folding them in — that’s what actually works. The coating gives the batter something to grip. The berries still move a little during baking, but they distribute instead of migrating entirely to one end of the cake.
Most recipes tell you to do this and don’t explain when or why it stops mattering. It doesn’t stop mattering. Do it every time, with any fruit, in any batter denser than a muffin.
Quick tip: Dry the berries on a paper towel before flouring them. Wet berries make the flour clump into paste, which then steams off in the oven and you’re back to square one.
The coffee is not optional.
I know it says “strong black coffee” in the ingredient list and some people will reach for water instead. Don’t. The coffee doesn’t make the cake taste like coffee — it makes the chocolate taste like more chocolate. There’s a difference.
I use whatever’s left in the pot from the morning. Cold is fine. One cup, no milk, no sugar.
The batter will look thin when you’ve combined everything. Thinner than you expect. I thought I’d done something wrong the first time — actually no, I thought that the second time too. It bakes up dense and moist, not thin. Trust the batter even when it looks wrong.
Alternating wet and dry with the buttermilk matters more than it sounds. Start with dry, end with dry. The buttermilk goes in the middle. If you dump everything in at once — which I’ve done out of impatience — the gluten develops unevenly and the crumb gets tight in patches.
The baking window is narrow.
30 minutes. Check it at 30.
My oven runs about 15 degrees hot, which I only confirmed after buying a thermometer two years in. At 35 minutes the edges were pulling away from the pans too aggressively, and the crumb along the sides was drier than the center wanted to be. At 32 minutes it came out right.
The toothpick test is the actual measure here — not the time. The toothpick should come out with a few moist crumbs, not wet batter, not bone dry. That window between wet and dry is about 90 seconds in my oven. Pay attention.
Cool in the pans for a full 15 minutes before turning out. I’ve rushed this. The layer cracked clean across the middle and I had to frost aggressively to hide it. Fifteen minutes.
The frosting is where I changed my mind.
I thought about using a ganache — actually no, I went back to the cocoa buttercream because it holds the berry weight on top without sliding.
Ganache looks better. The buttercream stays put. For this cake, staying put matters more because the fresh berries on top are heavy and will roll off a slick surface.
Beat the butter until it’s genuinely creamy — about 3 minutes with a hand mixer — before adding anything else. Adding cocoa to under-beaten butter makes the frosting grainy in a way that doesn’t smooth out later no matter how much milk you add. I know this because I’ve added too much milk trying to fix it and ended up with frosting that wouldn’t set.
The milk goes in last. Add it a tablespoon at a time. You might not need the full quarter cup.
Refrigerate the finished cake for at least 30 minutes before you cut it. This is the step people skip and then wonder why the layers slide when they slice. The frosting needs to firm up. The berries need to settle.
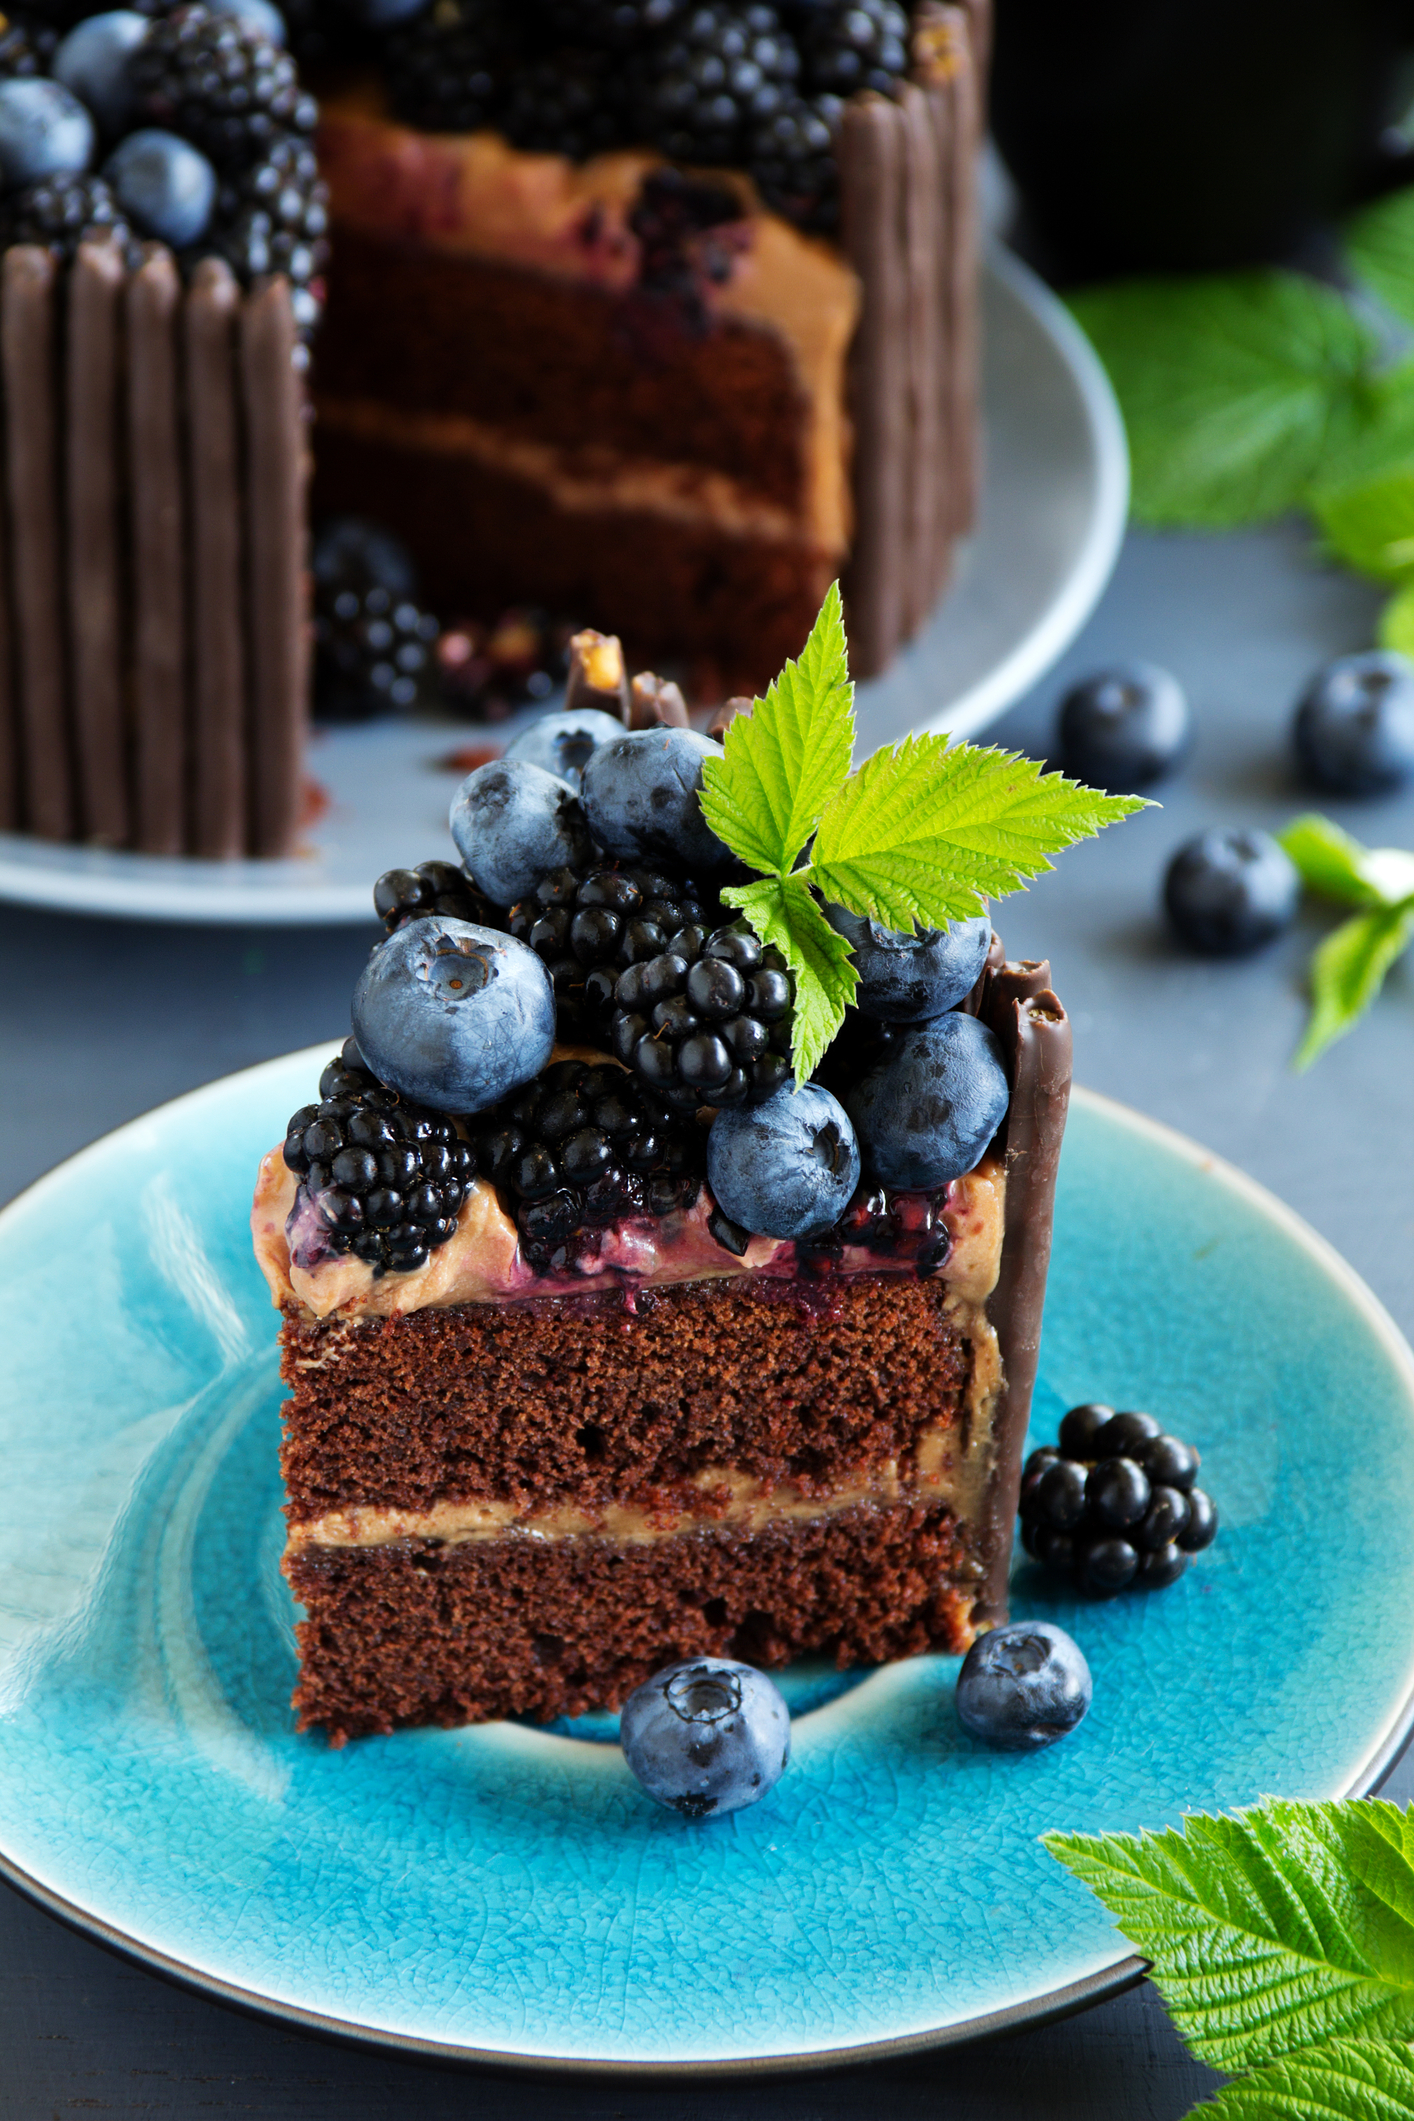
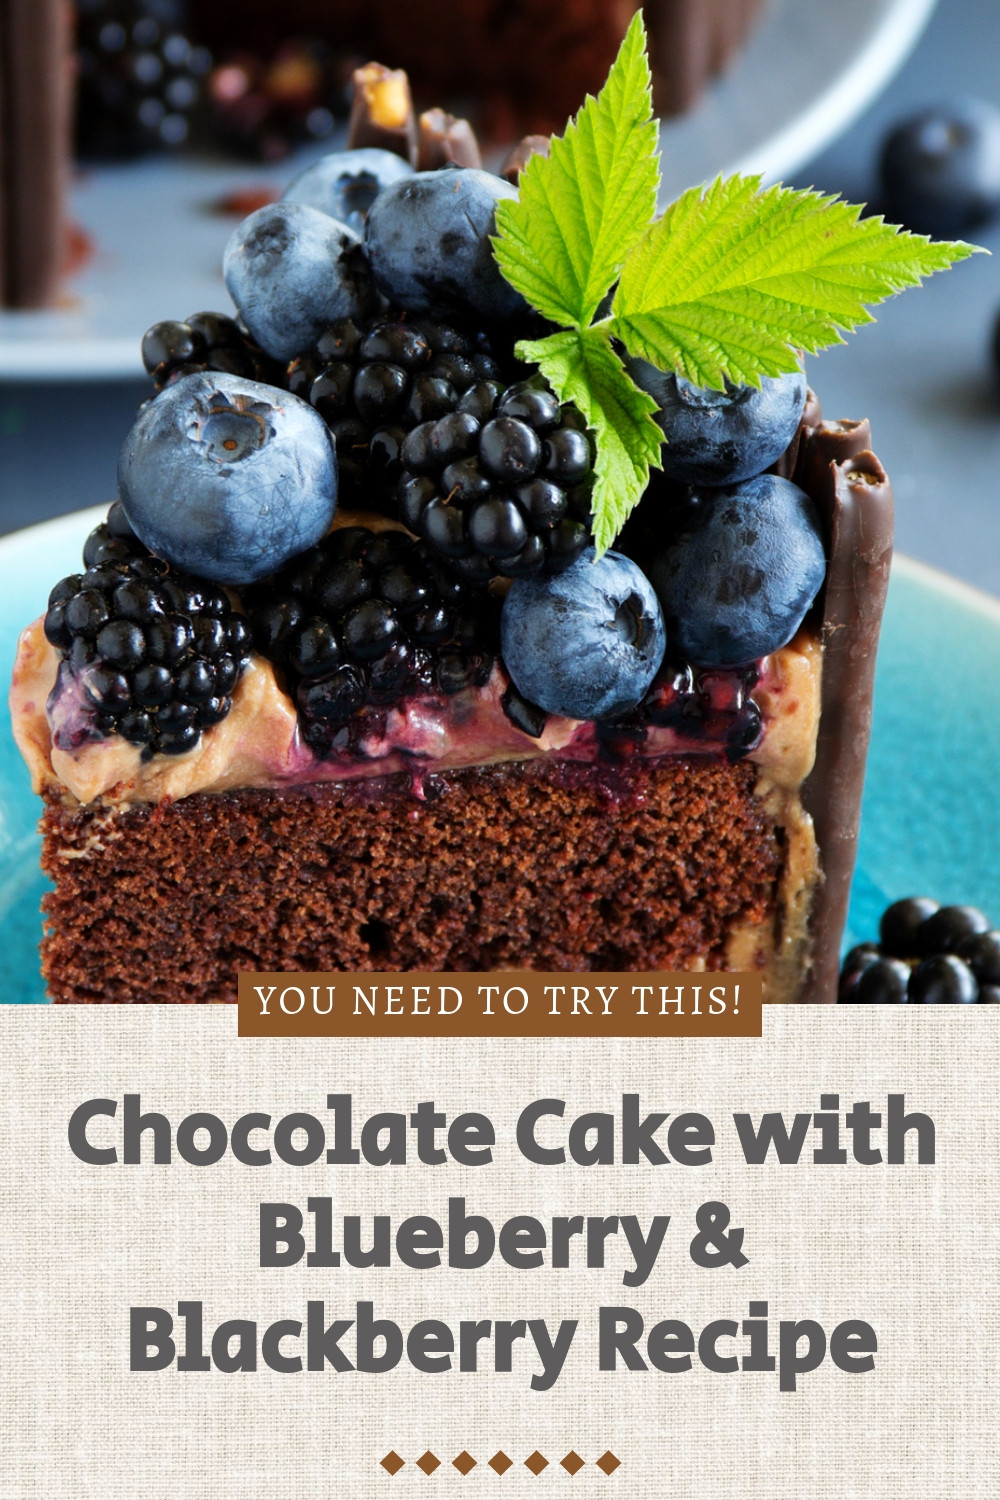
What it actually looks like when it’s done.
The berries on top don’t need to be arranged. I piled them. Some rolled. The cake still looked like something.
Inside, the blueberries and blackberries stain the crumb purple-gray at the edges where they baked. It looks a little strange before you taste it. After you taste it, it looks intentional.
Did yours come together cleaner than mine did the first time? I’m genuinely curious, because that batter-to-berry ratio felt like a guess when I landed on it.
The layers won’t be perfectly even unless you weigh the batter. I don’t weigh it. I eyeball it. The thicker layer goes on the bottom.
Imperfect. Still worth making again.
—Step 1: Preheat your oven to 350°F (175°C). Grease two 9-inch round cake pans, then dust them with flour — tap out the excess. Skipping the flour dusting means the bottom crust sticks no matter how well you greased it.
Step 2: Whisk together the 2 cups flour, 1.5 cups sugar, 0.75 cup cocoa powder, 2 tsp baking soda, 1 tsp baking powder, and 0.5 tsp salt in a large bowl. Whisk for a full 30 seconds — you’re aerating and combining at the same time, and lumps in the cocoa don’t disappear on their own later.
Step 3: In a separate bowl, beat the 2 eggs until slightly frothy, then add 1 cup strong black coffee, 0.5 cup vegetable oil, and 1 tsp vanilla extract. Stir until combined. (The coffee should be room temperature or cooler — hot coffee can start cooking the eggs before you’re ready.)
Step 4: Add the wet mixture to the dry in three additions, alternating with the 0.5 cup buttermilk — start with dry, add wet, add buttermilk, repeat, end with dry. The batter will look thin. That’s correct. Don’t add more flour.
Step 5: Toss 1.5 cups blueberries and 1.5 cups blackberries with 2 tbsp flour in a separate bowl until lightly coated. Make sure the berries are dry before you do this — pat them with a paper towel first. Fold 1 cup of blueberries and 1 cup of blackberries gently into the batter. Reserve the rest for the top.
Step 6: Divide the batter evenly between the two prepared pans. I tipped one pan slightly to watch the batter settle — it moves slowly, which told me it was going to bake up with some density. That’s what you want here.
Step 7: Bake for 30–35 minutes. Start checking at 30. A toothpick inserted in the center should come out with a few moist crumbs — not wet batter. (If your oven runs hot, start at 28 minutes.) Cool in pans for 15 minutes before turning out onto wire racks. Do not rush this step.
Step 8: For the frosting, beat 0.5 cup butter with a hand mixer for about 3 minutes until genuinely creamy and pale. Gradually add 0.75 cup cocoa powder and 3 cups powdered sugar, alternating with 0.25 cup milk. Add 1 tsp vanilla extract. Beat until smooth and spreadable — if it’s too thick, add milk one teaspoon at a time.
Step 9: Place the first cake layer on a serving plate and spread a generous layer of frosting on top. Set the second layer on top and frost the top and sides. Arrange the remaining fresh blueberries and blackberries on top. Refrigerate for 30 minutes before cutting.
Did your berry distribution turn out evenly, or did they cluster toward the edges like mine sometimes do? Share below!
Ways to Change It Up
Try this: Swap the blackberries for raspberries. The flavor is sharper and the seeds add a slight texture contrast against the dense crumb. It reads more tart than the blueberry-blackberry version.
Try this: Add 1 tsp of espresso powder directly to the dry ingredients alongside the cocoa. It deepens the chocolate flavor without making the cake taste like coffee — different from the brewed coffee in the batter, and the effect stacks.
Try this: Skip the buttercream entirely and use a whipped cream frosting instead — 2 cups heavy cream, 3 tbsp powdered sugar, beaten to stiff peaks. It won’t hold as long at room temperature, but the lightness against the dense chocolate crumb is a different kind of good.
Which would you go for? Drop it in the comments.
How to Serve It
Cut it cold, straight from the refrigerator. The layers hold cleaner and the frosting doesn’t smear across the cut face. Let individual slices sit at room temperature for about 10 minutes before eating — the crumb softens slightly and the berry pockets open up.
A spoonful of plain Greek yogurt next to a slice cuts the richness without adding sweetness. My daughter — who does not normally eat cake — ate two slices with yogurt and called it a snack.
For a dinner table, serve it with a small dish of the reserved fresh berries on the side so people can add more to their plate. It stretches the fruit flavor and makes the portions feel less heavy.
What would you pair it with?
—Storing It Without Ruining It
Cover it. Tightly. The frosting dries out fast in a refrigerator without a cover, and dry frosting is not the same thing as set frosting — it gets a skin that drags when you slice it.
In the fridge, it keeps for about 4 days before the berry moisture starts migrating into the crumb and making things soggy. Day 3 is honestly the sweet spot — the flavors have had time to settle and the berries inside the cake have softened just enough to blend with the crumb rather than sitting distinct inside it.
To freeze, wrap individual slices in plastic wrap and then in foil. They hold in the freezer for up to 2 months without much flavor loss. Thaw in the refrigerator overnight, not at room temperature — room temperature thawing makes the frosting weep.
Reheating is a personal call. I don’t reheat this cake. The berries get too soft and the frosting melts. If you want it warm, remove the frosting from the slice first, microwave the cake alone for about 15 seconds, then add the frosting back cold. It’s a little absurd but it works.
Have you ever saved leftovers like this? Tell me below!
Mistakes I Made So You Don’t Have To
I once forgot to flour the berries entirely, folded them in wet and bare, and watched them bleed purple streaks through the batter before it even hit the oven. The cake baked up stained and the berry flavor had basically dissolved into the crumb rather than staying in identifiable pockets. It tasted fine. It looked like a bruise.
I under-beat the butter for the frosting and ended up adding so much milk trying to smooth it out that the frosting turned runny. It dripped off the sides of the cake while I was still applying it, pooled on the plate, and I didn’t have enough frosting to re-do the top layer properly. The cake went out looking thin on one side.
I also tried to skip the 30-minute refrigeration before cutting — I had people waiting and I thought it was optional. The layers separated on the first slice and slid apart on the plate. I reassembled them on each individual plate and pretended that was intentional.
Did something like this happen to you?
Questions I’ve Actually Been Asked About This Cake
Can I use frozen berries instead of fresh? You can, but thaw them first and drain them thoroughly — frozen berries release a lot of liquid. Pat them dry before flouring. They’ll still sink slightly more than fresh. And the color bleed into the batter will be more aggressive. It depends on how much that bothers you.
Can I make this as a single-layer cake in a 9×13 pan? Yes. Bake time will shift to about 35–40 minutes. Check at 35. The berry distribution will be less even in a larger pan because the batter spreads thinner — the flour coating matters even more in that format.
Do I have to use buttermilk? I tried plain whole milk once. The crumb was denser and not in the way I wanted — more compact, less tender. Buttermilk’s acidity reacts with the baking soda and gives the crumb lift it doesn’t get from regular milk. But if buttermilk isn’t available, add 1.5 teaspoons of white vinegar to 0.5 cup regular milk and let it sit for 5 minutes first.
How far ahead can I make this? The unfrosted layers can be baked up to 2 days ahead and kept tightly wrapped at room temperature. The frosting can be made a day ahead and refrigerated — beat it briefly again before using. Fully assembled, about 4 days max in the fridge. Not longer.
Why did my cake dome in the center? Oven temperature. Either too hot, or the pans are too close to the top heating element. Try lowering the rack one position or reducing by 10 degrees. A domed cake is harder to stack — you can slice off the dome with a serrated knife once it’s fully cooled, but it’s easier to prevent it than fix it.
Can I make this without the coffee? Hot water works as a substitution, cup for cup. The chocolate flavor will be less forward — noticeable if you’re paying attention, less noticeable if you’re eating it next to strong flavors. But the coffee version is better. That’s just honest.
Which answer helped you most?
Where I’ve Landed With This One
I’ve made it four times now. The third time was the best. The fourth time I rushed the cooling step and the frosting slid on one side.
It is not a fast cake. From start to table it takes close to two hours when you factor in cooling, frosting, and refrigeration. There’s no version of this where you decide at 5pm that you’re making it for a 6pm dinner.
Fun fact: Blackberries are technically not berries in the botanical sense — they’re aggregate fruits made up of individual drupelets. Blueberries, on the other hand, are true berries. Neither fact changes how they taste in this cake.
The berry-to-chocolate ratio feels like it could tip in either direction depending on the season of your fruit. Sweeter berries in summer make the cake taste different than it does in fall with more tart ones. I haven’t figured out whether to adjust the sugar or just accept the variation.
Will you make this soon?
I’d be curious what your berries taste like when you get to it — whether your version ends up sweeter or sharper than mine. That question doesn’t have a fixed answer and I’m not sure it needs one.
Happy cooking! —Marina Caldwell
Triple Berry Chocolate Cake You Must Try
Ingredients
- 2 cups all-purpose flour
- 5 cups sugar
- 75 cup unsweetened cocoa powder
- 2 tsp baking soda
- 1 tsp baking powder
- 5 tsp salt
- 2 large eggs
- 1 cup strong black coffee
- 5 cup vegetable oil
- 1 tsp vanilla extract
- 5 cup buttermilk
- 5 cups fresh blueberries
- 5 cups fresh blackberries
- 2 tbsp flour (for coating berries)
- 5 cup butter
- 75 cup cocoa powder
- 3 cups powdered sugar
- 25 cup milk
- 1 tsp vanilla extract
Instructions
- 1Preheat oven to 350°F (175°C). Grease and flour two 9-inch round cake pans.
- 2Whisk together 2 cups flour, 1.5 cups sugar, 0.75 cup cocoa powder, baking soda, baking powder, and salt in a large bowl.
- 3In another bowl, beat eggs, then add coffee, oil, and 1 tsp vanilla extract.
- 4Combine wet and dry ingredients, alternating with buttermilk, starting and ending with dry ingredients.
- 5Coat blueberries and blackberries with 2 tbsp flour to prevent sinking.
- 6Gently fold 1 cup blueberries and 1 cup blackberries into the batter.
- 7Divide batter evenly between prepared pans.
- 8Bake for 30-35 minutes until a toothpick inserted in center comes out clean.
- 9Cool in pans for 15 minutes, then turn out onto wire racks to cool completely.
- 10For frosting, beat butter until creamy. Gradually add cocoa powder and powdered sugar.
- 11Add milk and 1 tsp vanilla extract, beating until smooth and spreadable.
- 12Place first cake layer on serving plate, spread frosting on top.
- 13Add second cake layer and frost the top and sides.
- 14Arrange remaining fresh blueberries and blackberries on top of cake.
- 15Refrigerate for 30 minutes before serving.
Notes
See full recipe for nutritional information.


