

The Night I Decided to Never Turn On My Oven Again (Almost)
It was a Tuesday in August and my kitchen was already 84 degrees by 11am. I had a bag of raw cashews sitting on the counter and absolutely zero interest in baking anything.
That’s how these bars were born. Not from inspiration. From stubbornness and heat avoidance.
I’d been playing around with cashew-based snacks for a few weeks, mostly blended things, mostly failed things. These finally stuck — literally and figuratively — and I’ve made them at least six times since then.
What Makes These Different From Every Other No-Bake Bar
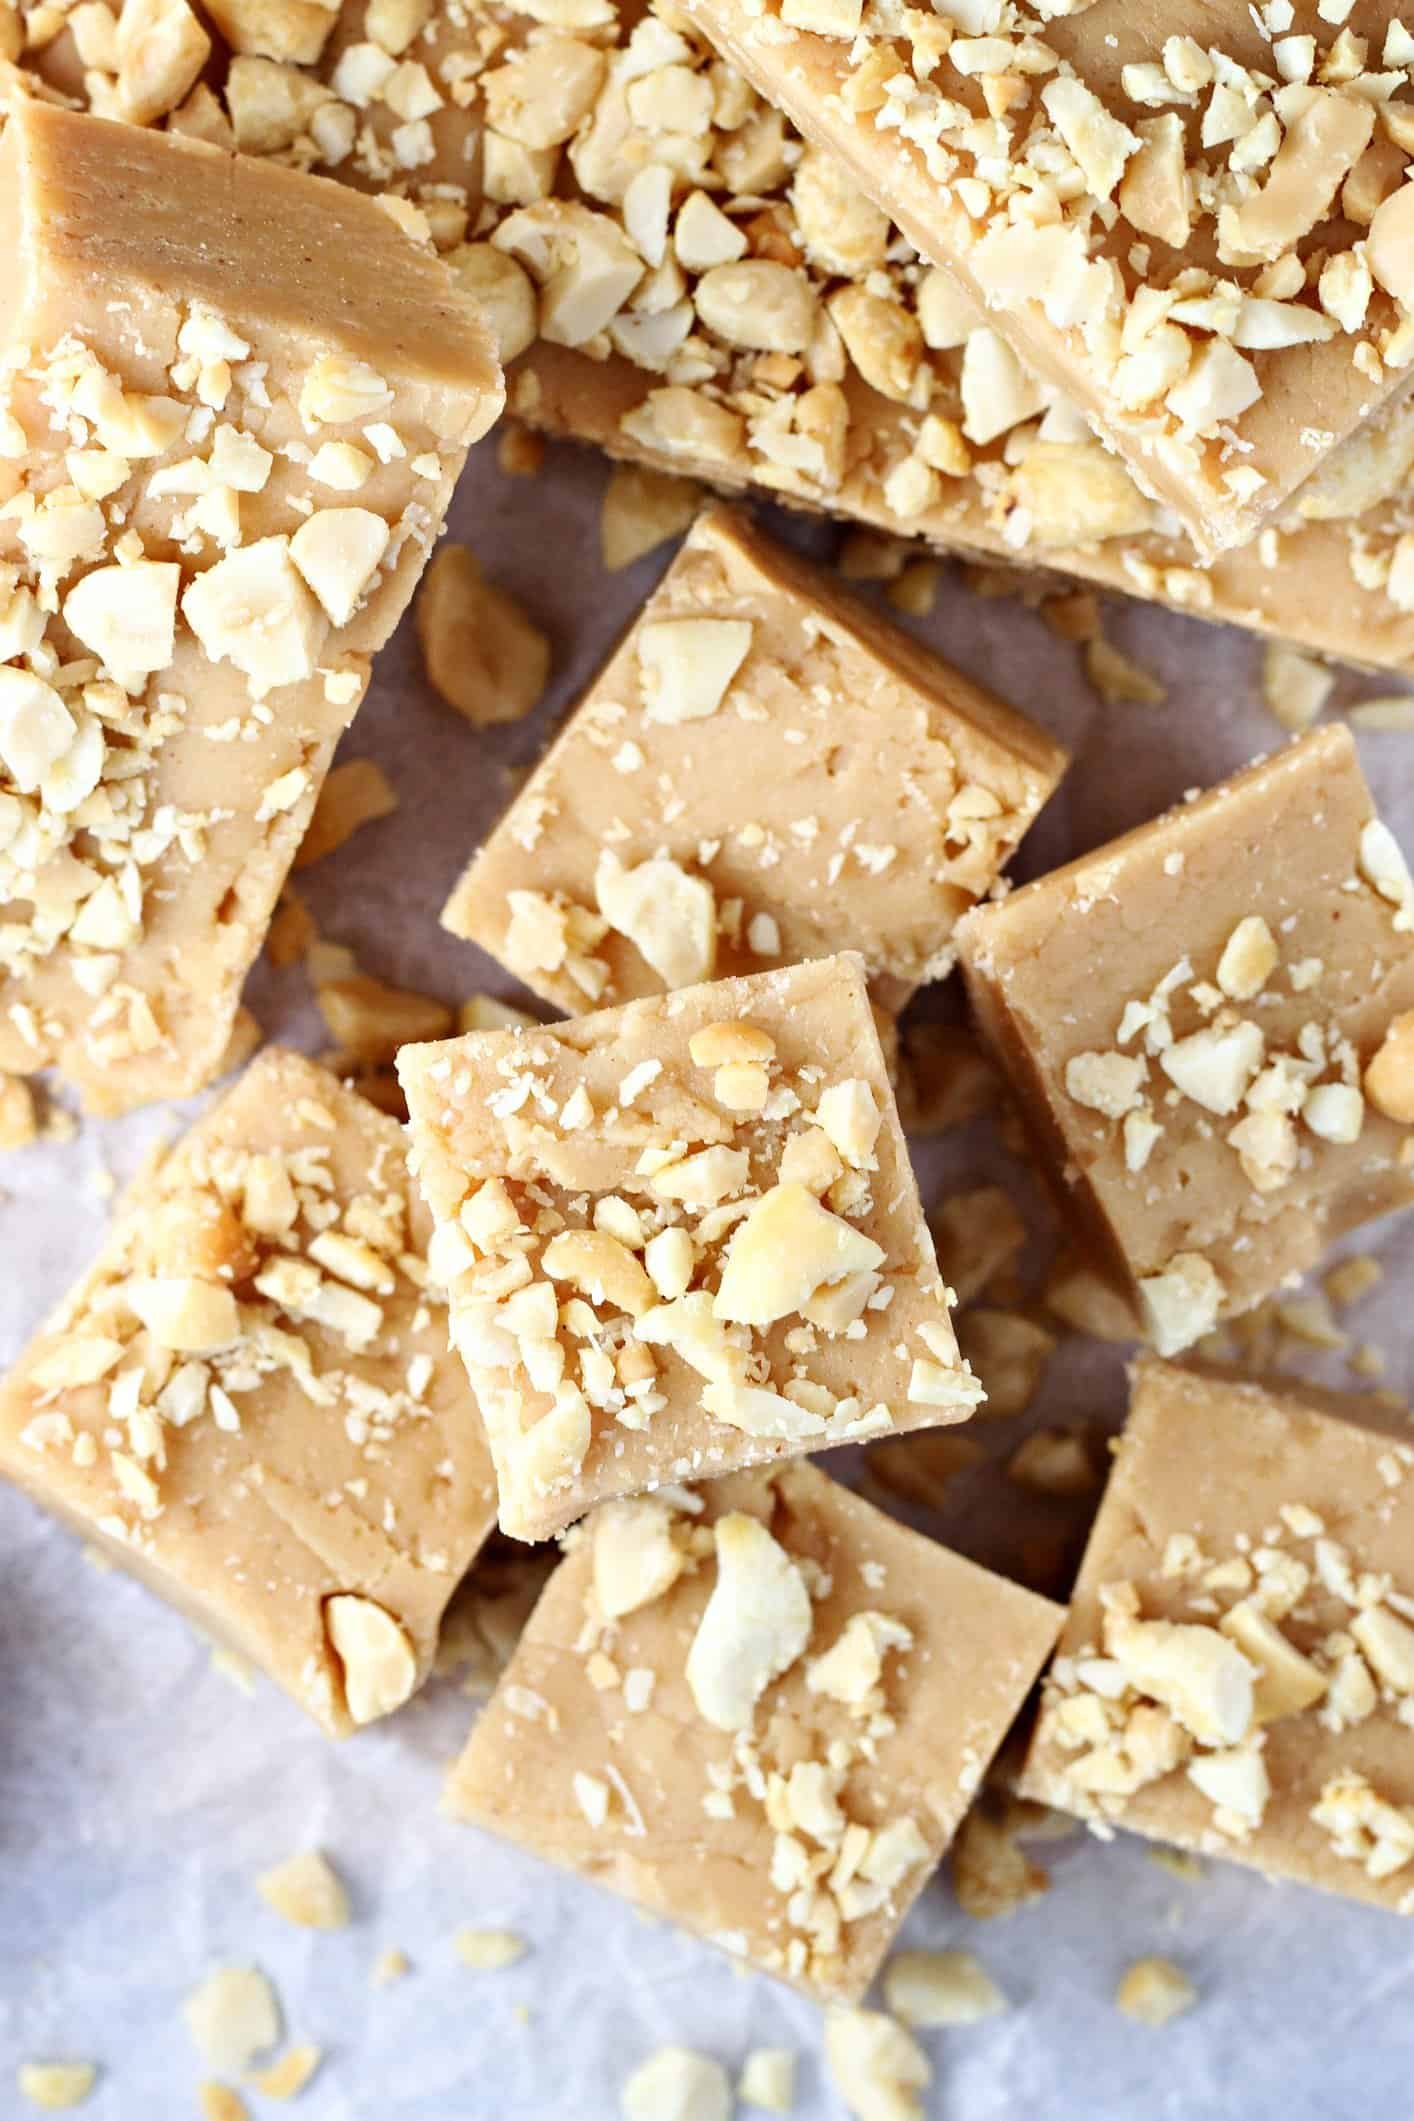
Most no-bake bars lean on dates or oats as the base. These use soaked raw cashews blended into a smooth paste, which gives them a texture closer to a chilled cheesecake than a granola bar.
Silky. Dense. Slightly sweet but not cloying.
The vanilla paste is doing a lot of work here — more than you’d expect. It’s not just flavor, it’s that warm, almost floral undertone that makes people ask what’s in these even though the ingredient list is embarrassingly short.
The Soaking Step Is Not Optional (I Learned This the Hard Way)
The first time I tried to skip soaking the cashews because I was impatient, I ended up with a grainy, oily mess that never fully smoothed out. Thirty minutes in hot water changes everything.
After soaking, the cashews blend into something almost creamy on their own. Add the coconut oil and honey and it becomes genuinely smooth — like a thick nut butter batter.
Quick tip: If you only have a standard blender, not a high-powered one, soak the cashews for a full hour instead of 30 minutes. It won’t be quite as smooth, but it gets close.
That Toasted Cashew Topping Though
I almost skipped the topping on my first batch because I didn’t want to dirty another pan. That would have been a mistake.
The toasted cashews on top go golden in about 4 to 5 minutes in a dry skillet over medium heat — watch them, because they go from golden to burned in about 30 seconds and I say this from direct personal experience. The crunch against the silky base is the whole point of this recipe, honestly.
Have you ever added a crunchy topping to something and realized it completely changed the dish? That’s exactly what happens here.
Overnight Wait: Annoying But Worth It
I will be honest — waiting overnight is the hardest part of this recipe. I tried cutting into a batch at the four-hour mark once because I was impatient, and the bars were too soft to slice cleanly.
Eight hours minimum. Overnight is better. The texture firms up in a way that makes the bars actually hold together when you pick them up.
My neighbor tried one the morning after I made them and immediately asked for the recipe. That felt like a good sign.
Five Ingredients and Something That Feels Fancy
There’s something satisfying about making something this simple that tastes like it took effort. Five ingredients. No oven. No candy thermometer. No special skills.
Just a food processor, a pan, some patience, and a refrigerator doing all the real work overnight.
These bars have become my go-to thing to bring to a friend’s house when I don’t want to show up empty-handed but also don’t want to spend two hours in the kitchen. They look polished. They taste like I tried harder than I did.
—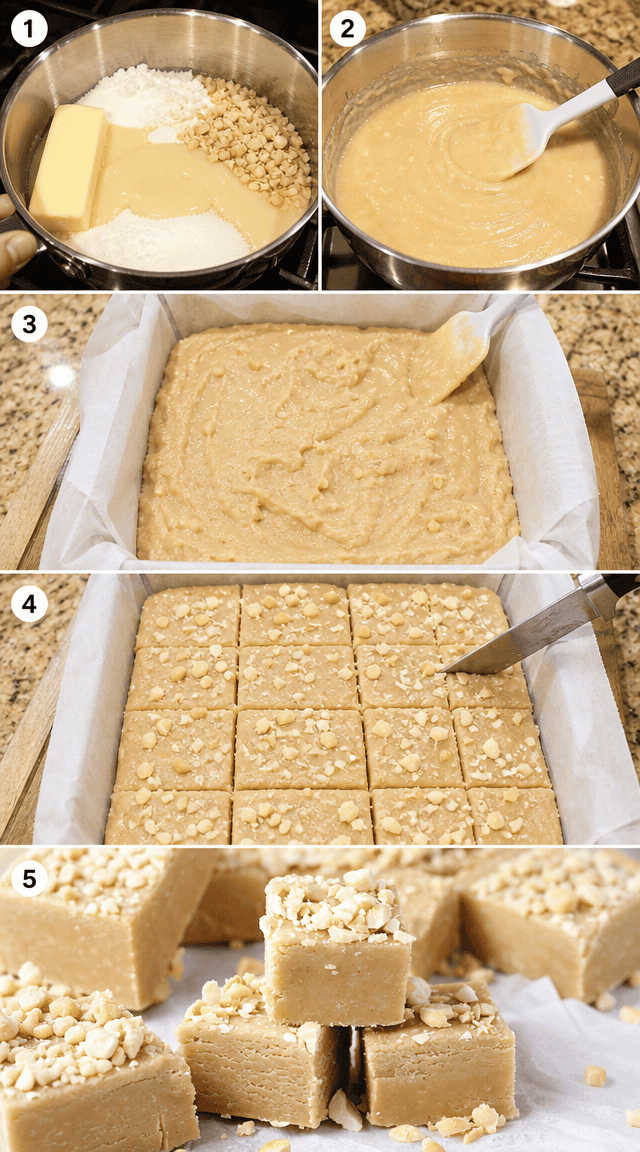
Step 1: Place 2 cups of raw cashews in a bowl and cover them completely with hot water. Let them soak for 30 minutes — don’t rush this, it’s genuinely the step that makes or breaks the texture. Set a timer if you’re the kind of person who wanders off and forgets (I am that person). Drain thoroughly when the time is up.
Step 2: Add the drained cashews, 4 tablespoons of melted coconut oil, 4 tablespoons of honey, and 2 teaspoons of vanilla paste to a high-powered food processor. Make sure your coconut oil is fully melted before it goes in — if it’s even slightly solid it can create little white clumps in the finished bars that don’t fully incorporate.
Step 3: Blend everything on high, stopping every 30 seconds or so to scrape down the sides with a spatula. (The first time I made this I didn’t scrape the sides and ended up with unblended cashew chunks in the bottom of the dish — not a disaster, but not what I wanted.) Keep blending until the mixture is completely smooth and creamy, about 2 to 3 minutes total.
Step 4: Line an 8×4 inch baking dish with parchment paper, leaving extra overhang on both long sides. This overhang is your best friend when it’s time to lift the whole slab out for slicing — don’t skip it.
Step 5: Pour the cashew mixture into the prepared dish and spread it out evenly using the back of a spoon. Press down firmly so there are no air pockets. I actually use my fingers at the end to smooth the surface because a spoon always leaves ridges that bother me.
Step 6: Toast your ¼ cup of chopped cashews in a dry skillet over medium heat, stirring constantly until they turn golden — this took me about 4 minutes but every stovetop is different, so just watch them closely. Scatter them evenly across the top of the cashew mixture and press them in gently so they don’t fall off when you slice. I genuinely love this step because the kitchen smells incredible.
Step 7: Cover the dish loosely and refrigerate overnight, or for at least 8 hours. When you’re ready to cut, lift the whole slab out using the parchment overhang and run a sharp knife under warm water before each slice — this gives you clean cuts instead of the bars crumbling at the edges. Slice into 24 bars.
Did your bars come out smooth or did you have trouble with the blending? Share below!
Ways to Change It Up
Try this: Swap the honey for maple syrup and add ½ teaspoon of cinnamon to the blend for a warmer, autumn-leaning flavor that my sister said tasted like snickerdoodle filling.
Try this: Press a layer of dark chocolate chips into the top instead of — or alongside — the toasted cashews, then refrigerate until the chocolate sets firm.
Try this: Stir a tablespoon of white miso paste into the cashew mixture before blending for a salty-sweet contrast that sounds strange but works surprisingly well.
Which would you go for? Drop it in the comments.
How to Serve It
Cut them into small bars and arrange them on a plate straight from the fridge — they hold their shape best when cold, so don’t leave them sitting out for more than 20 minutes before people eat them.
Serve alongside strong coffee or an espresso. The slight bitterness cuts through the sweetness of the honey in a way that makes both things taste better.
They also work as an afternoon snack alongside sliced apple or a few fresh strawberries — something slightly acidic and juicy next to the dense, creamy bar is a good contrast.
What would you pair it with?
—
Storing It Without Ruining It
Keep the bars in an airtight container in the fridge and they’ll stay good for up to a week. Stack them with a small piece of parchment between layers so they don’t stick together.
You can freeze them too. Lay them flat on a baking sheet for an hour to freeze individually, then transfer to a freezer bag. They keep for about 6 weeks and thaw in the fridge overnight with no texture issues.
No reheating needed or recommended — these are a cold snack and that’s what they should stay. Room temperature makes them too soft to hold their shape neatly.
Have you ever saved leftovers like this? Tell me below!
Mistakes I Made So You Don’t Have To
I once tried to rush the chill time because I had friends coming over earlier than expected — pulled them out at hour five and they just slumped apart when I sliced them. I had to serve them in a bowl with a spoon and call it “cashew cream.” It was fine. But it wasn’t bars.
I also used a regular blender once instead of my food processor because the processor bowl was already dirty and I didn’t want to wash it. The texture turned out gritty because the blender couldn’t get the cashews fully smooth — the food processor is worth the extra dish.
Third mistake: I skipped the parchment paper once and tried to just grease the pan instead. Getting the bars out was a disaster. Chunks. Just chunks. Always use parchment with overhang. Did something like this happen to you?
Questions I’ve Actually Been Asked About These Bars
Can I use cashew butter instead of soaking whole raw cashews? You can, but the result won’t be exactly the same. Store-bought cashew butter has different fat content and often added oil, which can make the final bars greasier and softer than you want. If you do use it, start with 1.5 cups, skip the added coconut oil, and taste before adding honey since some cashew butters are already sweetened. The texture will be closer to a fudge than a firm bar, so adjust your expectations going in.
My mixture looked grainy after blending — what went wrong? Almost always this means the cashews weren’t soaked long enough, or your machine isn’t powerful enough to fully break them down. If it looks grainy, don’t give up — keep blending in 30-second bursts and add one extra teaspoon of melted coconut oil to help the mixture loosen up. A Vitamix or similar high-powered blender will get you much closer to silky than a standard 500-watt blender will. Patience and soaking time are your two biggest tools here.
Can I make these vegan? Almost — the only swap needed is replacing the honey with pure maple syrup. Use the same quantity, 4 tablespoons, and the flavor changes slightly to something more earthy and less floral, but it works really well. The texture stays the same. I’ve made both versions and honestly my friend who doesn’t eat honey actually prefers the maple version, which surprised me.
Why did my bars not set firmly even after overnight refrigeration? A few possible reasons. The coconut oil might have been too warm when it went in, which can affect how it re-solidifies. The mixture might have too much liquid if your cashews weren’t drained thoroughly — even a little extra water changes the final firmness. Also make sure your fridge is actually cold enough. Mine runs around 37°F and these set up solidly every time at that temperature. If they’re still soft, try freezing them for 2 hours instead.
How do I get clean slices without the bars crumbling? Run your knife under warm water and wipe it dry before each cut — not just the first one, but every single cut. It takes an extra 10 seconds per slice but makes a noticeable difference. Also make sure the bars are fully chilled right up until you slice them. Take them out of the fridge, slice immediately, and serve. Don’t let them sit on the counter for 15 minutes before cutting or the edges get soft and messy.
Can I add protein powder to these? I’ve tried it once with an unflavored collagen powder and it worked without changing the texture too much — I used 2 tablespoons blended right in with everything else. Flavored protein powders are trickier because the sweetness levels vary a lot, so you’d need to reduce the honey if your powder is already sweet. I’d start with one tablespoon and taste the mixture before adding more. Vanilla-flavored protein powder actually pairs really naturally with the vanilla paste already in the recipe.
Which answer helped you most?
Go Make These This Week
Honestly, if you have cashews and a food processor, you’re most of the way there. The hardest part of this recipe is waiting.
I keep a batch in my fridge almost constantly now. Two bars in the afternoon actually keeps me going until dinner, which I didn’t expect from something this small.
They’re the kind of thing that looks like you put in more effort than you did. And I mean that as the highest possible compliment.
Will you make this soon? I genuinely hope so — drop a comment and let me know how yours turned out, especially if you tried one of the variations.
Fun fact: Raw cashews are technically not raw at all — they’re always heated at least once during processing to neutralize urushiol, the same compound found in poison ivy, which naturally occurs in the cashew shell. Every cashew you’ve ever eaten has been heat-treated before it reaches you.
Happy cooking! —Marina Caldwell
Silky Cashew Honey Bars Require Zero Oven Time
Description
Creamy No-Bake Cashew Honey Vanilla Bars
Ingredients
Instructions
- 1. Submerge raw cashews in hot water for 30 minutes to soften, then drain thoroughly.
- 2. Add soaked cashews, melted coconut oil, honey, and vanilla paste to a high-powered food processor.
- 3. Blend mixture on high until completely smooth and creamy, scraping down sides as needed.
- 4. Line an 8×4 inch baking dish with parchment paper, leaving overhang on sides for easy removal.
- 5. Transfer cashew mixture into the prepared dish, pressing down firmly and evenly with the back of a spoon.
- 6. Scatter toasted chopped cashews across the top, gently pressing them into the surface.
- 7. Refrigerate overnight until fully set, then lift out using parchment overhang and slice into 24 bars.
Notes
- Protein: 2g
- Fat: 7g
- Carbs: 7g NOTES: – For extra crunch, lightly toast the topping cashews in a dry skillet over medium heat until golden before using. – Bars can be stored in an airtight container in the refrigerator for up to one week. – For cleaner slices, run your knife under warm water before cutting.


