

I Skipped the Chilled Bowl the First Time
This is not a complicated recipe. That’s actually the problem.
When something looks easy, I stop paying attention, and that’s exactly what happened the first time I made these waffles for my daughter’s birthday breakfast. The batter came together fine. The waffles cooked fine. Then I tried to whip the cream in a room-temperature bowl on a warm morning and got something between heavy cream and disappointment — pourable, slightly frothy, definitely not peaks.
I served it anyway. Thin cream pooled into every square, soaked into the waffle, turned the whole thing soggy within four minutes.
Nobody complained. That’s the thing about eight-year-olds.
But I knew, and I spent the next attempt fixing exactly that one thing — bowl in the freezer for 15 minutes, cream cold from the back of the fridge — and the difference was not subtle. Stiff peaks in under three minutes. Cream that stayed put on top of the waffle instead of sliding off the side.
The waffles themselves I’ve made maybe a dozen times now. They go golden in about 4 to 5 minutes depending on the iron, and the inside stays soft even when the outside gets properly crisp. The strawberries are the part most recipes underplay — they need that 5 minutes with the powdered sugar, not as a garnish step, but because the juice they release becomes its own thing.
About the Batter — And What You Shouldn’t Do to It
Most waffle recipes will tell you to mix until smooth. They’re wrong.
Lumps are not a problem here. Overmixing is. I spent two batches early on stirring until the batter looked silky and both times got waffles that were chewy and dense instead of light — the gluten had already developed before the batter hit the iron. Stop when you still see small lumps. They cook out.
The melted butter goes into the wet ingredients, not the dry, and it needs to be cooled slightly before you add it or it will start cooking the eggs. I learned this the hard way once and got faint streaks of scrambled egg in the batter. Not enough to ruin anything, but visible. Quick tip: Let the melted butter sit for 3 to 4 minutes off the heat before mixing it in with the eggs and milk.
Wet into dry.
The batter will be thicker than pancake batter. That’s correct. If it seems too thick — I thought about thinning it with extra milk once, actually no, I left it alone — the waffle iron handles it fine. The steam inside the iron does the work that extra liquid would only undermine.
The vanilla in the batter is 2 teaspoons, which sounds like a lot for a waffle. It isn’t. The whole milk and butter both mute it slightly. You need the full amount to actually taste it in the finished waffle, and it’s the detail that makes these taste less like a diner waffle and more like something someone made deliberately.

The Strawberries Aren’t Just a Topping
Slice them and toss them with the powdered sugar before you start the waffles. Five minutes minimum, ten is better.
What happens is maceration — the sugar draws the juice out of the berries, and by the time you’re ready to serve, there’s a thin, slightly syrupy liquid at the bottom of the bowl. That liquid is better than strawberry jam on a waffle. It soaks into the surface just enough without making everything soggy the way syrup does.
Use fresh strawberries. Frozen ones release too much water and you end up with something watery and cold, which makes the whipped cream slide and the waffle go soft in under a minute.
Did yours get too juicy? That’s usually a sign the berries sat longer than 15 minutes — just drain a little of the liquid before serving if it’s pooling heavily.
Sliced thin is better than chunky here. Thick strawberry pieces slide off the top of the waffle and take the whipped cream with them when you cut in.
The Cream — Don’t Rush It and Don’t Walk Away
Heavy whipping cream, 3 tablespoons of granulated sugar, half a teaspoon of vanilla.
Cold bowl, cold cream, cold beaters if you’re using a hand mixer. Start on medium, not high — high speed at the start incorporates less air and you get a denser result. Move to high after about 90 seconds once the cream has started to thicken and hold its shape slightly.
Stiff peaks, not over-whipped. Over-whipped cream starts to look grainy and slightly yellow — that’s the fat beginning to separate. If you get there, it’s not fixable. Just fold in a spoonful of fresh cream and use it fast.
The whole process takes about 3 minutes once the bowl is properly chilled. That’s it. There’s no complexity here — it’s just temperature management and timing. Nothing clever required.
I used to make the cream first and let it sit in the fridge while I cooked the waffles. It softened enough to be annoying — not ruined, but not right either. Now I cook the waffles first, keep them warm in a 200°F oven, then whip the cream in the last 3 minutes before serving.
What Goes Wrong and Doesn’t Get Fixed
The first waffle out of the iron is almost always worse than the rest. The iron isn’t fully calibrated yet — even if the preheat light says it’s ready, the surface temperature isn’t even. I’ve tried adjusting for this and I’ve also tried just accepting it. Accepting it is faster.
Pale waffles — and I mean actually pale, not just lighter than the photo — mean the iron isn’t hot enough or you opened it too early. Leave it. The moment of resistance when you try to lift the lid before it’s done is your signal to wait another minute.
Honestly? Underbaked waffles are my most consistent failure with this recipe. I get impatient.
Greasing the iron matters more than most recipes admit. Too little and the waffle tears when you open the lid — the deep grid pockets stick. Too much and the exterior fries instead of crisps. Light spray, every single waffle, not just the first one.
The batter also doesn’t hold well. Make it, use it. I tried refrigerating leftover batter once overnight — the baking powder had already started working and the next-morning waffles were noticeably flat and rubbery. Not inedible, but not what this is supposed to be.
—Step by Step
Step 1: Preheat your Belgian waffle iron according to the manufacturer instructions. This matters more than it sounds — most irons need at least 5 full minutes to reach even heat, not just until the light flicks on. (I’ve shortcut this and always regretted it.)
Step 2: In a large bowl, whisk together 2 cups flour, 2 tablespoons granulated sugar, 1 tablespoon baking powder, and 1/2 teaspoon salt. Whisk thoroughly so the baking powder distributes evenly — clumps of it bake into bitter spots.
Step 3: In a separate bowl, beat the 2 eggs, then add 1 3/4 cups whole milk, 1/2 cup melted and slightly cooled butter, and 2 teaspoons vanilla extract. Mix until combined. The butter needs to be warm, not hot — if it’s still steaming, wait.
Step 4: Pour the wet ingredients into the dry and stir until just combined. Small lumps should still be visible. This is the step most people get wrong — stop early, not late. (Overmixed batter makes tough waffles. There’s no coming back from it.)
Step 5: Lightly grease the waffle iron with cooking spray. Pour the batter in — amount depends on your iron, but generally fill it to about 3/4 of the grid surface. Close and cook for 4 to 5 minutes or until the steam has nearly stopped releasing from the sides. Did yours come out pale even after 5 minutes? Let it go another full minute before you open it — share below!
Step 6: Transfer finished waffles to a plate in a 200°F oven to keep warm while you finish the batch. Stacking them traps steam and softens the exterior — single layer only.
Step 7: Toss 1 pound of sliced strawberries with 2 tablespoons powdered sugar. Let sit for at least 5 minutes. The juice that comes out is the point, not an accident.
Step 8: In a chilled bowl, whip 1 cup heavy cream with 3 tablespoons granulated sugar and 1/2 teaspoon vanilla until stiff peaks form. Start at medium speed, finish at high. 3 minutes total, maybe less.
Step 9: Plate the warm waffles, spoon the strawberries over with whatever juice has accumulated, then add the whipped cream. Serve immediately — this is not a build-ahead situation.
Ways to Change It Up
Try this: Swap the vanilla in the cream for a teaspoon of almond extract. It pulls the strawberry flavor in a slightly different direction — less dessert, more interesting.
Try this: Add a tablespoon of lemon zest to the macerated strawberries along with the powdered sugar. The juice it produces tastes sharper and less sweet, which works well against the richness of the cream.
Try this: Brown the butter before you melt it for the batter. It adds about 5 minutes and a faintly nutty note that doesn’t announce itself but makes the waffle taste more like something you’d pay for.
Which would you go for? Drop it in the comments.
How to Serve It
The obvious answer is breakfast. But these also work at a late brunch alongside something savory — a plate of scrambled eggs, maybe bacon — where the sweetness doesn’t feel like the whole point of the meal.
Skip the maple syrup. The strawberry juice is already doing that job, and syrup on top of the cream just makes everything slide around and pools at the plate edge before anyone finishes eating.
If you’re serving more than four people, keep the waffles in a single layer in the oven and assemble each plate individually rather than putting everything out and letting people serve themselves. The cream melts into warm waffles within about 90 seconds, and self-serve situations always mean someone’s plate sits too long before they get to it.
What would you pair it with?
—Storing It Without Ruining It
The waffles store fine. The assembled topping does not.
Leftover waffles go in an airtight container in the fridge for up to 3 days. Reheat them in a toaster oven at 350°F for about 6 minutes — they crisp back up almost completely. A regular toaster works too if your waffle squares fit.
Freezing works well. Lay them flat on a baking sheet until frozen solid, then transfer to a bag. They last about 2 months and reheat from frozen in about 8 minutes at 350°F with no thawing needed.
The whipped cream doesn’t store. It weeps in the fridge and collapses by the next day. Make only what you’ll use. If you somehow have extra, fold it into scrambled eggs in the morning — it sounds strange and it works.
The macerated strawberries keep in the fridge for about 24 hours before they get mushy and too watery. Day-of is better. Day-after is fine on yogurt. Day three and they’re past it.
Have you ever saved leftovers like this? Tell me below!
Mistakes I Made So You Don’t Have To
I once used half-and-half instead of whole milk because I was out. The waffles cooked up thinner and didn’t crisp properly — the fat content isn’t the same, and the texture suffered enough that I noticed immediately. Use whole milk.
I skipped greasing the iron after the first waffle, convinced the butter in the batter would be enough. The second waffle tore cleanly in half down the center when I opened the lid. I ate both halves but it wasn’t a great feeling.
I added the powdered sugar to the strawberries and then immediately plated them — no resting time — and the fruit was still firm and dry on top of the waffle with none of the juice that makes this work. Five minutes is the actual minimum. Ten is better. Set a timer.
Did something like this happen to you?
Questions I Actually Get About This Recipe
Can I make the batter ahead of time? Not really. The baking powder activates when it hits the wet ingredients, and by the next morning it’s mostly spent. You can mix the dry ingredients and the wet ingredients separately and keep them in the fridge overnight, then combine right before cooking — that works.
What if I don’t have a Belgian waffle iron — can I use a regular one? Yes, but the cooking time drops to about 3 minutes and the pockets are shallower, so the strawberry juice fills them faster and you lose some of the texture contrast. And honestly the whole point of Belgian-style is the deep grid. It matters.
Can I use frozen strawberries? I tried this once and the result was watery, cold, and visually unappealing. Frozen berries release too much liquid even after thawing. Fresh only for this one. But if it’s the dead of winter and frozen is all you have, thaw them completely, drain them, and reduce your maceration time to about 3 minutes — they need much less.
How long do the waffles stay crispy after cooking? About 4 minutes at room temperature before they start to soften from the steam escaping. In a 200°F oven, single layer, they hold for about 20 minutes. After that, the texture starts declining.
Can I substitute buttermilk for the whole milk? It depends on whether you want a tangier waffle. Buttermilk works and produces a slightly more tender crumb, but the flavor shifts noticeably. Some people prefer it. I don’t, but it’s not wrong. Reduce the baking powder by about a quarter teaspoon if you do this, since buttermilk is acidic.
Is it worth making the whipped cream from scratch instead of using canned? The canned version melts in about 60 seconds once it hits the warm waffle. Homemade holds its shape for several minutes longer. For something you’re serving to guests, yes. For a Tuesday morning when you’re by yourself — I’ve made worse decisions than canned cream.
Which answer helped you most?
The Part I Keep Coming Back To
This recipe doesn’t have a dramatic story behind it. I made it, liked it, made it again, fixed the cream situation, and kept going.
What stays with me is how much the strawberry juice changes the whole experience — it’s the detail that separates a plate of waffles with fruit on top from something that actually feels like it was thought about. Five minutes of sitting time. That’s the whole gap.
Fun fact: Strawberries are technically not berries at all — botanically, they’re an accessory fruit, meaning the fleshy part develops from the receptacle that holds the seeds rather than from the ovary of the flower itself. The actual “fruits” are the tiny seeds dotting the surface.
I’ve made this for exactly four people and I’ve made it for one person sitting at the kitchen counter on a Saturday when nothing else was happening. Both versions tasted the same.
Will you make this soon?
The only thing I’m still not settled on is the sugar in the cream — 3 tablespoons makes it noticeably sweet, and sometimes I want it less so the vanilla comes through more clearly. I’ve tried 2 tablespoons and liked it better, then made it with 3 again the next week and thought that was right. I haven’t resolved this.
Happy cooking! —Marina Caldwell
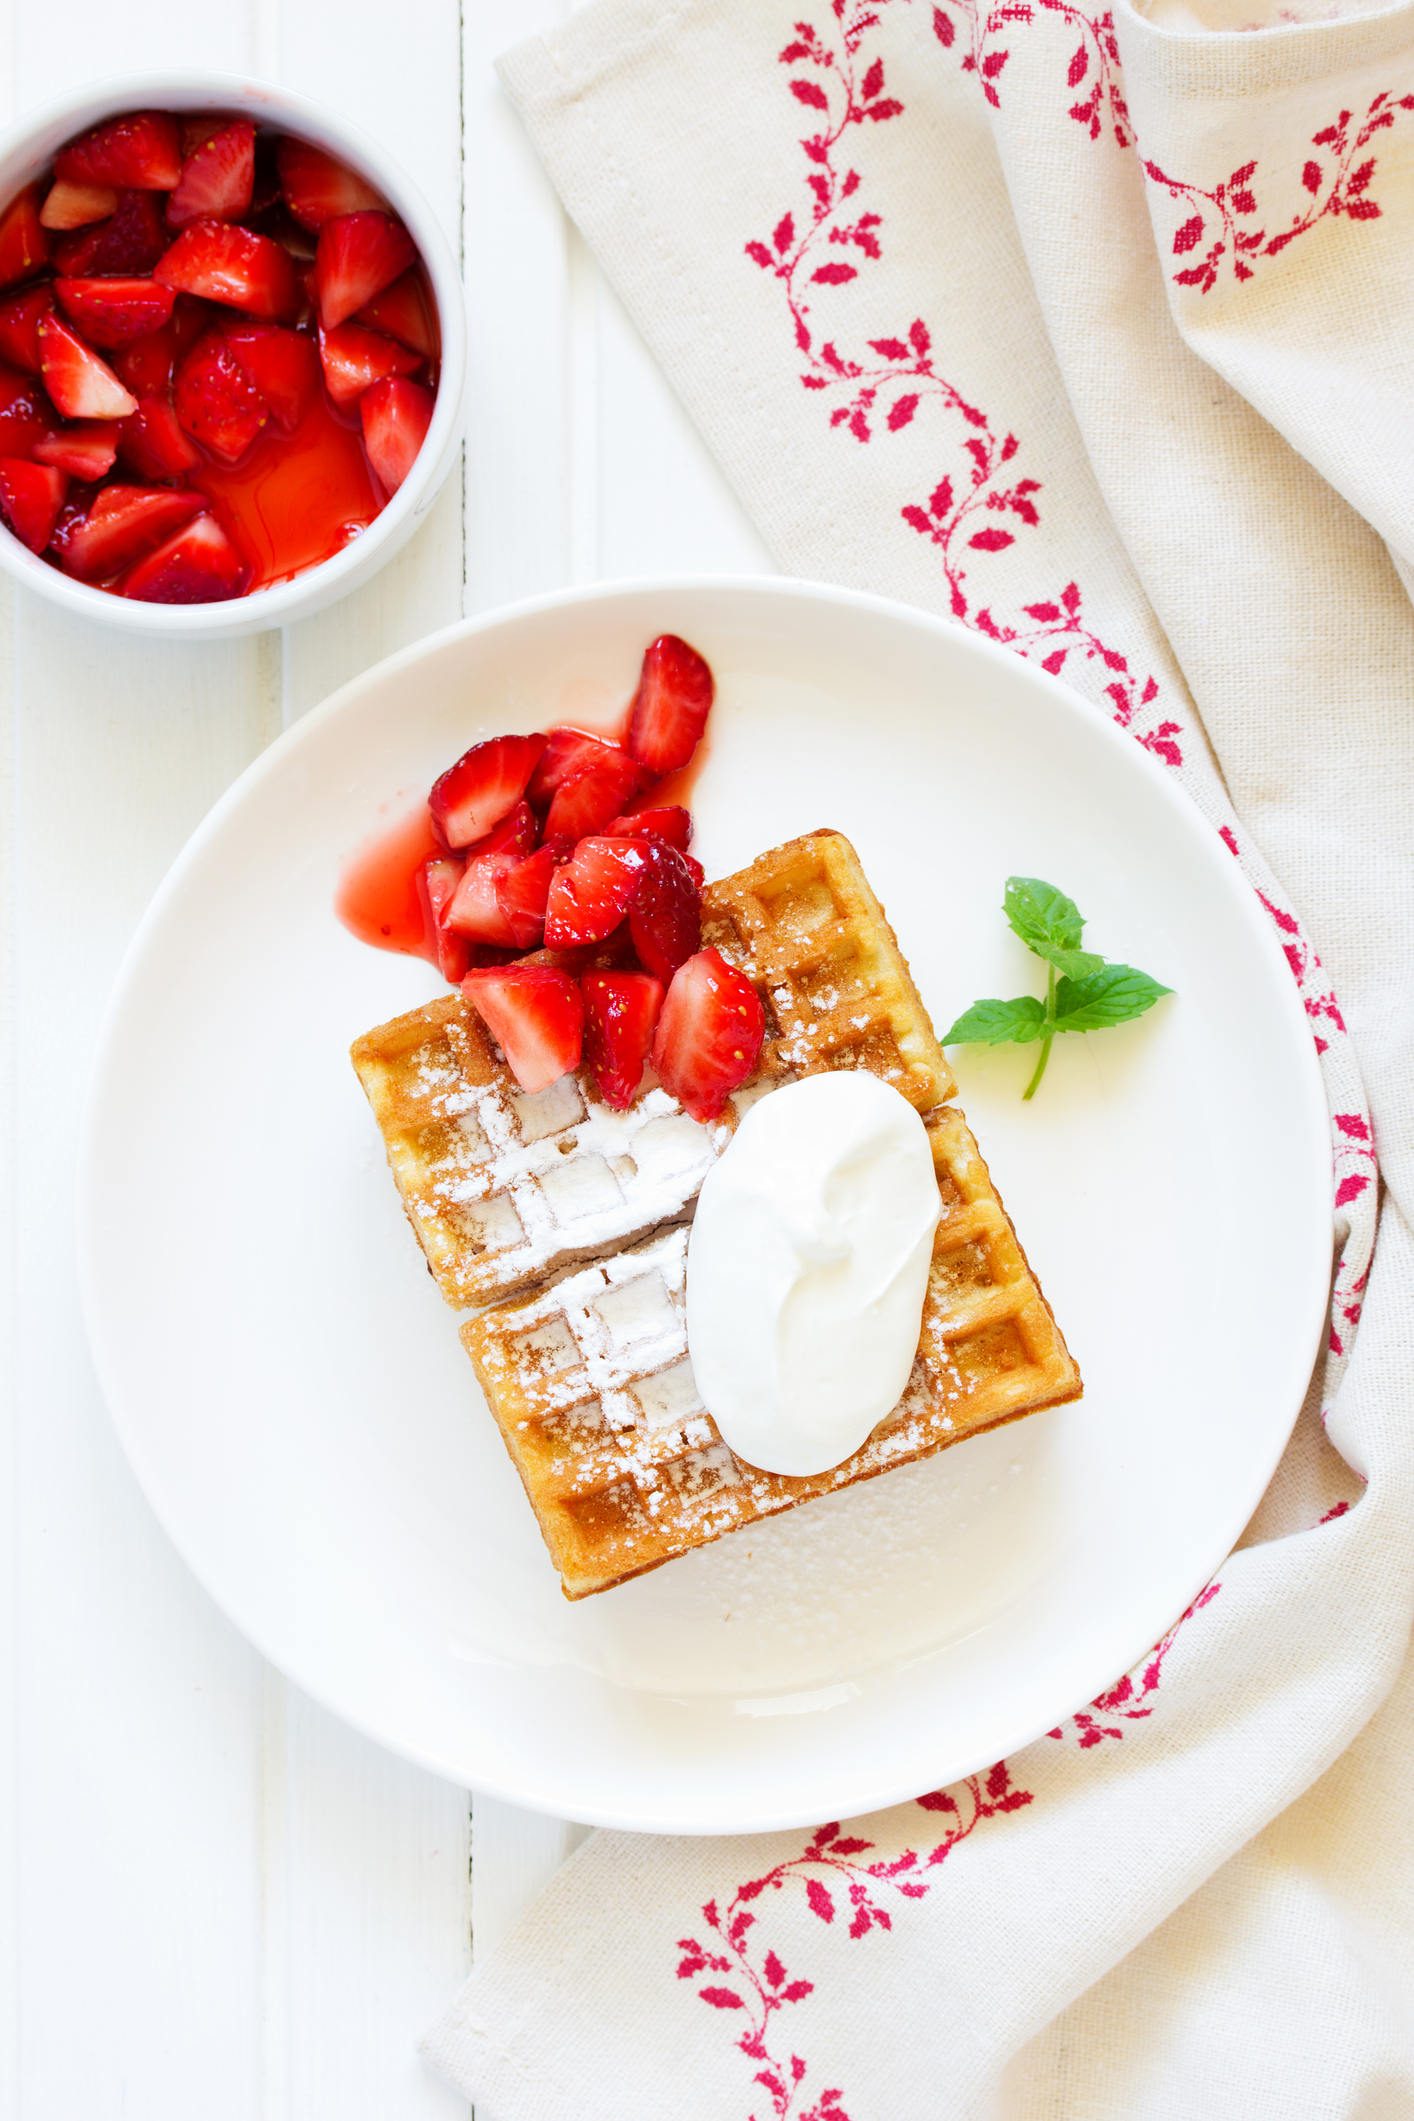
Belgian Waffles A Strawberry Whipped Cream Dream
Ingredients
- 2 cups all-purpose flour
- 2 tablespoons granulated sugar
- 1 tablespoon baking powder
- 1/2 teaspoon salt
- 2 large eggs
- 1 3/4 cups whole milk
- 1/2 cup melted butter
- 2 teaspoons vanilla extract
- 1 pound fresh strawberries, sliced
- 2 tablespoons powdered sugar
- 1 cup heavy whipping cream
- 3 tablespoons granulated sugar
- 1/2 teaspoon vanilla extract
Instructions
- 1Preheat Belgian waffle iron according to manufacturer instructions.
- 2In a large bowl, whisk together flour, 2 tablespoons sugar, baking powder, and salt.
- 3In another bowl, beat eggs and add milk, melted butter, and 2 teaspoons vanilla extract; mix well.
- 4Pour wet ingredients into dry ingredients; stir until just combined with small lumps remaining.
- 5Lightly grease waffle iron with cooking spray.
- 6Pour batter into waffle iron and cook according to instructions until golden and crispy, about 4-5 minutes per waffle.
- 7Transfer cooked waffles to a warm plate and keep warm.
- 8Toss sliced strawberries with 2 tablespoons powdered sugar in a bowl; let sit 5 minutes.
- 9In a chilled bowl, whip heavy cream with 3 tablespoons sugar and 1/2 teaspoon vanilla until stiff peaks form.
- 10Serve warm waffles topped with whipped cream and strawberries.
Notes
See full recipe for nutritional information.


