

The Night I Finally Got These Right
It was a Tuesday in January and I had butter going in a pan, half-watching it, and then I smelled it — that nutty, almost caramel-like smell that means you’re either right on time or one second too late.
I’d burned it the week before. Whole batch, trash can.
This time I caught it just as the milk solids turned deep golden, poured it immediately into a cold bowl, and something clicked. These cookies became the thing I make when I want to bring something to someone’s house and actually feel proud of it.
Why the Butter Actually Matters Here
Brown butter isn’t just a technique people use to sound fancy. It genuinely changes the flavor — something between toffee and toasted hazelnut comes through in every bite, and you can’t get that any other way.
Use a stainless steel pan. Not nonstick. You need to see the color of those milk solids at the bottom, and a dark pan will hide them until it’s too late.
Quick tip: Pull the pan off heat the moment you see deep amber color and smell something nutty — the butter keeps cooking in the pan for a few seconds even after you remove it from the burner.
What Makes These Chewy and Not Crispy
Two things: dark brown sugar and an extra egg yolk. The molasses in dark brown sugar holds moisture, and that yolk adds fat without extra liquid.
I also pull them out when the centers still look soft and slightly puffy — almost like they’re not done. They finish cooking on the pan.
My neighbor Diane thought I was crazy when I pulled them out at 9 minutes and they looked underbaked. She texted me an hour later saying they were the chewiest cookies she’d ever had.
The Rolling Sugar Situation
You mix some of the granulated sugar with a bit of the brown sugar in a shallow dish and roll each dough ball through it before baking. That coating does two things — it gives you a slightly crisp exterior and a sparkly, crackled top.
Don’t skip this step. I tried making a batch without rolling once, just to save time, and the difference was genuinely noticeable. Less texture. Less contrast.
Have You Ever Frozen Cookie Dough?
These dough balls freeze beautifully — up to three months. Have you ever had a batch of homemade cookies ready to bake in twenty minutes with almost no effort?
Just pull out however many you need, add two minutes to the bake time, and go. I keep a bag in the freezer almost always.
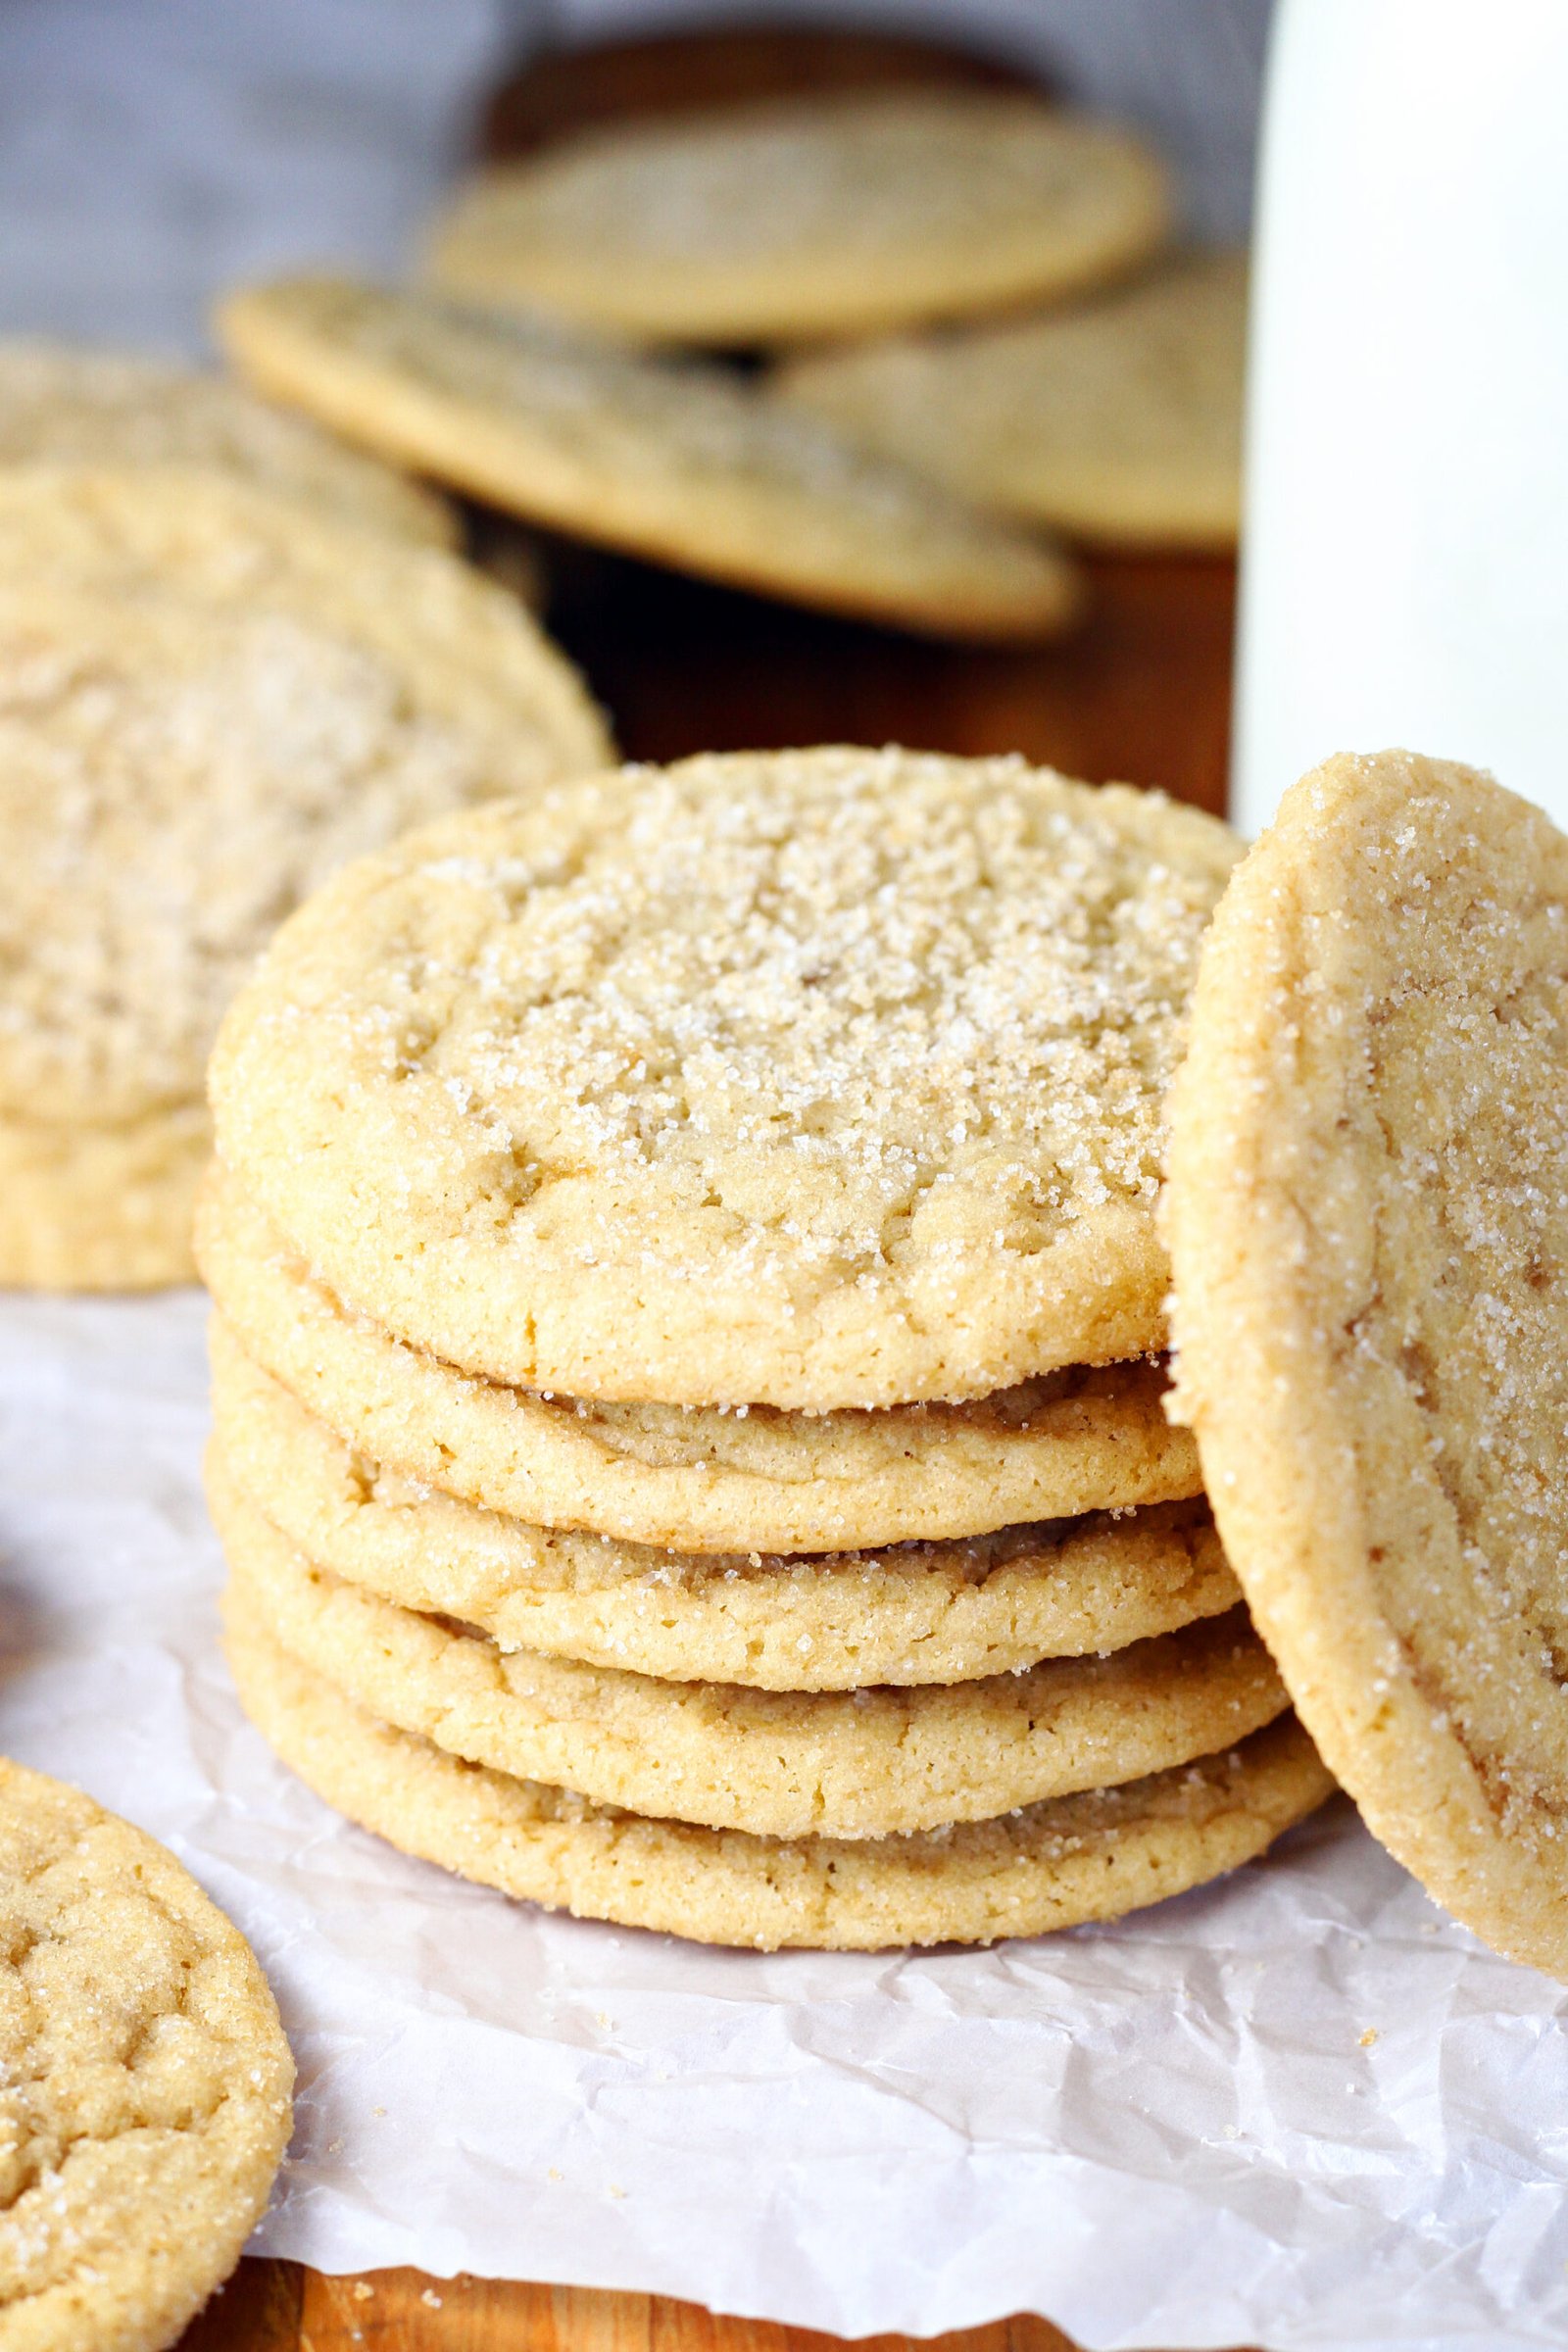
What These Taste Like Straight Off the Rack
Warm. Chewy in the middle with a slightly set edge. That brown butter flavor comes through clearly — it’s not subtle.
My sister said they tasted like brown sugar caramels in cookie form. That’s probably the most accurate description I’ve heard.
I honestly ate three of them standing at the counter before I even put the rest on the rack. No regrets.
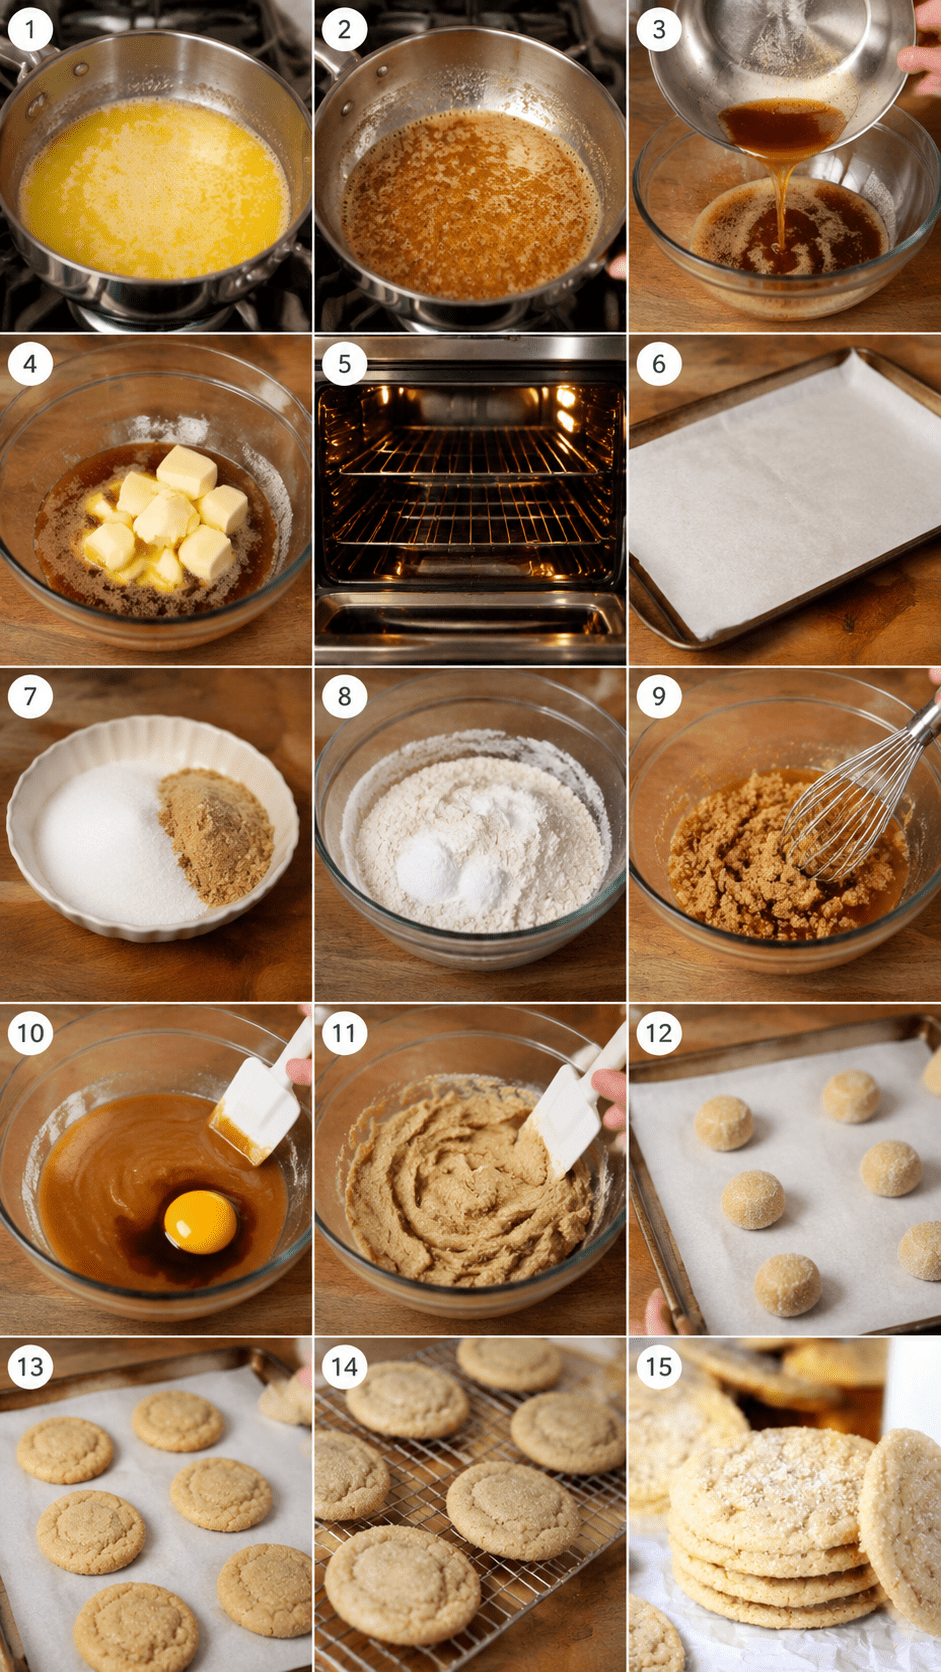
How to Make These Step by Step
Step 1: Melt 10 tablespoons of butter in a stainless steel skillet over medium heat. Swirl it continuously — don’t walk away — until it turns deep golden brown and smells nutty, about 3 to 5 minutes. (If it smells sharp or acrid at all, it’s burned. Start over. I know. It hurts.)
Step 2: Pour the browned butter immediately into a large heatproof bowl. Add the remaining 4 tablespoons of butter and stir until melted. Let the whole thing rest for 15 minutes — this brings the temperature down so you don’t scramble your eggs later.
Step 3: While butter rests, preheat your oven to 350°F with the rack in the center. Line two baking sheets with parchment paper. In a shallow dish, mix the granulated sugar with ¼ cup of the dark brown sugar and set it aside — this is your rolling mixture.
Step 4: In a separate bowl, whisk together the flour, baking soda, and baking powder. Set it aside. Nothing exciting here, but don’t skip the whisk — it distributes the leaveners evenly and you don’t want one cookie with a weird baking soda pocket.
Step 5: Stir the remaining 1¾ cups dark brown sugar and the salt into the cooled butter mixture, about 30 seconds, until smooth. Then add the whole egg, the egg yolk, and the vanilla extract. Mix until fully combined — the mixture should look glossy and smell incredible at this point.
Step 6: Fold the flour mixture into the butter mixture until just incorporated with no dry streaks remaining. Don’t overmix. The dough will be soft but not sticky. I always get a little excited at this stage because it already smells like the finished cookies.
Step 7: Roll the dough into 1½-inch balls — roughly the size of a large walnut. Coat each ball generously in the reserved sugar mixture, turning it to cover all sides. Arrange them about 2 inches apart on your prepared baking sheets.
Step 8: Bake one sheet at a time for 8 to 10 minutes, until the edges are just set but the centers still look soft and slightly puffy. Pull them at 9 minutes if you’re unsure. They will firm up on the pan — residual heat does the rest.
Step 9: Let the cookies cool on the pan for exactly 2 minutes before moving them to a wire rack. Moving them too soon means they’ll fall apart; too late and they’ll stick. Two minutes is the window.
Did you brown the butter and nail the color on your first try? Share below!
Ways to Change It Up
Try this: Add a teaspoon of cinnamon and a pinch of cardamom to the flour mixture for a spiced version that works especially well in fall. The brown butter plays really nicely with warm spices.
Try this: Press a few flaky sea salt flakes onto the top of each dough ball right before baking. The salt hits first, then the sweet and nutty underneath — it’s a whole different cookie.
Try this: Fold in half a cup of white chocolate chips with the flour. The sweetness of white chocolate against the deep brown butter flavor is a combination I didn’t expect to love as much as I do.
Which would you go for? Drop it in the comments.
How to Serve It
Straight off the cooling rack, still slightly warm, with a cold glass of whole milk. That’s my first recommendation and I’ll die on that hill.
They’re also really good alongside a scoop of vanilla bean ice cream — the chewiness of the cookie against cold, creamy ice cream is something else entirely.
If you’re bringing these somewhere, stack them in a paper bag or a tin lined with parchment. They stay soft for two days at room temperature and actually taste better on day two once the flavors settle.
What would you pair it with?
Storing It Without Ruining It
Room temperature in an airtight container, up to 4 days. Put a slice of bread in there with them — sounds weird, works completely. The bread gives up its moisture and the cookies stay soft.
For the freezer, you’ve got two options. Baked cookies freeze fine in a zip bag for up to 2 months — thaw at room temp for about 30 minutes. Or freeze the raw dough balls on a sheet pan first, then transfer to a bag, and bake straight from frozen at 350°F adding 2 minutes.
Don’t refrigerate the baked cookies. The fridge dries them out fast and you’ll lose that chew you worked for.
Have you ever saved leftovers like this? Tell me below!
Mistakes I Made So You Don’t Have To
I once used a nonstick pan to brown the butter because it was the first one I grabbed, and I couldn’t see what was happening at the bottom. By the time I smelled it, it had gone from brown to black. Stainless steel only. Every time.
I also didn’t let the butter cool long enough once — maybe 5 minutes instead of 15 — and when I added the eggs the mixture got weirdly grainy and the cookies baked up flat. The full rest time isn’t optional.
Third mistake: baking both sheets at the same time on different racks. The bottom sheet over-browned on the edges while the centers were still raw. One sheet at a time, centered rack. It takes longer but it matters.
Did something like this happen to you?
Questions I Actually Get About These Cookies
Can I use light brown sugar instead of dark? You can, but the flavor will be noticeably milder. Dark brown sugar has more molasses, which contributes to that deeper, almost caramel-like taste that makes these worth making. Light brown sugar will still produce a good cookie, but it won’t have the same depth. If dark brown sugar is all you can get, go with it — but if you have a choice, pick dark every time.
Why do I need both a whole egg and an extra yolk? The whole egg gives structure and helps the cookie set. The extra yolk adds fat and richness without adding more water, which keeps the texture fudgy and chewy rather than cakey or crisp. It’s a small thing that makes a real difference. I’ve made these with two whole eggs before to test it — the cookies were fine but noticeably less chewy in the center.
My cookies came out flat. What happened? Most likely the butter was still too warm when you added the eggs, or your baking soda is old. Test your baking soda by dropping a pinch into hot water — if it doesn’t bubble immediately, it’s dead and needs replacing. Also make sure you’re rolling the dough into proper balls and not pressing them flat before baking. They should go in round and tall.
Can I make the dough ahead? Yes, and honestly the dough benefits from it. You can refrigerate it covered for up to 48 hours before baking. Cold dough spreads less, which means slightly thicker cookies. Just let it sit out for about 10 minutes before rolling if it’s been in the fridge — it firms up quite a bit and is hard to roll when very cold.
Do I have to roll them in sugar? Technically no, but the sugar coating gives the outside that slightly crisp, sparkly shell that contrasts with the soft center. Without it, the exterior is a little plain and the texture is more uniform all the way through — which some people prefer, but most don’t once they’ve had the rolled version. I tried skipping it once out of laziness and went back immediately.
How do I know when they’re actually done if the centers look underbaked? The edges should look set and just barely starting to firm up, while the center is still puffed and soft-looking. They should not look wet or shiny in the middle, but they also shouldn’t look fully cooked. 9 minutes is usually the sweet spot in my oven at 350°F. Every oven runs differently though, so check at 8 minutes the first time and adjust from there.
Which answer helped you most?
One Last Thing Before You Go Make These
Brown butter feels intimidating the first time. It’s not. It’s just butter, heat, and paying attention for about four minutes.
Once you smell that toasty, nutty shift happen in the pan, you’ll understand why this step exists. It’s not decorative. It changes everything.
These take maybe 35 minutes start to finish, including cooling time. That’s a Tuesday afternoon. That’s a rainy Saturday morning. That’s anytime.
Fun fact: Butter is made up of about 80% fat, 18% water, and 2% milk solids — and it’s those milk solids that brown and create the nutty, complex flavor when you cook them down.
Will you make this soon? Drop a comment when you do — I genuinely want to know how the brown butter went for you.
Happy cooking! —Marina Caldwell
Chewy Sugar Cookies Made With Toasted Brown Butter
Description
Nutty Brown Butter Chewy Sugar Cookies
Ingredients
Instructions
- 1. Melt 10 tablespoons butter in a stainless steel skillet over medium heat, then swirl continuously until deep golden brown with a nutty aroma, about 3-5 minutes total. Watch carefully to prevent burning.
- 2. Pour browned butter into a large heatproof bowl and stir in remaining 4 tablespoons butter until melted. Rest for 15 minutes.
- 3. Preheat oven to 350°F with rack centered. Line two baking sheets with parchment paper.
- 4. Combine granulated sugar with ¼ cup brown sugar in a shallow dish; reserve for rolling.
- 5. Whisk flour, baking soda, and baking powder in a separate bowl; set aside.
- 6. Stir remaining 1¾ cups brown sugar and salt into cooled butter until smooth, about 30 seconds.
- 7. Mix in egg, egg yolk, and vanilla until fully combined.
- 8. Fold flour mixture into butter mixture until just incorporated with no dry pockets remaining.
- 9. Roll dough into 1½-inch balls, coat generously in reserved sugar mixture, and arrange 2 inches apart on prepared sheets.
- 10. Bake one sheet at a time for 8-10 minutes until edges are just set but centers remain soft and slightly puffy.
- 11. Cool on pan for 2 minutes before transferring to a wire rack.
Notes
- Protein: 2g
- Fat: 7g
- Carbs: 25g ## NOTES: – Using a stainless steel pan rather than nonstick is essential for properly monitoring the butter’s browning color – Pull cookies out while they still look slightly underdone — residual heat finishes the job perfectly – Dough balls can be frozen unbaked for up to 3 months; bake straight from frozen adding 2 extra minutes


