

The Loaf That Started a October Tradition
The first time I made this, I pulled it out of the oven too early and the center was completely raw. Just a wet, orange cave where bread was supposed to be.
So I know this loaf. I know its tricks.
Now it shows up every October in my kitchen, usually on a Saturday when the air finally gets that cold, dry edge. My neighbor called it “the smell from your house” and I’m still not sure if that was a compliment, but I’m choosing to take it as one.
Why This One Works When Others Don’t
A lot of pumpkin loaf recipes end up dry, almost chalky, by day two. This one doesn’t.
The combination of canned pumpkin and applesauce — or oil if you want a slightly richer crumb — keeps things genuinely moist for three days without any extra tricks. It’s not magic, it’s just the right ratio of wet to dry.
And the two kinds of chocolate chips matter. The full-size semi-sweet ones get a little melty and pooled inside the loaf, while the minis scatter through every single bite in a way the big chips can’t do on their own.
What You Need Before You Start
Two 8×4 inch loaf pans. That’s non-negotiable — I once tried to bake this in one large pan and the outside cooked while the center sat there completely raw for another 20 minutes.
Parchment paper, not just grease. The batter is sticky and pumpkin-forward, and it will cling to a bare pan.
Room temperature eggs. I know, I know — it sounds fussy. But cold eggs straight from the fridge genuinely seize up the fat in this batter in a way you can feel when you stir it.
The Spice Situation
Four teaspoons of pumpkin pie spice sounds like a lot. It is a lot.
But this is a big batch — two full loaves — and the pumpkin needs that much spice to actually come through once it bakes. I went with three teaspoons my second time and could barely taste it past the chocolate. Don’t scale it down.
Quick tip: If you’re making your own pumpkin pie spice, use 2 teaspoons cinnamon, 1 teaspoon ginger, ½ teaspoon nutmeg, and ½ teaspoon cloves — that’ll get you close enough to the full 4 teaspoons this recipe needs.
Something Only Someone Who Made It Would Know
The batter looks wrong at first. Too thick, almost reluctant to fold together.
Don’t add more liquid. Don’t panic. Once the wet ingredients fully fold into the dry, it relaxes into something that looks more like a thick cake batter — just keep folding slowly and it gets there in about 30 seconds.
Have you ever bailed on a recipe right at that weird batter stage? Because I almost did the second time I made this, and I would have really regretted it.
Honestly, the Waiting Is the Hardest Part
You have to let this cool completely before you cut it. Completely.
I cut into my first loaf at about 15 minutes out of the oven and it fell apart — gummy, unset, just not ready. The slices looked sad. The flavor was there but the texture was a mess and I had to eat it with a spoon, which my husband found very funny.
Give it the full hour on the rack. It’s worth it. The crumb sets up properly and you get those clean, sturdy slices that actually hold together.
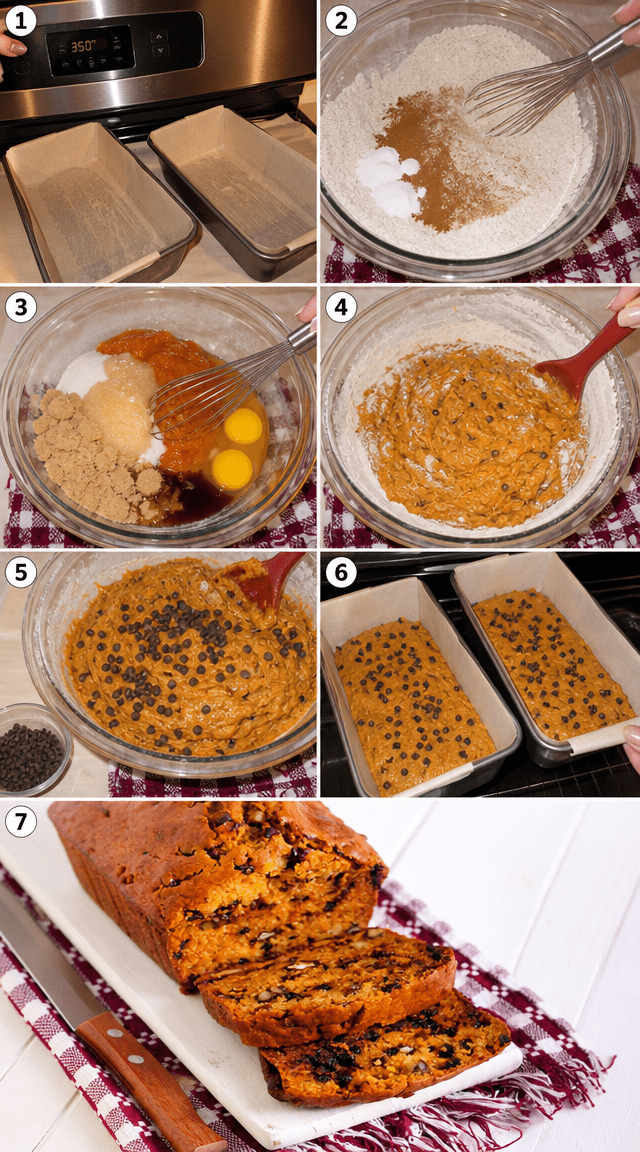
Step 1: Heat your oven to 350°F and prep your two 8×4 inch loaf pans — grease them first, then line with parchment. Leave a little overhang on the long sides so you can lift the loaves out cleanly. This is the step I always skip in my head and then regret when I’m trying to wrestle a hot loaf out of a naked pan.
Step 2: In a large bowl, whisk together the 3 cups of flour, 1 teaspoon salt, 1 teaspoon baking powder, 1 teaspoon baking soda, and 4 teaspoons pumpkin pie spice. Whisk it longer than you think you need to — at least 30 seconds. (The baking powder and soda need to be evenly distributed or you’ll get random dense spots in the finished loaf.)
Step 3: In a separate bowl, combine the 2 cups of canned pumpkin, ⅔ cup brown sugar, ⅔ cup granulated sugar, 1 cup applesauce or canola oil, 3 room-temperature eggs, and 1 tablespoon vanilla. Stir until it looks uniform and smooth — no streaks of egg, no clumps of pumpkin sitting separate. This took me about 90 seconds of stirring with a regular wooden spoon.
Step 4: Pour the wet mixture into the dry ingredients and fold — don’t stir, don’t beat — just fold until you can barely see any dry flour. Stop there. I know it’s tempting to keep going until it looks smooth, but overmixing is exactly what makes pumpkin bread come out dense and rubbery instead of tender.
Step 5: Fold in the 1½ cups of semi-sweet chocolate chips and the ½ cup of mini chips, but save a small handful of the minis for topping. The batter will feel thick here and the chips might resist at first — just keep folding gently until they’re evenly scattered through. I actually love this part, there’s something satisfying about how the chips disappear into the orange batter.
Step 6: Divide the batter evenly between your two prepared pans — I use a kitchen scale for this, each pan should get roughly the same weight so they bake at the same rate. Scatter the reserved mini chips across the tops of both loaves. They’ll sink slightly but stay visible and give you that speckled top that looks really nice once baked.
Step 7: Bake at 350°F for 50 to 55 minutes. Start checking at 48 minutes with a toothpick inserted straight into the center — you want it to come out clean or with just a dry crumb or two, not wet batter. My oven runs slightly hot and these were done at exactly 51 minutes, so start checking early rather than late.
Step 8: Let the loaves rest in their pans on a wire rack for 10 minutes, then lift them out using the parchment overhang and let them cool directly on the rack. Do not slice until fully cooled — I know this is painful — but the texture at the one-hour mark is genuinely different from the texture at 20 minutes out.
Did you bake both loaves at once or one at a time? Share below!
Ways to Change It Up
Try this: Swap the semi-sweet chips for white chocolate chips entirely. The sweetness is different — almost caramel-like — and it plays really well against the spice. My sister prefers it this way and honestly, I can see why.
Try this: Add ½ cup of toasted pecans along with the chocolate chips. Chop them roughly — not fine — so you get actual texture in the bite. It changes the loaf from something soft and yielding to something with a little structure.
Try this: Stir in 1 teaspoon of espresso powder with the dry ingredients. You won’t taste coffee, but it deepens the chocolate flavor noticeably. My husband has no idea I do this and he says it’s his favorite version.
Which would you go for? Drop it in the comments.
How to Serve It
A thick slice with a thin smear of salted butter at around 8am with coffee. That’s the move. The salt cuts through the sweetness just enough.
Warmed for 15 seconds in the microwave, then served alongside a bowl of vanilla ice cream for dessert. It sounds like too much, but it isn’t.
Wrapped in parchment and tied with twine as a gift for a neighbor or teacher — this loaf travels well once fully cooled and it looks genuinely thoughtful without being fussy.
What would you pair it with?
Storing It Without Ruining It
Room temperature is fine for day one and day two — just wrap it tightly in plastic wrap or store it in an airtight container. Don’t refrigerate it right away, the fridge dries it out faster than you’d expect.
After day two, move it to the fridge wrapped in plastic and it’ll hold well for another four days. Let a slice sit at room temperature for 10 minutes before eating, or give it 12 seconds in the microwave.
For freezing — wrap each loaf (or individual slices, honestly easier) tightly in plastic wrap first, then wrap again in foil. It freezes for up to 3 months and thaws on the counter in about an hour without losing much texture at all.
Have you ever saved leftovers like this? Tell me below!
Mistakes I Made So You Don’t Have To
I once skipped lining the pans with parchment because I was in a hurry and thought a good greasing would be enough. It wasn’t. The bottom third of both loaves stuck and tore coming out, and I spent 10 minutes piecing together bread like a sad puzzle.
I overmixed the batter on my third attempt — I kept going until it looked completely smooth, which felt right but wasn’t. The loaves came out noticeably denser and took longer to chew than they should have. Now I stop the moment I can’t see dry streaks and not a second later.
I also underbaked the first time by pulling them out at 45 minutes because the tops looked done and smelled incredible. The toothpick lied to me — I didn’t insert it deep enough into the actual center. The outer inch was cooked, the middle was not. Did something like this happen to you?
Questions I Actually Get About This Loaf
Can I use fresh pumpkin instead of canned? You can, but fresh pumpkin puree has a much higher water content than canned, which means your batter will be wetter and the bake time will be longer and less predictable. If you really want to use fresh, roast and drain it well through a fine mesh strainer or cheesecloth for at least 30 minutes before measuring. Even then, the texture won’t be as consistent as with canned — I’ve tried it twice and preferred the canned version both times for how reliably it turned out.
Can I use oil instead of applesauce? Yes, absolutely. Canola oil gives you a slightly richer, denser crumb with a bit more moisture that stays soft longer. Applesauce gives a slightly lighter texture with a faint sweetness underneath the spice. I’ve made it both ways and genuinely like both — the applesauce version feels a little more wholesome, the oil version feels more like a proper dessert bread. Use whichever you have or whichever fits what you’re going for that day.
What if I only have one loaf pan? Bake the first loaf, let it cool for 10 minutes and remove it, then re-line the pan and bake the second. Keep the remaining batter covered at room temperature while the first loaf bakes — don’t refrigerate it. The baking soda has already been activated by the time the wet and dry ingredients mixed, so it won’t wait forever, but it’ll be fine for the 55 minutes or so the first loaf is in the oven.
Can I make this into muffins instead? Yes, and it works well. Fill lined muffin cups about ¾ full, top with a few mini chips, and bake at 350°F for 20 to 24 minutes. Check at 20 minutes with a toothpick. You’ll get approximately 24 standard muffins from this full batch, which makes it genuinely useful for school mornings or packing into lunches. The texture is slightly different — a touch more domed and springy — but the flavor is exactly the same.
Does it matter what kind of canned pumpkin I use? Use 100% pure canned pumpkin, not pumpkin pie filling. Pie filling already has sugar and spices added, and if you use it here your loaf will be overly sweet and the spice ratios will be off in a way that’s hard to predict. The can should say “100% pure pumpkin” or just “pumpkin” with no other ingredients listed. I’ve grabbed the wrong can before while shopping on autopilot and had to run back and swap it.
How do I know it’s really done baking? A toothpick or thin skewer inserted into the very center — not near the edge, not near the top crack — should come out clean or with one or two dry crumbs. If there’s wet batter on it, give it 5 more minutes and test again in a slightly different spot. The top will also feel firm and springy when you press it gently with one finger, not soft or jiggly. I also look for the edges pulling away from the parchment slightly, which is usually a reliable sign it’s set all the way through.
Which answer helped you most?
Make It This Weekend, Honestly
This loaf is the kind of thing that makes your kitchen smell like the best version of October. Not a candle version. The real thing.
It comes together in one bowl of dry ingredients, one bowl of wet, a fold, and about an hour in the oven. That’s it.
You get two loaves — one for your house and one to give away or freeze for the week you need something without any effort.
I’ve made this probably eleven or twelve times now and I still look forward to slicing into the first one after it cools. That moment when the crumb holds together and you can see the melted chocolate pockets — it gets me every time.
Will you make this soon? Drop a comment and let me know how it goes. I genuinely want to hear if your toothpick lied to you too.
Fun fact: Canned pumpkin is often made from a variety of squash called Dickinson pumpkin, not the classic round orange carving pumpkin — it has a denser, drier flesh that purees more smoothly and consistently than a jack-o’-lantern variety ever would.
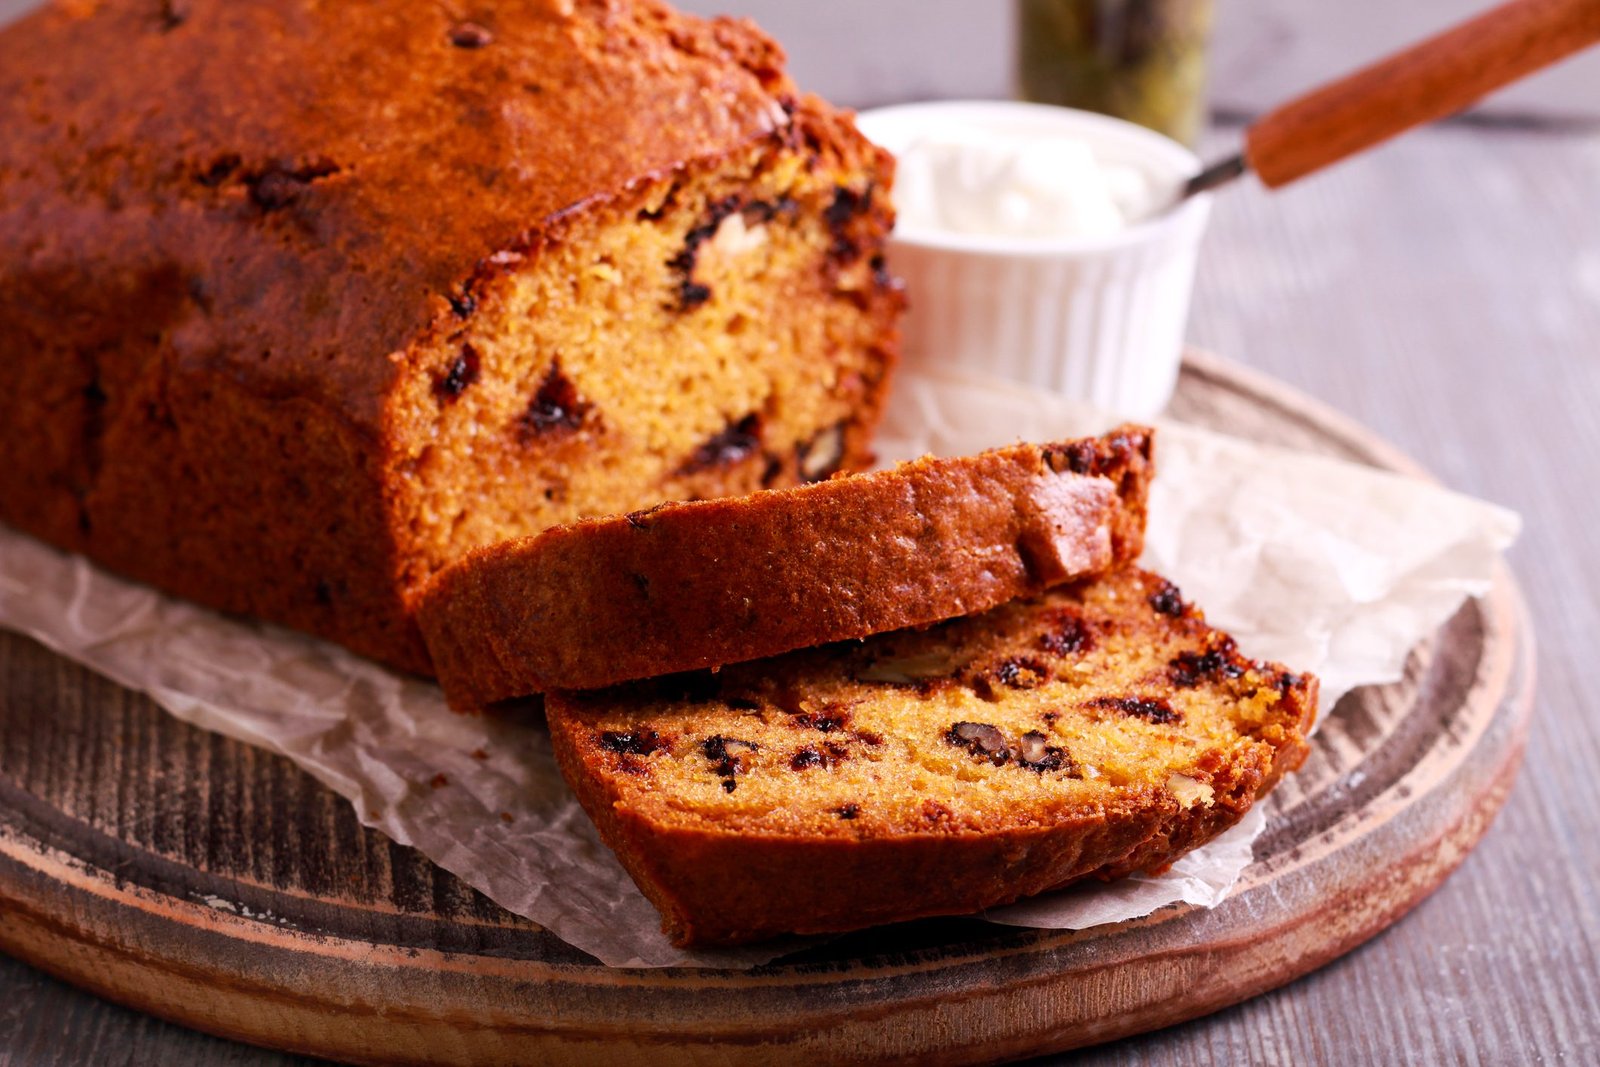
Chocolate Chip Pumpkin Loaf Warming Every Autumn Table
Description
Spiced Pumpkin Loaf With Chocolate Chips
Ingredients
Instructions
- 1. Heat oven to 350°F. Grease and line two 8×4 inch loaf pans with parchment paper.
- 2. Whisk together flour, salt, baking powder, baking soda, and pumpkin pie spice in a large bowl.
- 3. In a separate bowl, combine pumpkin, both sugars, applesauce or oil, eggs, and vanilla until smooth.
- 4. Gently fold wet mixture into dry ingredients, stirring only until just combined.
- 5. Fold in both chocolate chips, setting aside a few mini chips for topping.
- 6. Divide batter evenly between prepared pans and scatter reserved chips on top.
- 7. Bake 50-55 minutes until a toothpick inserted in the center comes out clean.
- 8. Rest in pans for 10 minutes, then transfer to a wire rack to cool completely.
Notes
- Protein: 4g
- Fat: 7g
- Carbs: 35g NOTES: – Do not overmix the batter once wet and dry ingredients combine, as this leads to a dense, tough loaf. – For cleanest slices, allow bread to cool completely before cutting. – Bread freezes beautifully for up to 3 months when wrapped tightly in plastic wrap and foil.


