

The Coffee Went In Before I Thought About It
I’ve made this cake four times now, and I still hesitate at the coffee step every single time.
It looks like too much liquid. It looks like you’ve ruined a perfectly good dry mix. You haven’t.
The first time I made it, I was curious — not in a relaxed, Sunday-afternoon way, but in a can-I-actually-pull-this-off way. I’d been avoiding layered cakes for years. Two pans, two rounds of cooling, actual frosting that has to go on straight. It felt like a production.
It took about 55 minutes total and the hardest part was waiting for the layers to cool completely before I frosted them.
Not assembling. Not mixing. Waiting.
The impatient choice — frosting before they’ve fully cooled — turns the icing into a sliding problem. I watched one layer creep sideways for about 30 seconds before I just pushed it back and pretended it didn’t happen.
What the Batter Tells You (If You’re Paying Attention)
The dry mix — flour, sugar, cocoa, baking soda, baking powder, salt — looks fine. Normal cake dry mix.
Then you pour in a full cup of strong black coffee, a cup of buttermilk, half a cup of oil, and two eggs, and it gets very loose, very fast.
Looser than you’d expect for a layer cake.
Most chocolate cake recipes use water. This one uses coffee, and I thought about swapping it — actually no, I didn’t swap it. I was curious what the coffee would do, and it does something. The chocolate flavor in the finished cake is noticeably deeper than any cocoa-only cake I’ve made. You don’t taste coffee. You taste chocolate that means it.
Beat it on medium for exactly 2 minutes. Not 90 seconds because you’re tired of holding the mixer. Two minutes.
Quick tip: Measure the buttermilk first and let it sit on the counter while you mix your dry ingredients — cold buttermilk straight from the fridge can slow the batter from coming together evenly.
The batter will be thin. That’s correct. Pour it evenly between two greased and floured 9-inch pans and don’t second-guess yourself.
Thirty-Five Minutes. Not Thirty.
350°F, and don’t open the oven before 28 minutes.
I pulled mine at 30 once. The center was technically set but the crumb was gummy for the first two slices, then it corrected itself as it sat. I’ve made worse, but I won’t do it again — 33 to 35 minutes is where this cake wants to be.
Toothpick clean, edges pulling slightly from the pan sides.
Cool in the pans for 15 minutes before you even think about turning them out. The structure needs that time. I once tried to rush this step and the bottom of one layer stuck — not catastrophically, but in a way that left a divot I had to hide with extra frosting on one side.
Then wire racks. Then full cool. Full means fully cool to the touch, not just not hot.
The whole baking window.
The Icing Is the Part Nobody Explains Right
Most recipes say “beat butter until creamy” and move on. They’re not wrong, but they’re not giving you enough.
You need the butter genuinely soft — not melted, not just out of the fridge. Room temperature soft means your finger leaves an indent without resistance. If you’re adding cocoa powder to cold butter, the frosting will stay grainy no matter how long you beat it.
Alternate the cocoa and powdered sugar with splashes of heavy cream.
Not all the cream at once. A tablespoon at a time, until you see the texture shift from stiff to spreadable. Three cups of powdered sugar sounds like a lot — it is a lot — but this is a two-layer cake with full coverage on the sides. It needs the volume.
The vanilla goes in last, and the frosting should be glossy and smooth before you stop.
If it looks dull and slightly separated, beat it another 90 seconds. Glossy is what you’re after.
I’ve had batches that came together in 4 minutes and one that took almost 10 — I still don’t know why that one was so stubborn.
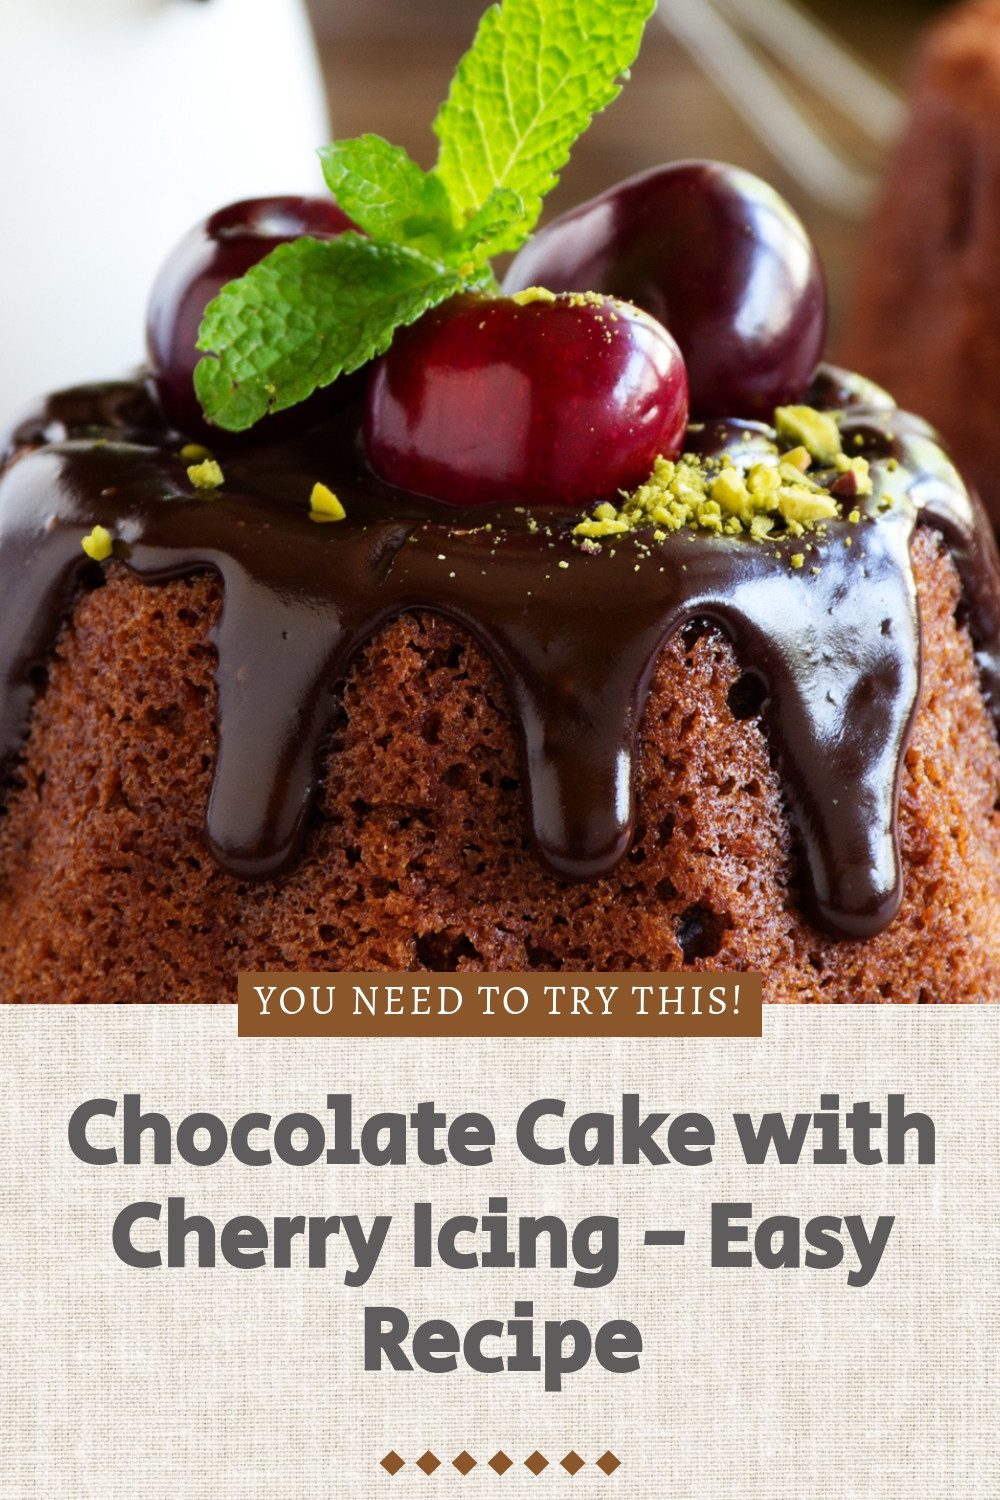
The Cherries Are Not Optional
I know some people see the cherry on top as decorative. Ignore that instinct.
Fresh cherries — when they’re in season — add something the cake needs. A sharp, slightly sour note against the dense cocoa frosting. Maraschino work fine, but they’re sweeter, and with an already-sweet frosting the contrast is milder.
My neighbor Elena brought me cherries from her tree last July and I made this cake the same afternoon. That version was noticeably better than every other time.
Use fresh if you can. That’s the whole opinion.
Arrange them around the top edge rather than scattered — it looks intentional without requiring any real decorating skill, and each slice gets a cherry naturally.
One per serving, centered on each slice. Or clustered at the edge. Honestly? It’s not that deep.
The frosting will hold them in place once it sets.
A Note on Doing This for the First Time
This is genuinely a beginner-friendly cake, but not because it’s forgiving. It’s beginner-friendly because every step is straightforward if you don’t rush it.
Rush it and you’ll have a lopsided, gummy, sliding mess. Take it at the pace the cake asks for — 20 minutes of mixing, 35 minutes of baking, 15 minutes in the pan, full cooling before frosting — and it comes out the way it’s supposed to.
The batter is thin. The frosting is sweeter than you think you want. The coffee is not optional.
I still haven’t fully decided if I prefer this with two distinct layers of frosting in the middle or a thinner layer there and more on the sides. Both work. Neither is definitively right. That’s probably the one thing about this cake I haven’t resolved.
How to Make This Cake, Step by Step
Step 1: Preheat your oven to 350°F. Grease two 9-inch round cake pans, then dust them with flour, tapping out any excess. Don’t skip the flour — grease alone isn’t enough for a cake this moist to release cleanly.
Step 2: In a large bowl, whisk together 1 3/4 cups all-purpose flour, 2 cups sugar, 3/4 cup unsweetened cocoa powder, 2 teaspoons baking soda, 1 teaspoon baking powder, and 1 teaspoon salt. Make sure the cocoa is evenly distributed before you add anything wet — clumps in the dry mix become clumps in the finished cake.
Step 3: Add 2 large eggs, 1 cup strong black coffee, 1 cup buttermilk, 1/2 cup vegetable oil, and 1 teaspoon vanilla extract to the dry bowl. Beat on medium speed for 2 full minutes. (Set a timer — it’s genuinely easy to stop at 90 seconds when it looks combined enough. It’s not combined enough.)
Step 4: Divide the batter evenly between the two prepared pans. If you want to be precise, use a kitchen scale — each pan should get roughly the same weight. The batter will look very thin in the pans. That’s how it goes.
Step 5: Bake for 30–35 minutes. Start checking at 30 with a toothpick inserted in the center. You want it to come out clean or with one or two dry crumbs — not wet batter, not completely slick. The edges should be just starting to pull from the sides of the pan.
Step 6: Cool the cakes in the pans on wire racks for 15 minutes exactly, then turn them out and let them cool completely on the racks. I set mine on the counter near a window — they were fully cool in about 45 minutes. Don’t frost them warm. I have done this. I am telling you not to.
Step 7: For the frosting: beat 1/2 cup softened butter until it’s creamy and slightly lighter in color, about 2 minutes. Gradually add 2/3 cup unsweetened cocoa powder and 3 cups powdered sugar, alternating with the 1/3 cup heavy cream a little at a time. Beat in 1 teaspoon vanilla extract. Continue beating until the frosting is smooth and glossy — not dull, not stiff. If it’s too thick, add cream one teaspoon at a time.
Step 8: Place one fully cooled cake layer on a serving plate. Spread an even layer of frosting across the top — I use about a third of the total frosting here. Set the second layer on top.
Step 9: Frost the top and sides of the assembled cake with the remaining frosting. Don’t overthink the sides — a small offset spatula or the back of a spoon works fine. It doesn’t have to be smooth. Did yours get a little rough on the sides too? Share below!
Step 10: Place one cherry on each serving, centered, or arrange 8–10 cherries around the top edge before slicing. Fresh cherries can be pressed in gently — they’ll hold. Maraschino cherries should be dried on a paper towel first or the syrup will run into the frosting.
Ways to Change It Up
Try this: Swap the plain chocolate frosting for a whipped cream layer between the two cake layers, and use the chocolate frosting only on the outside. The contrast between the lighter middle and dense exterior is worth trying at least once.
Try this: Add a thin layer of cherry jam or cherry preserves on top of the frosting between the layers before stacking. About 3 tablespoons is enough — more than that and the layers will slide.
Try this: Replace the vegetable oil with the same amount of melted coconut oil. The flavor difference is subtle but the crumb is slightly denser and holds its moisture longer — especially noticeable on day two.
Which would you go for? Drop it in the comments.
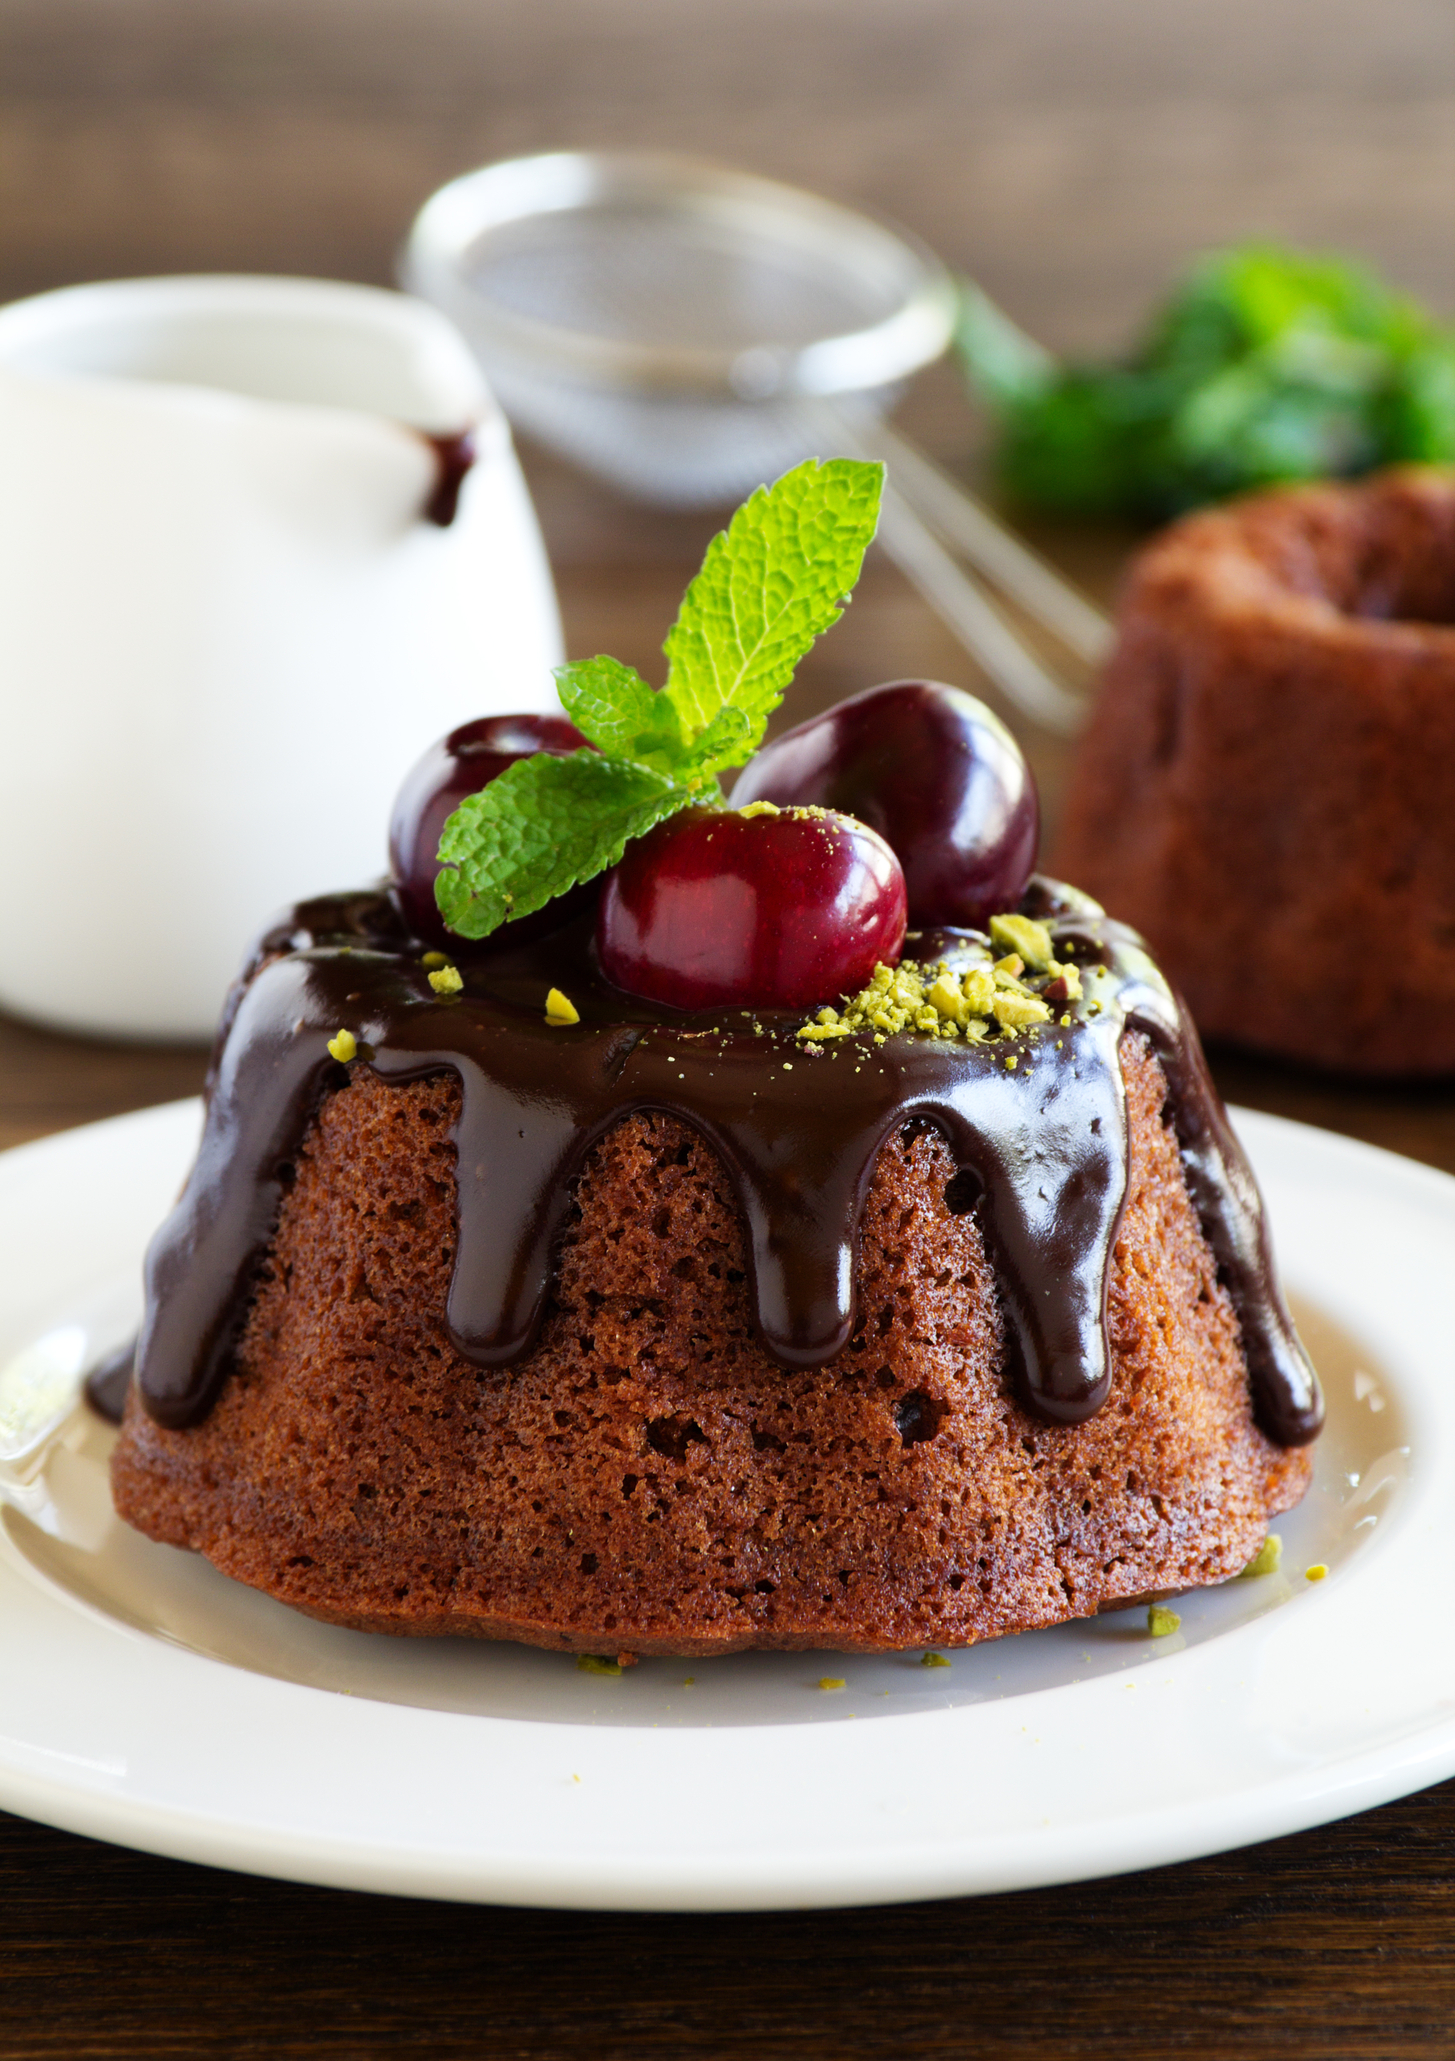
How to Serve It
This cake is good at room temperature, full stop. Cold from the fridge, the frosting firms up and the crumb tightens. If you’re serving it straight from the refrigerator, pull it out 20 minutes beforehand.
A small scoop of vanilla ice cream alongside — not on top — lets the cake stay the main thing. On top gets messy fast and melts into the frosting in a way that makes both components worse.
If you’re serving at a table, slice with a sharp knife wiped clean between each cut. The frosting drags.
What would you pair it with?
Storing It Without Ruining It
Cover the cake tightly — a cake dome or an upside-down large bowl works — and leave it at room temperature for up to 2 days. After that, it starts to dry out at the edges.
In the fridge, covered, it keeps for about 4 days. The frosting will look a little dull once chilled, but it comes back to life as the cake warms up.
Freezing works better than I expected. Wrap individual slices in plastic wrap, then again in foil, and they’ll keep for up to 6 weeks without losing much. Thaw on the counter for about an hour.
Don’t freeze the whole assembled cake — the cherry garnish doesn’t survive, and the frosting texture changes unevenly as it defrosts.
Have you ever saved leftovers like this? Tell me below!
Mistakes I Made So You Don’t Have To
I once used Dutch-process cocoa in place of regular unsweetened cocoa and the cake didn’t rise properly. Dutch-process is alkalized, which affects how it reacts with the baking soda. The layers came out flatter and denser than they should have been.
The second mistake: I used cold eggs straight from the fridge and the batter didn’t emulsify as smoothly. Small streaks of oil were still visible after the full 2-minute mix. The cake baked fine but the crumb was slightly uneven in texture — you’d notice if you were looking for it.
The third one: I underfilled one pan and overfilled the other. One layer was noticeably thinner than the other, and the frosting layer between them couldn’t compensate. The cake looked lopsided from the side and there was nothing to do about it once it was assembled.
Did something like this happen to you?
Questions I Actually Get Asked
Can I make this without coffee? You can substitute an equal amount of hot water, but the chocolate flavor will be noticeably less intense. I tried this once and the cake was fine — just flatter-tasting. The coffee doesn’t make it taste like coffee; it makes it taste more like itself.
Can I use a different pan size? It depends on what you have. Two 8-inch pans will give you taller layers but may need an extra 4–5 minutes of baking. A 9×13 inch pan works too — start checking at 28 minutes. And don’t use a pan smaller than 8 inches or the batter will overflow.
How far ahead can I bake the layers? Up to 2 days. Wrap the cooled layers individually in plastic wrap and leave them at room temperature. But don’t frost them until the day you’re serving — the frosting pulls moisture from the cake if it sits assembled too long.
My frosting is grainy. What happened? Cold butter. Almost always cold butter. It needs to be genuinely room temperature — soft enough to dent easily. If it’s already grainy, beat it longer and add cream one teaspoon at a time. It usually smooths out with enough beating. Not always.
Can I use sour cream instead of buttermilk? Thin it with a tablespoon or two of milk first — about 3/4 cup sour cream to 1/4 cup milk gets close to the right consistency and acidity. I’ve done this when I was out of buttermilk. The crumb was slightly tighter but not noticeably different to anyone eating it.
Does this cake work without the cherries? Yes. It’s a chocolate layer cake either way. But “Easy Chocolate Cherry Cake” without cherries is just chocolate cake, and the sharp fruit note genuinely changes the eating experience. Skip them if you have to. But don’t skip them on purpose.
Which answer helped you most?
Before You Start Mixing
Have your eggs and buttermilk out at room temperature before you begin. The 20-minute prep time assumes you’re not waiting on ingredients to warm up.
Brew the coffee strong. Stronger than you’d drink it. A cup from the bottom of a pot that’s been sitting for an hour works — but freshly brewed strong coffee is better.
This is an 8-to-10 serving cake. It’s substantial. If you’re making it for fewer than 6 people, plan for leftovers or plan to share.
Will you make this soon?
Fun fact: Cocoa powder contains small amounts of caffeine and theobromine — the same compound that makes chocolate mildly mood-lifting. A 3/4-cup measure like this recipe uses contains roughly as much theobromine as a small square of dark chocolate.
I still haven’t fully settled on whether the jam layer between the cakes makes it better or just different. I’ve made it both ways. I keep making both ways. That’s probably not going to resolve itself anytime soon.
Happy cooking! —Marina Caldwell
Easy Chocolate Cherry Cake Recipe for Beginners
Ingredients
- 1 3/4 cups all-purpose flour
- 2 cups sugar
- 3/4 cup unsweetened cocoa powder
- 2 teaspoons baking soda
- 1 teaspoon baking powder
- 1 teaspoon salt
- 2 large eggs
- 1 cup strong black coffee
- 1 cup buttermilk
- 1/2 cup vegetable oil
- 1 teaspoon vanilla extract
- 1/2 cup butter, softened
- 2/3 cup unsweetened cocoa powder
- 3 cups powdered sugar
- 1/3 cup heavy cream
- 1 teaspoon vanilla extract
- 8-10 fresh or maraschino cherries for topping
Instructions
- 1Preheat oven to 350°F. Grease and flour two 9-inch round cake pans.
- 2In a large bowl, whisk together flour, sugar, cocoa powder, baking soda, baking powder, and salt.
- 3Add eggs, coffee, buttermilk, oil, and vanilla extract. Beat on medium speed for 2 minutes until well combined.
- 4Divide batter evenly between prepared pans.
- 5Bake for 30-35 minutes until a toothpick inserted in the center comes out clean.
- 6Cool cakes in pans for 15 minutes, then turn out onto wire racks to cool completely.
- 7For the icing, beat softened butter until creamy.
- 8Gradually add cocoa powder and powdered sugar, alternating with heavy cream.
- 9Beat in vanilla extract until smooth and spreadable.
- 10Place one cake layer on a serving plate and spread with icing.
- 11Top with second cake layer and frost the top and sides.
- 12Top each serving with a cherry in the center or arrange cherries around the top edge.
Notes
See full recipe for nutritional information.


