

I Made These Four Times Before I Stopped Adjusting
Four batches in two weeks, and I still wasn’t sure I had it right. That uncertainty is the thing nobody tells you about lemon bars — they look done before they are, and they look underdone even when they’re fine.
My neighbor Diane makes these every Easter and they come out with this clean, bright tang that I’ve been quietly trying to match for three years. I’m not there yet. But the fourth batch was close enough that I wrote down exactly what I did.
Curious is how I’d describe what got me through those four attempts — not stubborn, actually curious. Each time something was slightly off, I found myself wanting to understand it rather than abandon the whole thing.
The Crust Tried to Fall Apart on Me.
First attempt, I pressed the dough in too loosely. It crumbled when I cut the bars — not catastrophically, but enough to be annoying when you’re trying to lift a clean square off the parchment.
The fix wasn’t complicated. Press harder than you think you need to. Use the flat bottom of a measuring cup and go over the whole surface twice. The dough should feel almost compacted, not just draped across the pan.
Not packed like you’re making a sandcastle. Firm. There’s a difference you’ll feel.
I also didn’t let the crust cool enough before I poured the filling on the second try — maybe six minutes instead of the ten or so it actually needed. The edges where the filling met the hot crust went slightly gummy. It still tasted fine, but it wasn’t the texture I was after.
Quick tip: Pull the crust out of the oven and leave it alone for at least 10 minutes. Set a timer. Don’t rush this part.
About the Lemon.
Bottled juice is not the same. I thought about just using bottled once — actually no, I didn’t seriously consider it, but I understand the impulse. Fresh juice gives you something sharper and slightly floral that bottled doesn’t have.
Three tablespoons sounds like very little. It isn’t. Combined with a full tablespoon of zest, the filling comes out genuinely tart — not candy-lemon, not vague citrus. Zest is doing more work than the juice here.
Zest first, then juice. Zest into the bowl before you cut the lemon, because trying to zest a squeezed lemon half is a waste of time and you won’t get much off it.
On my third batch, I added extra zest — about half a teaspoon more than called for. It pushed the flavor forward in a way I liked. I haven’t mentioned that in the recipe below because it’s genuinely optional, but it’s what I do now.
The Filling Set Wrong Once.
Batch two, I baked the filling for the full 20 minutes. The center wasn’t jiggly anymore — it was completely firm. When I cut into it after cooling, the texture was closer to a chewy candy than a lemon bar. Not bad. Just not right.
Pull it at 18 minutes and check for a slight jiggle in the dead center — the size of a silver dollar, roughly. The edges should be fully set. That center wobble will firm up as it cools, which takes a full 30 minutes minimum on a wire rack.
Skipping the wire rack matters more than I expected.
Cooling it directly on the counter traps steam under the pan. The bottom of the crust softens. Even 20 minutes on a rack makes a noticeable difference — the crust stays distinct from the filling instead of blurring into it.
Most recipes just say “cool completely.” They skip this part entirely. I don’t know why.

Cutting Them Without Making a Mess.
Warm bars fall apart. Cold bars cut cleanly. I know this now. I did not know it on the first batch, when I cut them after maybe 15 minutes because I wanted to see how they looked.
A sharp knife, wiped between each cut. That’s it. Not a serrated knife — that tears the top layer and drags powdered sugar into the filling. A chef’s knife, pulled cleanly straight down, wiped on a damp towel after each slice.
Sixteen squares from an 8×8 pan means four cuts each direction. Do the math before you start so you’re not trying to correct an uneven grid halfway through.
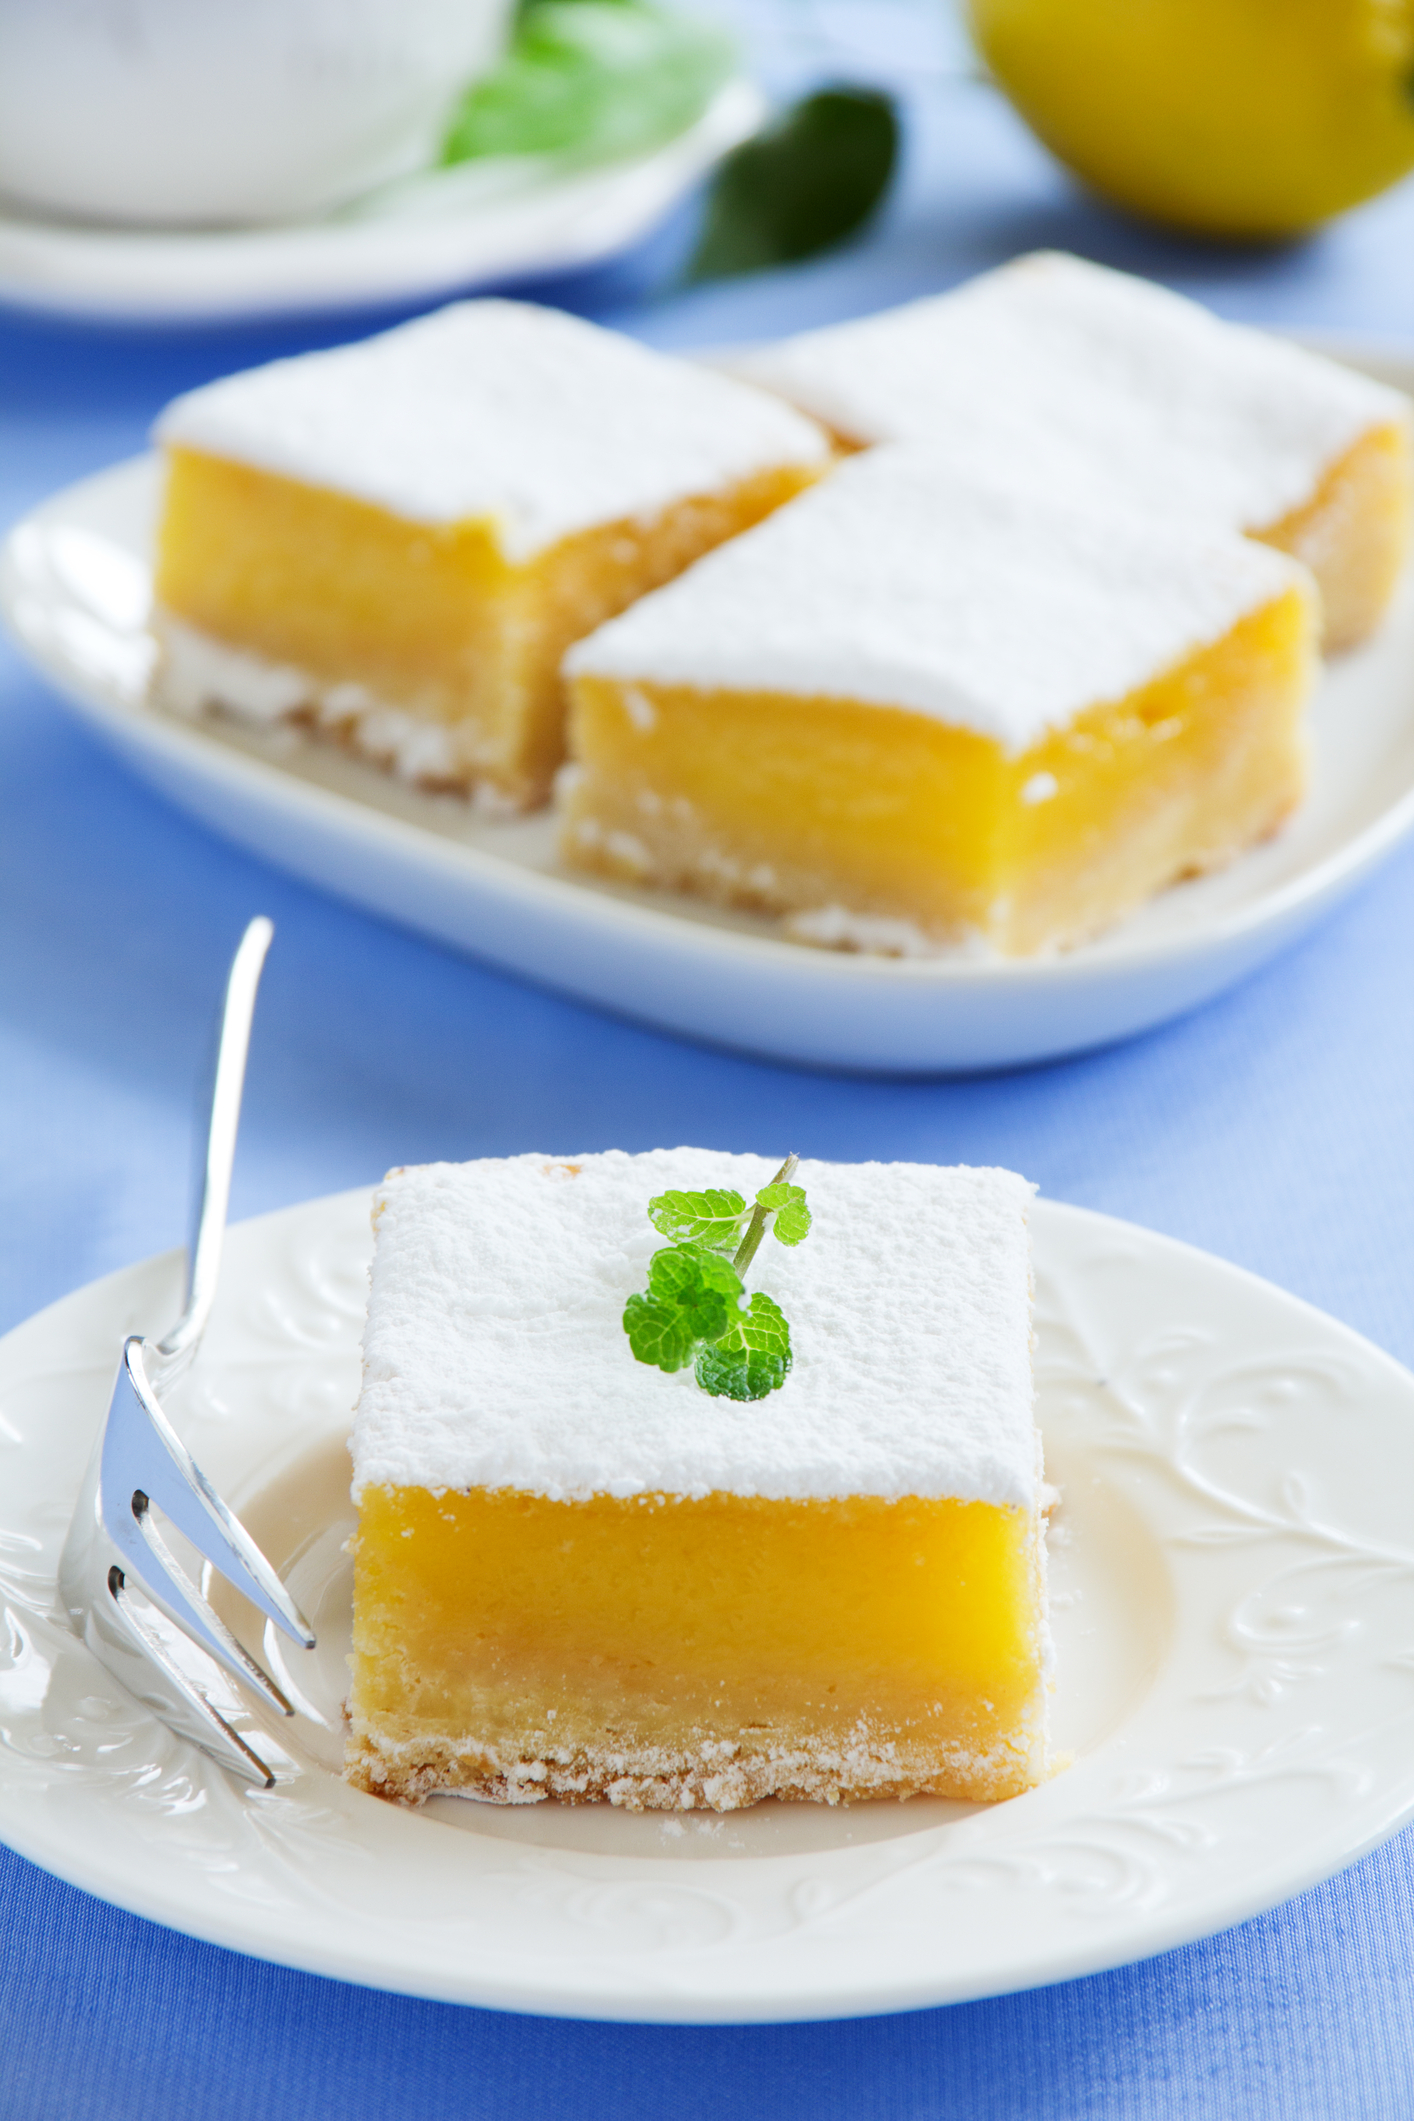
Dust the powdered sugar just before serving, not right after cutting. It absorbs into the top if the bars are still slightly warm, and then you end up dusting again anyway, which is fine but unnecessary.
What I’d Tell Someone Making This for the First Time.
It’s a forgiving recipe in some ways and unforgiving in others. The crust is hard to ruin if you use cold-ish butter and don’t overwork it. The filling timing, though — that’s where you have to pay attention.
Honestly? The powdered sugar at the end covers a lot. Even my slightly-overbaked second batch looked presentable once it was dusted. I’ve made worse things that looked better.
Did the filling set evenly for you, or did you get a wavier center than expected? I’m still not entirely sure if my oven runs hot.
The bars are best on the second day — this is the one observation only someone who’s made them repeatedly would catch. Something about overnight refrigeration tightens the texture and deepens the lemon flavor in a way the same-day version doesn’t quite have.
—Step 1: Preheat your oven to 350°F (175°C) and line an 8×8 inch baking pan with parchment paper, leaving some overhang on the sides. The overhang matters — it’s how you’ll lift the whole slab out later without it cracking down the middle.
Step 2: In a bowl, combine 1 cup all-purpose flour, 1/2 cup softened butter, 1/4 cup powdered sugar, and 1/4 teaspoon salt. Mix until the texture is crumbly and holds together when you squeeze a bit in your palm. (Don’t use melted butter here — softened only, or the crust bakes up greasy instead of shortbread-like.)
Step 3: Press the mixture firmly and evenly into the prepared pan. Use the flat bottom of a measuring cup to compact it — go over the surface at least twice. The layer will be thin, maybe half an inch, and that’s correct.
Step 4: Bake the crust for 12–15 minutes until it’s lightly golden around the edges. Mine took exactly 13 minutes to reach the color I wanted — pale gold, not tan. Pull it out and let it rest on a wire rack for at least 10 minutes before adding the filling. I know you want to move faster. Wait anyway.
Step 5: In a separate bowl, whisk 2 large eggs and 1 cup granulated sugar until the mixture is pale and slightly thick — about 90 seconds of real whisking. Then stir in 3 tablespoons flour, 1/2 teaspoon baking powder, 3 tablespoons fresh lemon juice, and 1 tablespoon lemon zest. (Zest goes in last, after the juice, so it doesn’t clump against the dry ingredients.)
Step 6: Pour the filling over the cooled crust. It’s thin and liquid — that’s normal. It will set in the oven. Did yours look thinner than you expected at this stage? Share below!
Step 7: Bake for 18–20 minutes. Check at 18. You’re looking for set edges and a center that jiggles slightly when you nudge the pan — think Jell-O that’s almost ready, not raw batter. Pull it when that jiggle is small and localized to the center two inches.
Step 8: Cool completely on a wire rack — at least 30 minutes, ideally closer to 45. Refrigerate for another 30 minutes if you want cleaner cuts. Dust with 2 tablespoons powdered sugar just before serving, then cut into 16 squares using a sharp, clean knife wiped between each cut.
Ways to Change It Up
Try this: Add 1/2 teaspoon of vanilla extract to the filling. It softens the tartness slightly and adds a background warmth that makes the lemon flavor feel more layered without dulling it.
Try this: Swap half the lemon juice for fresh lime juice and use lime zest instead of lemon. The flavor shifts — sharper, slightly more bitter, and it pairs well with a pinch of flaky salt on top instead of powdered sugar.
Try this: Press a thin layer of finely chopped toasted almonds into the crust before baking. About 2 tablespoons mixed into the dough gives the base a nuttier, slightly denser texture that holds up better under the filling.
Which would you go for? Drop it in the comments.
How to Serve It
Straight from the fridge with nothing else — this is the move when you’ve made them the night before. Cold bars hold their shape, the lemon flavor is sharper, and the powdered sugar hasn’t had time to absorb.
Alongside something creamy and plain — a small scoop of vanilla ice cream, a spoonful of plain Greek yogurt, or a bit of whipped cream with no sugar added. The contrast between the tart filling and the fat in the cream is genuinely good.
On a plate with fresh berries — not for looks, but because raspberries especially cut through the sweetness in a way that makes the lemon taste brighter. Don’t arrange them. Just scatter a handful next to the bars.
What would you pair it with?
—Storing It Without Ruining It
Airtight container, refrigerator, up to 3 days. That’s the official answer. In reality I’ve eaten them on day four and they were fine — a little softer, but fine.
Stack them with a layer of parchment between each row. The powdered sugar on the bottoms of one bar will stick to the filling of the bar below it if you don’t. You’ll end up pulling them apart and tearing the tops.
Freezing works, but dust the powdered sugar after thawing, not before. Frozen powdered sugar goes translucent and slightly wet when it defrosts. The bars themselves freeze well — up to 2 months wrapped tightly in plastic, then foil.
To thaw, leave them in the fridge overnight. Room temperature thawing makes the crust go soft faster than refrigerator thawing does. I don’t know exactly why that is, but it’s consistent.
Have you ever saved leftovers like this? Tell me below!
Mistakes I Made So You Don’t Have To
I once poured the filling over a crust that was still warm to the touch — not hot, just warm — and the bottom layer of filling cooked slightly on contact before the whole thing went into the oven. The texture at the very bottom of the filling was rubbery. Not enough to ruin it, but I noticed.
I skipped the baking powder on batch three — just forgot it. The filling baked up flat and slightly dense, without that barely-there lift that keeps it from feeling like a layer of sweet lemon cement. It’s a small amount, but it does something.
I tried to speed up cooling by putting the pan in the freezer for 10 minutes. The top layer of the filling cracked when I cut it — not dramatically, but a visible crack running diagonally across three bars. Temperature shock. Don’t do it.
Did something like this happen to you?
Questions I Actually Get About These
Can I use bottled lemon juice? You can. The bars will taste noticeably flatter — bottled juice has a cooked, slightly metallic edge that fresh doesn’t have. If that’s all you have, use it, but add an extra half teaspoon of zest to compensate. And yes, I tried it once just to see.
How do I know when the filling is actually done? About 18 minutes in, nudge the pan. The outer two inches should be completely still. The center — roughly a two-inch circle — can wobble. But if the whole surface moves as one liquid sheet, give it two more minutes. Don’t rely on color; the filling doesn’t brown.
Can I double the recipe for a 9×13 pan? It depends on your oven. I haven’t tested it, but the filling layer will be thicker, which means longer bake time — probably 22–25 minutes instead of 18–20. Check at 20. The crust time stays roughly the same since it’s still the same thickness; you’re just covering more area.
Why did my filling crack on top? Overbaked, or cooled too fast. Both cause it. A cracked top doesn’t affect the flavor at all. Dust extra powdered sugar over it. Nobody will know.
Do I have to use parchment? No. But lifting the whole slab out of an unlined pan without it falling apart is genuinely difficult. Greased foil works too. Whatever gets you the overhang handles on two sides so you can lift cleanly.
Can kids help make these? The crust-pressing step, yes — that’s actually good for small hands. The whisking for the filling, also yes. Zesting is an adult job. Hot pan, obviously an adult job. But it’s a reasonable baking project if someone is around to handle the oven parts. I let my daughter press the crust in once and she took it very seriously.
Which answer helped you most?
Where I’m Still Not Completely Satisfied
The fourth batch was the best I’ve made. I’m still not certain it’s Diane’s recipe. There’s something about hers — maybe more zest, maybe a longer chill time — that I haven’t cracked yet.
What I do know is that this version is genuinely good. Tart enough to be interesting, sweet enough that you want another square, with a crust that holds its structure without being chalky or greasy.
Will you make this soon?
If you do, let it sit overnight. I keep saying this because it keeps being true — day two, straight from the fridge, is the version I’d actually serve to someone I wanted to impress.
Day three, they’re a little soft. Still edible. But day two is the window.
I’ll probably make them again next week to test one more thing — whether browning the butter for the crust changes anything. I have a suspicion it does. I don’t have confirmation yet.
Fun fact: Lemon zest contains oils from the lemon’s outer peel that are significantly more concentrated than the juice — the zest of one lemon holds roughly five times the aromatic compounds of the same lemon’s juice, which is why a single tablespoon can carry most of the flavor in this recipe.
Happy cooking! —Marina Caldwell
Easy Lemon Bars Zesty Cookie Cake Treat
Ingredients
- 1 cup all-purpose flour
- 1/2 cup butter, softened
- 1/4 cup powdered sugar
- 1/4 teaspoon salt
- 2 large eggs
- 1 cup granulated sugar
- 3 tablespoons all-purpose flour
- 1/2 teaspoon baking powder
- 3 tablespoons fresh lemon juice
- 1 tablespoon lemon zest
- 2 tablespoons powdered sugar for topping
Instructions
- 1Preheat oven to 350°F (175°C). Line an 8×8 inch baking sheet with parchment paper.
- 2Mix 1 cup flour, softened butter, 1/4 cup powdered sugar, and salt until crumbly.
- 3Press mixture evenly into prepared baking sheet.
- 4Bake crust for 12-15 minutes until lightly golden. Remove and cool slightly.
- 5In a bowl, whisk together eggs and granulated sugar until well combined.
- 6Stir in 3 tablespoons flour, baking powder, lemon juice, and lemon zest.
- 7Pour filling mixture over cooled crust.
- 8Bake for 18-20 minutes until filling is set but slightly jiggly in center.
- 9Cool completely on wire rack for at least 30 minutes.
- 10Dust with powdered sugar and cut into 16 equal squares.
- 11Store in airtight container for up to 3 days.
Notes
See full recipe for nutritional information.


