

The first time I made these, the dough stuck to everything.
My husband watched me wrestle a rope of dough across the counter for about four minutes before he quietly left the room. The second time, I’d figured out to flour my hands, not the surface, and it changed the whole process.
Soft pretzels have this reputation for being fussy. They’re not, really — but there’s one step that trips almost everyone up the first time, and I want to get into that before anything else.
The baking soda bath. Don’t skip it.
I skipped it once. Full honesty: I thought it was optional, like a suggestion rather than a requirement.
The pretzels came out looking like dinner rolls. Pale, soft, no chew, no color. I ate them with mustard and tried to convince myself they were fine.
They weren’t fine.
What the baking soda bath actually does — and this is the thing only someone who’s made these a few times starts to understand — is change the surface pH of the dough before it hits the oven. That’s what creates the dark, slightly crisp exterior while the inside stays soft. Thirty seconds per side, boiling water, 8 tablespoons of baking soda. That’s it.
About the dough itself.
It’s a simple mix: 3 cups flour, a tablespoon of sugar, 1½ teaspoons of salt, and 2¼ teaspoons of instant yeast, then oil and warm water to bring it together.
Knead it for a solid 5–7 minutes — I thought about using my stand mixer — actually no, I always do this one by hand because you can feel when the dough shifts from rough to smooth. There’s a moment somewhere around minute six where it stops tearing and starts stretching, and that’s when you know.
Quick tip: If the dough feels sticky but workable, don’t add more flour. A slightly tacky dough bakes up chewier than a stiff one.
Shaping them. Honestly, it gets easier.
Each piece of dough gets rolled into a 20-inch rope, which sounds long until you’re doing it and realize 20 inches is barely enough.
Cross the ends, fold them back down onto the base — that’s the classic shape. My first few looked more like croissants than pretzels, and I served them at a get-together without saying anything. Nobody complained. Have you ever just committed to a weird-looking bake and hoped for the best?
By pretzel four or five, the shape clicks. It really does.
It looked wrong when I pulled them out. It wasn’t.
At 12 minutes they were deeply golden — darker than I expected, almost too dark, and I nearly pulled them early.
I’m glad I didn’t. That color is exactly what you want. The outside had this thin, slightly chewy shell and the inside was soft and a little doughy in the best way. I brushed on the melted butter right after pulling them out, added the coarse salt while they were still hot, and then did a second butter coat because the notes I’d written down said to and I’m glad I listened to past-me.
The second coat of butter — it catches the salt, makes everything glossy, and the pretzels hold that warmth for longer than you’d think.
What my family actually said.
My youngest ate three before dinner was on the table. My husband said they tasted “like the mall but better,” which I’m choosing to take as a compliment.
My sister thought they could use a little more salt on top, and honestly she’s not wrong — I’ve since started being more generous with the coarse sea salt than the recipe technically calls for.
They went fast. I’ve made worse.
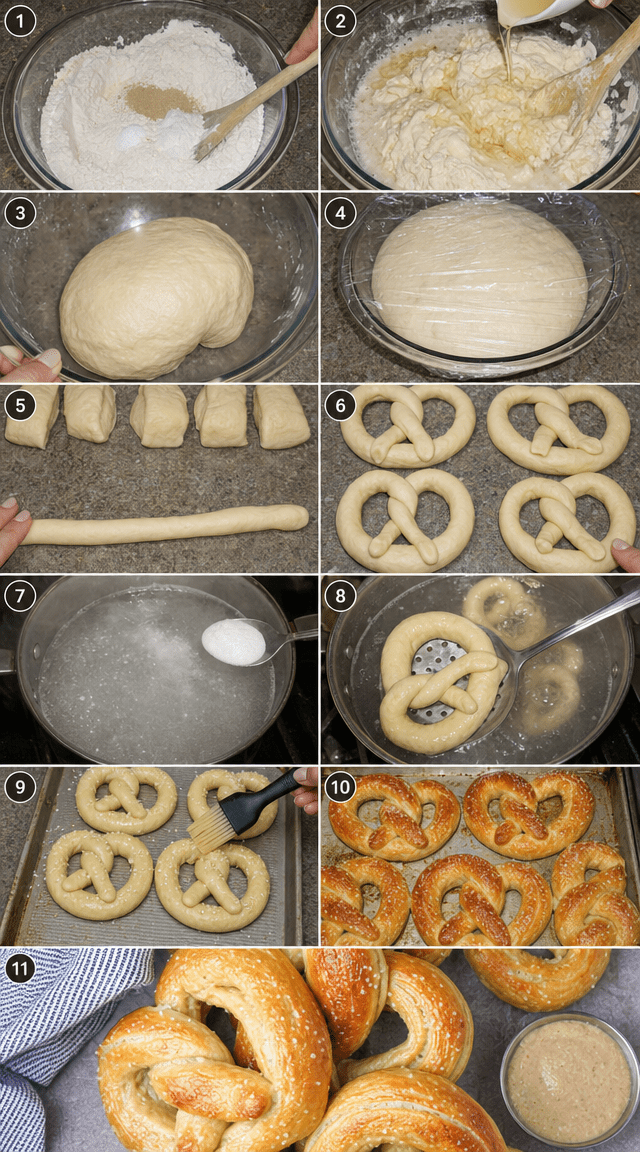
How to Make Homemade Soft Pretzels
Step 1: In a large mixing bowl, combine 3 cups all-purpose flour, 1 tablespoon granulated sugar, 1½ teaspoons salt, and 2¼ teaspoons instant yeast. Stir them together until evenly distributed — just a minute or so with a fork does it. You want everything mixed before the wet ingredients go in so the yeast doesn’t clump.
Step 2: Pour in 1 tablespoon vegetable oil and 1 cup warm water. Mix until the dough comes together into a rough, shaggy ball. It’ll look messy at this point — that’s fine, don’t panic. (The water should feel warm to the touch but not hot; too-hot water kills the yeast.)
Step 3: Turn the dough out onto a lightly floured surface and knead for 5–7 minutes. You’re looking for a texture that’s smooth, stretchy, and springs back when you poke it. I always go the full 7 minutes because the first time I stopped at 5, the pretzels were a little dense in the middle.
Step 4: Put the dough back in the bowl, cover with a clean kitchen towel, and let it rise for 1 hour until doubled in size. Set a timer and walk away. (Don’t put it near a draft — I left mine by an open window once and it barely rose at all.)
Step 5: Punch the dough down and divide it into 8 equal pieces. Roll each piece into a rope about 20 inches long. Take your time here — if the dough keeps springing back, let it rest for 5 minutes and try again.
Step 6: Shape each rope into a pretzel: hold both ends, cross them over each other, then fold the crossed ends back down onto the bottom of the loop. Press them gently to stick. The first two might look a little off — that’s normal.
Step 7: Bring 8 cups of water and 8 tablespoons of baking soda to a rolling boil in a large pot. This is the step that makes everything. Lower each pretzel in carefully — I use a slotted spatula — and boil 30 seconds per side, then transfer to a greased baking sheet. Did your baking soda bath fizz up more than expected? Share below!
Step 8: Brush each boiled pretzel with melted butter and sprinkle generously with coarse sea salt. Don’t be shy with the salt — the pretzels can handle more than you think, and being timid here is a mistake I made more than once.
Step 9: Bake at 425°F for 12–15 minutes. They’ll turn deeply golden and smell incredible by minute 12. Pull them when they look almost too dark — that’s the right moment. Transfer to a wire rack and do a second butter coat while they’re still hot.
Ways to Change It Up
Try this: Swap the coarse sea salt for everything bagel seasoning. Press it in right after the butter so it sticks. It sounds like a lot but it works.
Try this: After shaping, stuff a small cube of sharp cheddar into the center of each pretzel before the baking soda bath. Seal the dough tightly around it. The cheese melts in and you get a gooey center that’s pretty hard to beat.
Try this: Skip the salt entirely and brush with cinnamon sugar right out of the oven instead of the second butter coat. Serve with a cream cheese dip. My kids ask for this version specifically now.
Which would you go for? Drop it in the comments.
How to Serve It
These are best straight off the cooling rack — still warm, with a side of spicy brown mustard or a sharp beer cheese dip if you have the time to make one.
They also work well cut in half and used as a sandwich bun, especially with something like pulled pork or a fried egg and cheese for breakfast. The chew holds up to fillings without going soggy.
For a casual spread, set out three or four dipping options — honey mustard, nacho cheese, marinara — and let people grab and dip. They go fast at a table.
What would you pair it with?
Storing It Without Ruining It
Room temperature, in an airtight bag or container, they’re good for about 2 days. After that they start getting stiff and the exterior loses its thing.
For the fridge — honestly, I don’t usually bother. They don’t love the cold and the texture gets chewy in the wrong way after about 24 hours in there.
Freezer is the move if you made a full batch. Wrap each one individually in plastic wrap, then put them all in a zip bag. They keep well for up to a month. To reheat, go straight from frozen into a 350°F oven for about 10–12 minutes — they come back pretty close to fresh.
Day-old pretzels that aren’t frozen? Five minutes at 350°F brings them right back. I do this with leftovers almost every time.
Have you ever saved leftovers like this? Tell me below!
Mistakes I Made So You Don’t Have To
I once let the baking soda water cool down between batches because I got distracted. The last four pretzels went into lukewarm water and they did not get that deep brown crust in the oven — they came out a weird pale tan. Keep the water at a full boil the whole time.
I over-floured the counter on my second batch and the dough got stiff and hard to shape. The baked pretzels were denser than they should have been. Use just enough flour to keep things from sticking, and stop there.
I also didn’t grease my baking sheets the first time. Two pretzels tore when I tried to lift them. Line with parchment or grease well — either works, but do one of them. Did something like this happen to you?
Questions I Get About These Pretzels
Can I use active dry yeast instead of instant? Yes, but proof it first in the warm water with the sugar for about 5–10 minutes until it foams. Instant yeast skips that step; active dry doesn’t. I’ve done it both ways and the pretzels come out the same.
Why is there so much baking soda in the bath? It depends on how alkaline you want the surface — more soda means more color and more of that classic pretzel flavor. Eight tablespoons to 8 cups of water is the ratio that’s worked consistently for me. I tried 4 tablespoons once and the color was noticeably lighter.
Can I make the dough ahead of time? After the first rise, you can punch it down, cover it tightly, and refrigerate it overnight. Pull it out an hour before you want to shape and bake. But the day-of dough is easier to work with — cold dough fights back when you try to roll it.
Do I have to use coarse salt on top? No. Fine salt disappears into the butter and you lose that crunch. Coarse sea salt is what gives you that texture contrast with each bite. Use it if you can.
How long does the shaping actually take once I get the hang of it? About 20 minutes for all 8 once you know what you’re doing. The first time took me closer to 35 minutes because I kept re-rolling. And the early ones still tasted great even when they looked strange.
Can I double the recipe? I’ve done it. The dough itself doubles fine, and the baking soda bath handles it — just keep the water at a boil and work in batches. The only issue is oven space; I had to bake in three rounds instead of two, which added about 15 minutes to the total time.
Which answer helped you most?
Go make them this weekend.
These are the kind of bake where the first batch teaches you everything and the second batch feels easy.
The baking soda bath is non-negotiable, the second butter coat is worth it, and flouring your hands instead of the counter will save you a lot of frustration.
Fun fact: Baking soda has been used as a leavening agent since the mid-1800s, but when dissolved in boiling water, it partially converts to sodium carbonate — a stronger alkali that’s responsible for the signature pretzel crust and that distinct, slightly tangy flavor you can’t get any other way.
The whole process — mix, knead, rise, shape, bath, bake — takes a little over two hours, and most of that is the dough sitting under a towel while you do something else.
Will you make this soon? Drop a comment and let me know how they turn out, or if your shaping looked a little creative on the first round. Mine did too.
Happy cooking! —Marina Caldwell
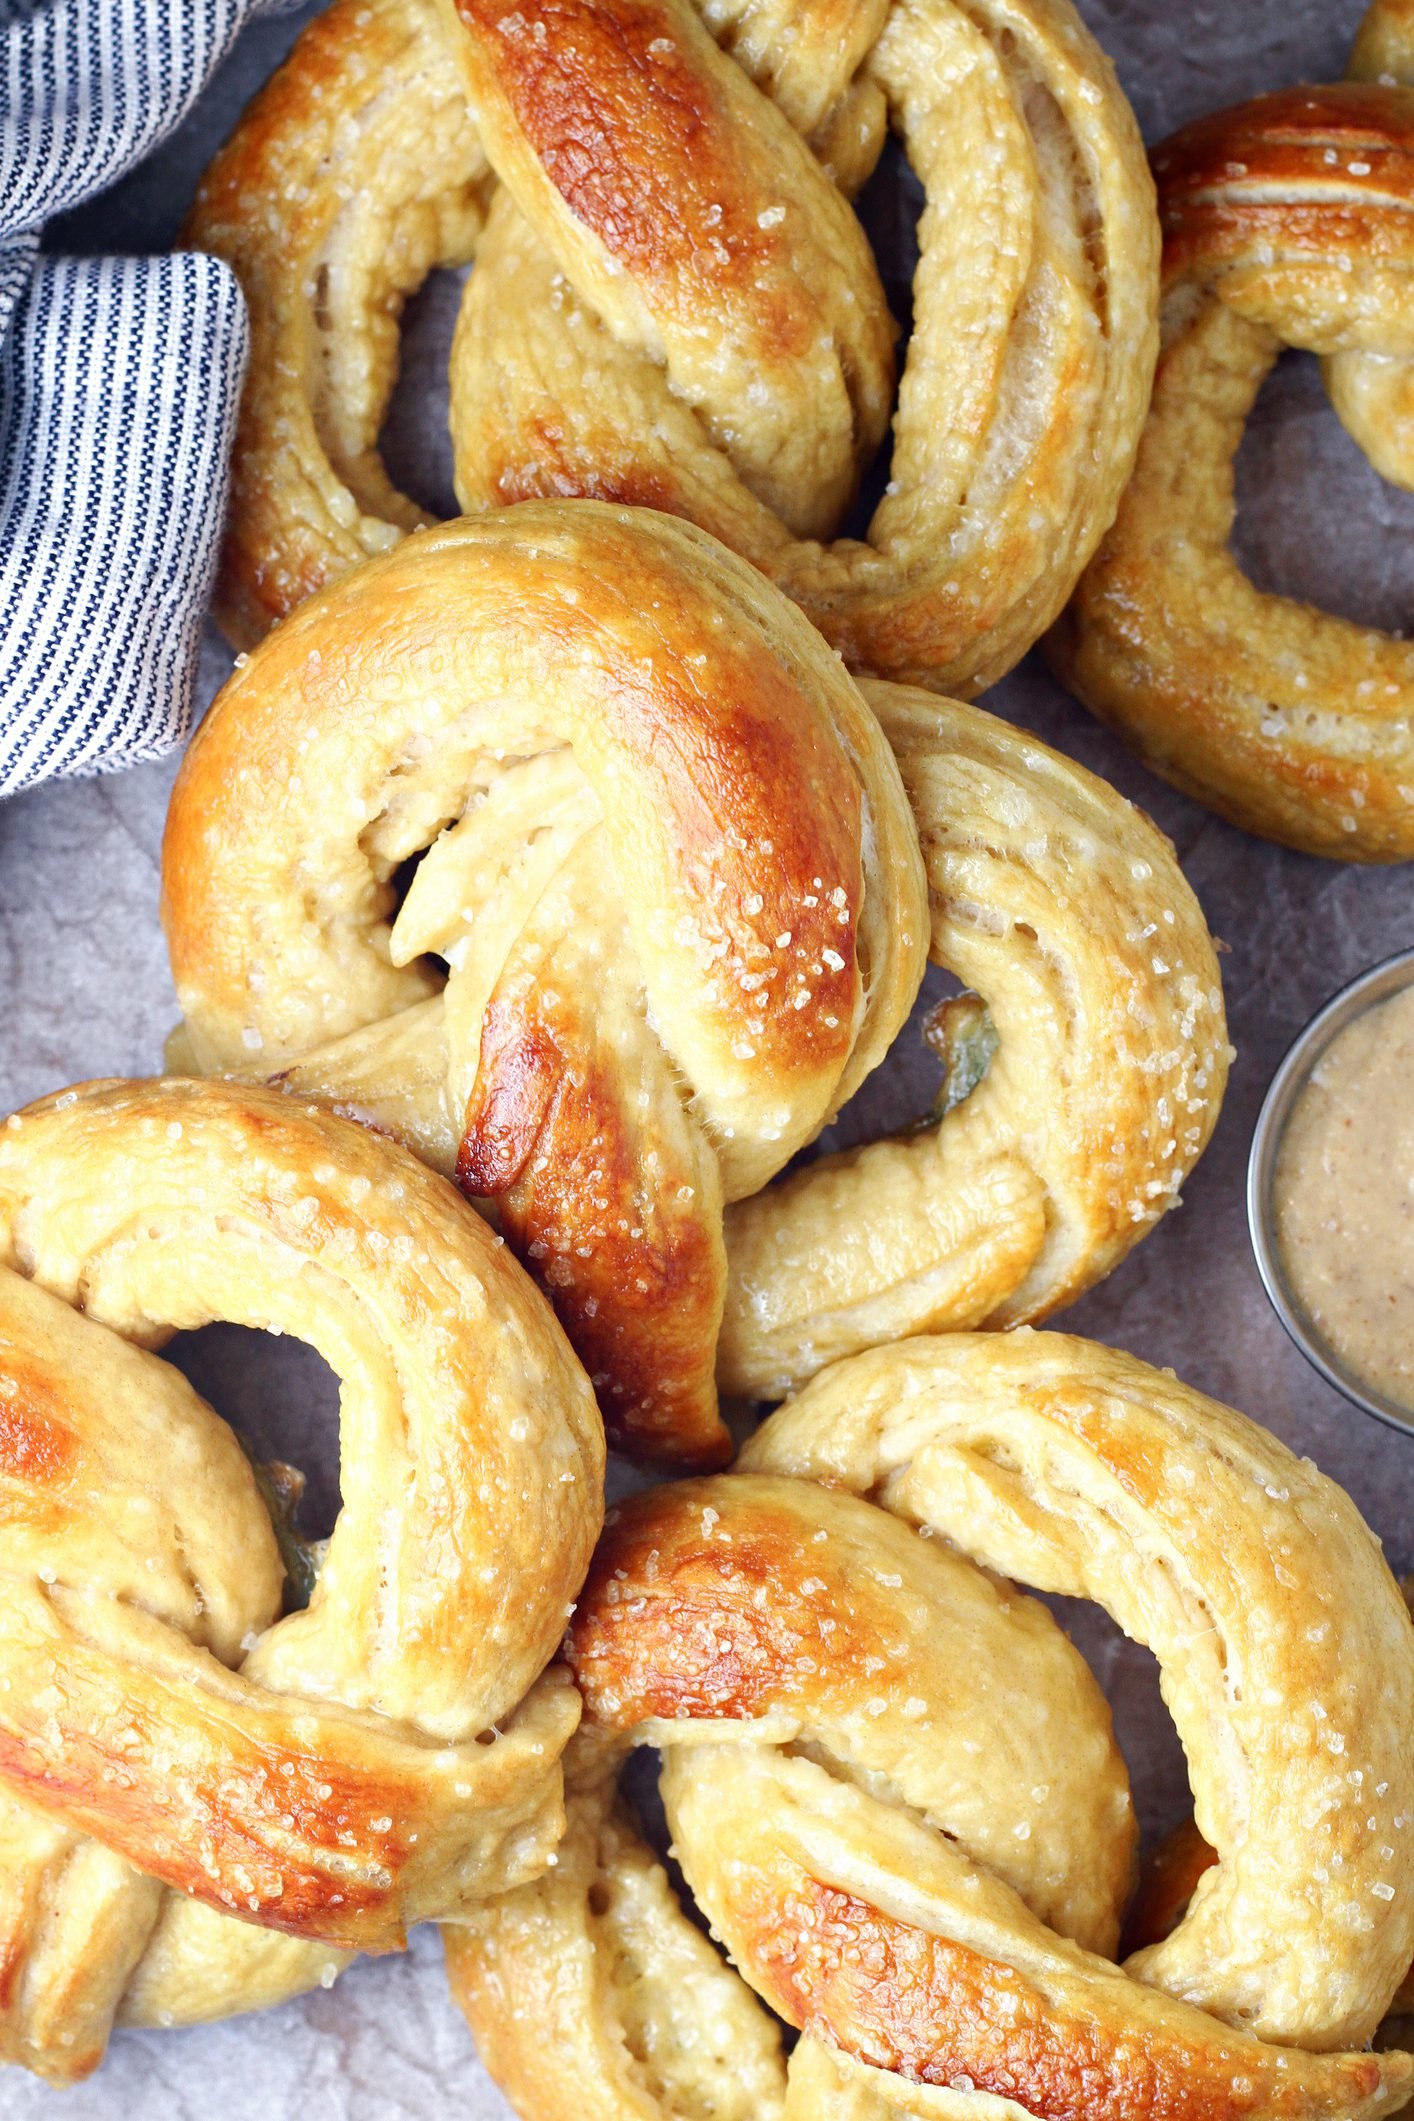
Homemade Soft Pretzels With That Perfect Chewy Bite
Ingredients
- 3 cups all-purpose flour
- 1 tablespoon granulated sugar
- 1½ teaspoons salt
- 2¼ teaspoons instant yeast
- 1 tablespoon vegetable oil
- 1 cup warm water
- 8 cups water
- 8 tablespoons baking soda
- 2 tablespoons coarse sea salt
- 2 tablespoons unsalted butter, melted
Instructions
- 1Combine flour, sugar, salt, and instant yeast together in a large mixing bowl until evenly distributed.
- 2Pour in vegetable oil and warm water, mixing until the mixture comes together into a soft, shaggy dough.
- 3Turn dough onto a lightly floured surface and knead firmly for 5-7 minutes until the texture becomes smooth and stretchy.
- 4Return dough to the bowl, cover with a clean kitchen towel, and allow it to rest and rise for 1 hour until doubled in size.
- 5Punch dough down and divide into 8 equal portions, rolling each piece into a long 20-inch rope.
- 6Shape each rope into a classic pretzel by crossing the ends and folding them back down onto the base.
- 7Heat 8 cups of water with baking soda in a large pot, bringing it to a rolling boil.
- 8Carefully lower each pretzel into the baking soda bath for 30 seconds per side, then transfer to greased baking sheets.
- 9Generously brush each pretzel with melted butter and finish with a sprinkle of coarse sea salt.
- 10Slide into a preheated 425°F oven and bake for 12-15 minutes until deeply golden brown.
- 11Transfer finished pretzels to a wire cooling rack before serving.
Notes
– For extra shine and color, brush a second coat of melted butter immediately after removing the pretzels from the oven. – Do not skip the baking soda bath — this step is what creates the signature chewy crust and deep brown color. – Leftover pretzels can be refreshed in a 350°F oven for 5 minutes to restore their soft, warm texture.


