

The muffin that made me question everything I thought I knew about baking.
My husband grabbed one straight off the cooling rack at 7am on a Tuesday and said nothing — just nodded slowly, which from him is basically a standing ovation.
The first time I made these, I pulled them at 18 minutes and the centers were gummy. Not underdone in a charming, fudgy way. Just gummy.
I went back to 20 minutes on the second batch and everything clicked.
About the cocoa — it matters more than you’d think.
Not all cocoa powder behaves the same in a batter this wet.
I used a mid-shelf unsweetened Dutch-process cocoa the first few times, then switched to a natural cocoa once — actually no, I went back to Dutch-process, the color was just better and the bitterness was smoother against the ganache.
Have you ever noticed how the cocoa scent changes when it hits the hot oven around the 10-minute mark? That’s when I know it’s going to be okay.
The folding part. Don’t skip reading this.
Overmixing is the thing that killed my third batch — I was stirring while on the phone and went about 40 strokes too many, and those muffins came out with a tight, almost rubbery crumb that no amount of ganache could save.
Fold until you stop seeing dry streaks. That’s it. Stop there.
Quick tip: Use a wide rubber spatula and fold from the bottom up, turning the bowl as you go — it takes maybe 12 strokes total and you’ll feel the difference in the baked texture.
The ganache situation.
60 seconds.
That’s how long you wait after pouring the hot cream over the chopped chocolate before you touch it — and I did not wait long enough the first time, started whisking immediately, and ended up with a grainy, streaky mess that I served anyway because the muffins were already on the plate.
The ganache broke. I served it anyway.
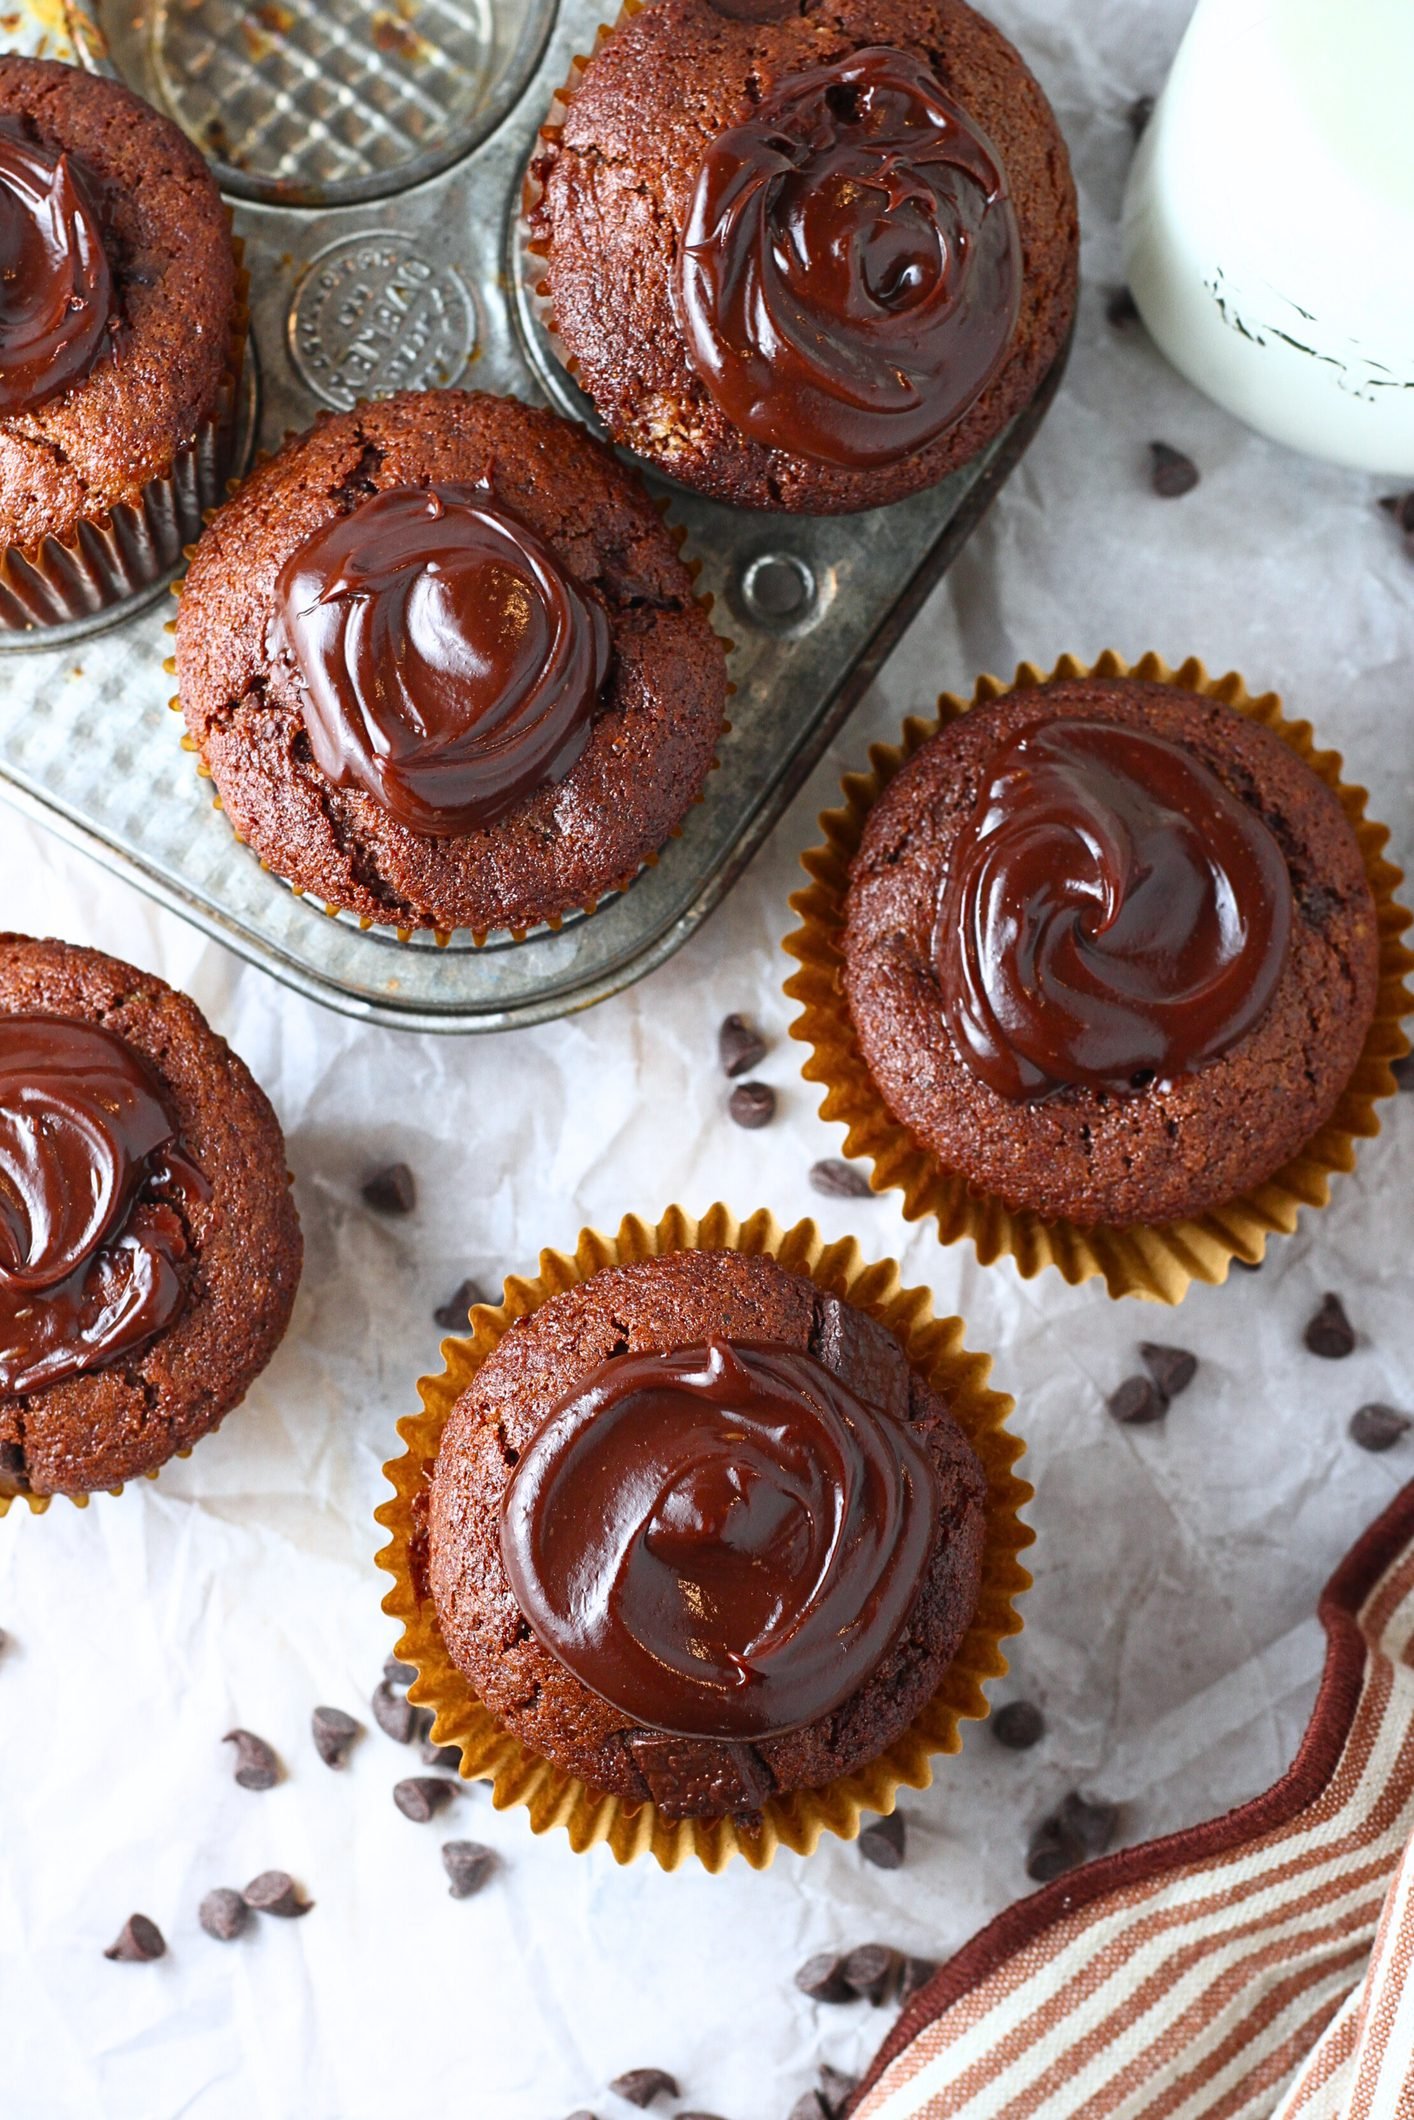
When it works — and it does work, consistently, once you respect that 60-second pause — it comes out glossy and pourable, and it sets on the muffin top into something that cracks slightly when you bite through it, which is honestly the best part of the whole thing.
It looked wrong. It wasn’t.
The batter is very dark, almost black, and thicker than you’d expect — not pourable, more like a soft drop cookie dough consistency.
I thought I’d measured wrong the first time because it just looked so dense going into the tin, but it bakes up with a domed top and an open crumb that holds the ganache without getting soggy, which is not something I expected.
What I’d tell you before you start.
Room temperature eggs and milk. Non-negotiable, actually — cold eggs went into one batch when I was in a hurry, and the oil didn’t incorporate properly, and those muffins had greasy patches on the bottom.
Also: let the muffins cool fully before the ganache goes on, because I poured it over warm muffins once, honestly I wasn’t paying attention,
and it slid straight off and pooled in a chocolate ring around the base of each one. Still tasted fine. Looked ridiculous.
My kids ate them so I called it a win.

Indulgent Cocoa Muffins Crowned With Silky Chocolate Ganache
Step 1: Heat your oven to 350°F and line all 12 cups of a standard muffin tin with paper liners. I always do this first before touching any ingredients, because nothing is worse than a finished batter sitting while you scramble for liners.
Step 2: Sift the flour, cocoa powder, baking powder, baking soda, and salt together into a large mixing bowl. Sifting matters here — cocoa powder clumps, and those clumps don’t always break up during folding, so you end up with bitter pockets in the finished muffin.
Step 3: In a separate bowl, whisk the eggs and sugar together vigorously until the mixture turns pale and slightly airy, about 2 minutes by hand. You’ll see it go from yellow and flat to a lighter, thicker ribbon — that’s what you want before adding anything else.
Step 4: Add the milk, oil, and vanilla to the egg mixture and whisk until fully combined. (Make sure everything is at room temperature here — cold milk straight from the fridge made my oil separate out once and the batter looked curdled going into the oven.)
Step 5: Gradually fold the wet ingredients into the dry, stirring only until no dry streaks remain. I count my strokes — somewhere around 12 to 15 folds is usually enough, and I stop the second the flour disappears even if it looks like it needs more.
Step 6: Fold in the chocolate chips gently, maybe 4 or 5 strokes. They sink a little during baking no matter what, but that’s fine — you still get pockets of melted chocolate throughout the crumb.
Step 7: Spoon the batter into the lined cups, filling each about two-thirds full. The batter is thick, so a spoon works better than pouring — use a second spoon to scrape it off cleanly. Do you use an ice cream scoop for muffin batter? Share below!
Step 8: Bake for 18 to 20 minutes, until a toothpick inserted into the center of a muffin comes out nearly clean — a couple of moist crumbs is fine, but wet batter means go another 2 minutes. My oven runs slightly hot, so I check at 18 minutes every time and usually pull them at 19.
Step 9: Let the muffins rest in the tin for 5 minutes, then move them to a cooling rack. Don’t skip the rest — they’re still setting up inside during those 5 minutes, and pulling them too soon can cause the tops to stick or the centers to dimple.
Step 10: While the muffins cool completely, make the ganache. Warm the heavy cream in a small saucepan over medium heat just until you see tiny bubbles forming at the edges — not a full boil, just barely steaming. Pour it straight over the chopped chocolate in a heatproof bowl.
Step 11: Wait 60 seconds. Set a timer if you need to. Then whisk from the center outward in small, slow circles, gradually widening until the whole thing comes together into a glossy, smooth ganache. It takes about 90 seconds of whisking and then it suddenly looks right — you’ll know.
Step 12: If you want a thicker ganache that sits on top of the muffin rather than running down the sides, let it cool at room temperature for another 5 minutes before spooning it on. Drizzle or spoon generously over each completely cooled muffin, then leave them alone for about 10 minutes to let the ganache set before serving.
Ways to Change It Up
Try this: Swap the semi-sweet chocolate chips for dark chocolate chips (70% or above) in the batter for a more bitter contrast against the ganache — my sister prefers this version and honestly I’m starting to come around to it.
Try this: Stir a tablespoon of espresso powder into the dry ingredients before mixing — it doesn’t make the muffins taste like coffee, it just makes the chocolate flavor land harder and darker.
Try this: Add a pinch of flaky sea salt on top of the ganache right before it sets — the salt hits first, then the chocolate, and it changes the whole experience of eating one.
Which would you go for? Drop it in the comments.
How to Serve It
These work at room temperature on their own, but if you warm one in the microwave for about 12 seconds, the ganache softens back to almost liquid and the chocolate chips inside go gooey again — it’s a different experience entirely.
I’ve served them alongside a scoop of vanilla bean ice cream for dessert, with the warm muffin method above, and the contrast of cold ice cream against the chocolate is genuinely good.
For breakfast or a snack, just a strong cup of black coffee next to one of these is the move — the bitterness of the coffee cuts through the ganache in a way that makes both things taste better.
What would you pair it with?
Storing It Without Ruining It
Ganache-topped muffins are a little fussier to store than plain ones, but not by much.
At room temperature in an airtight container, they stay good for about 2 days — after that the ganache gets a dull film on it and the muffin itself starts to dry at the edges.
In the fridge they’ll last 4 to 5 days, but the ganache firms up considerably and the muffin goes a bit dense from the cold, so pull them out at least 20 minutes before you eat one, or do the 12-second microwave trick.
For freezing: freeze the muffins without the ganache if you can, wrapped individually in plastic wrap and then in a zip bag — they reheat in about 20 minutes at 300°F and come out almost like fresh. Make a fresh batch of ganache to top them after reheating. I learned this the hard way after freezing a full ganache-topped batch and watching the topping crack and separate on thawing.
Have you ever saved leftovers like this? Tell me below!
Mistakes I Made So You Don’t Have To
I once used half-and-half instead of heavy cream for the ganache because I was out of heavy cream and didn’t want to make a store run — the ganache never fully set and stayed runny even after 30 minutes, which meant it dripped off every muffin immediately. Half-and-half doesn’t have enough fat.
I underfilled the muffin cups the first time, going about half full instead of two-thirds, and ended up with flat-topped muffins that were more like thick chocolate discs — they need that extra batter to dome properly in the oven.
Skipping the sifting step once meant I had a visible dry cocoa clump in one muffin that didn’t bake out — just a dusty, bitter pocket in the middle of an otherwise good muffin. Not catastrophic but annoying enough that I never skip it now. Did something like this happen to you?
Questions I Actually Get About These Muffins
Can I use milk chocolate instead of semi-sweet for the ganache? You can, but milk chocolate ganache is noticeably sweeter and softer — it takes longer to set, sometimes up to 20 minutes, and the contrast with the cocoa muffin is less pronounced. I tried it once and it was fine, just cloying for my taste.
Can I make these without the chocolate chips in the batter? Sure. The muffin stands on its own without them — the chips add texture and extra chocolate pockets but they’re not structural. And honestly the ganache on top carries the chocolate flavor hard enough that you won’t miss them much.
My ganache seized up and went grainy — what happened? Water got into it somewhere, or you started whisking before the chocolate had time to melt fully. It depends on how far gone it is — if it’s just a little grainy, add a teaspoon of warm cream and whisk hard. But if it’s completely broken and clumpy, start over. About 60 seconds of patience at the beginning prevents this almost every time.
How do I know when the muffins are done without a toothpick? Press the center of a muffin lightly with your fingertip — it should spring back. If it leaves a dent, go another 2 minutes. I still use a toothpick though, because the spring test is less reliable with a chocolate batter this dark.
Can I double the recipe? Yes, and it scales cleanly — I’ve made 24 at once with no issues. Just make the ganache in two separate batches rather than doubling it in one bowl, because a large volume of chopped chocolate doesn’t melt as evenly from a single pour of cream.
Can I use oil other than vegetable? It depends on the oil. Neutral oils like canola or sunflower work fine. I tried avocado oil once and noticed a very faint grassy aftertaste — not bad, just different. But avoid anything with a strong flavor, like olive oil. It’ll compete with the cocoa and lose.
Which answer helped you most?
Go make them this week.
These are the muffins I come back to when I want something that feels like an actual effort without being an actual effort — start to finish, including ganache cooling time, you’re at about 45 minutes.
The cocoa batter is forgiving once you know the two rules: don’t overmix, and use room temperature dairy. That’s genuinely most of it.
Fun fact: Cocoa powder contains theobromine, a compound chemically similar to caffeine that gives dark chocolate its characteristic lift — a single one of these muffins has more theobromine than a cup of green tea.
The ganache looks fancy but it’s three ingredients and one technique — and the technique is mostly just waiting.
Will you make this soon? Drop a comment and tell me which variation you’re going for — the espresso version, the flaky salt finish, or just straight as written.
Happy cooking! —Marina Caldwell
Indulgent Cocoa Muffins Crowned With Silky Chocolate Ganache
Ingredients
- 2 cups all-purpose flour
- 3/4 cup unsweetened cocoa powder
- 2 teaspoons baking powder
- 1/2 teaspoon baking soda
- 1/2 teaspoon salt
- 3/4 cup granulated sugar
- 2 large eggs
- 1 cup whole milk
- 1/2 cup vegetable oil
- 2 teaspoons vanilla extract
- 1 cup semi-sweet chocolate chips
- 1 cup heavy cream
- 8 ounces semi-sweet chocolate, chopped
Instructions
- 1Heat oven to 350°F and place paper liners into all 12 cups of your muffin tin.
- 2Sift flour, cocoa powder, baking powder, baking soda, and salt together into a large mixing bowl.
- 3Whisk eggs and sugar vigorously in a separate bowl until the mixture turns pale and airy.
- 4Blend milk, oil, and vanilla into the egg mixture until fully incorporated.
- 5Gradually fold wet ingredients into the dry mixture, stirring only until no dry streaks remain.
- 6Gently fold chocolate chips throughout the batter without overmixing.
- 7Spoon batter into prepared cups, filling each about two-thirds of the way up.
- 8Bake 18-20 minutes until a toothpick inserted into the center pulls out nearly clean.
- 9Rest muffins in the tin for 5 minutes before moving them to a cooling rack.
- 10Warm heavy cream in a small saucepan over medium heat until tiny bubbles appear at the edges.
- 11Pour steaming cream directly over the chopped chocolate in a heatproof bowl and wait 60 seconds.
- 12Whisk steadily from the center outward until the ganache becomes completely smooth and shiny.
- 13Drizzle or spoon ganache generously over each cooled muffin and allow it to set for 10 minutes before serving.
Notes
– Room temperature eggs and milk blend more smoothly into the batter, producing a more even, tender crumb. – Avoid overmixing once wet and dry ingredients combine, as this develops gluten and results in dense, tough muffins. – For a thicker ganache topping, allow it to cool at room temperature for 5 additional minutes before spooning over muffins.


