

The batch that made me stop buying bakery cookies.
My husband ate four of these before they even cooled, standing at the counter in his work clothes. I had planned to save half for his office.
The first time I made them, I pulled them out at 12 minutes and they were too set — almost cakey, nothing like the fudgy brownie texture I was going for. Took me two more batches to figure out the 10-minute pull is non-negotiable.
That discovery changed everything about how I bake cookies now.
What’s actually going on with the texture.
The cocoa powder is doing a lot of work here — more than you’d expect from half a cup. It gives the dough this heavy, almost brownie-batter density before it even goes in the oven.
Here’s something I noticed that no recipe ever told me: the centers will look genuinely underdone when you pull them. Glossy, slightly sunken, a little wobbly. Wrong-looking. You have to trust it.
Quick tip: Pull the cookies at exactly 10 minutes if you want that fudgy, brownie-like center — they keep setting on the hot pan for a full 5 minutes after you take them out of the oven.
The chocolate chip situation.
Semi-sweet and white chocolate together was not my first instinct — actually, I almost went all semi-sweet and skipped the white chips entirely.
The white chocolate chips do something unexpected. They don’t make it sweeter, exactly. They break up the intensity of all that cocoa in a way that keeps you reaching for another one.
Have you ever tried mixing two types of chips in a cookie before? I’d love to know what combo you’ve landed on.
About refrigerating the dough.
I skipped this step the first time — the whole 30-minute chill — and the cookies spread too much and came out flat and lacey at the edges, not thick and fudgy.
Cold dough holds its shape. It also — and this surprised me — makes the chocolate flavor noticeably deeper, almost like it had time to think about what it wanted to be.
It looked wrong. It wasn’t.
The raw dough is very dark and very soft, almost more like thick cake batter than cookie dough. I panicked the first time and added extra flour.
That was a mistake I won’t make again. The dough is supposed to look like that.
Sticky. Dense. Nearly black from all the cocoa. Don’t touch it.
The cold milk is not optional.
I know it sounds like a throwaway suggestion, but the recipe calls for a cup of whole milk — chilled — and I thought about adding paprika to the presentation, actually no, I’m talking about serving these warm with that cold milk alongside and it genuinely matters.
The contrast between a slightly warm cookie and ice-cold milk is the whole point. My youngest figured this out before I did, honestly.
Warm cookie. Cold milk. That’s it.
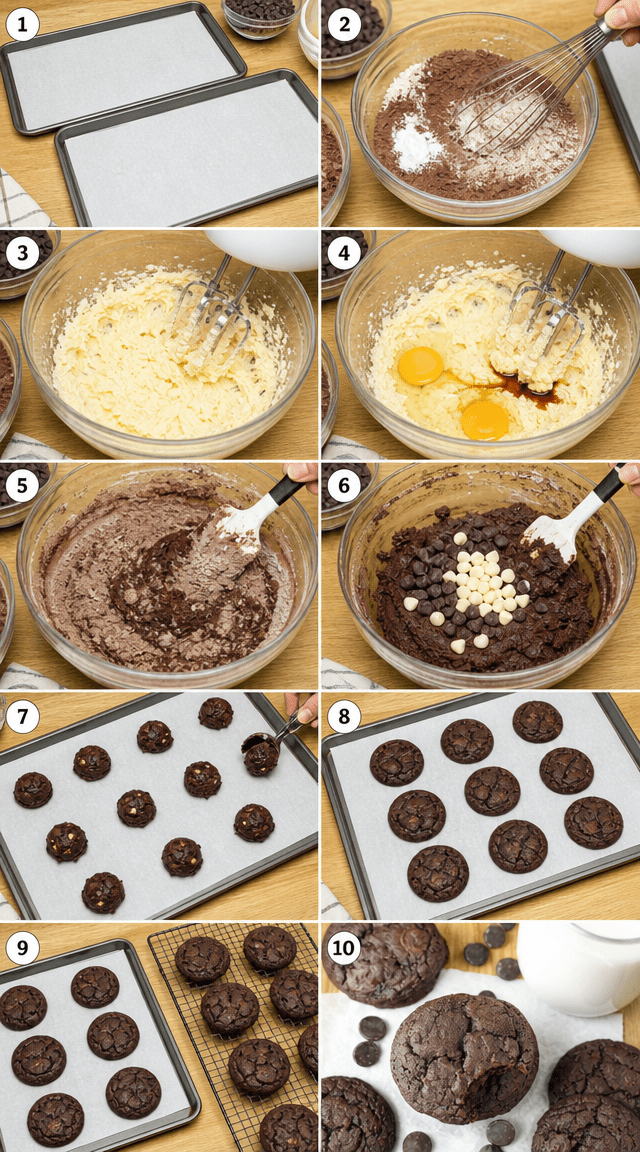
Step 1: Heat your oven to 350°F and line two baking sheets with parchment paper. I keep a roll of parchment in my drawer specifically for cookies — it makes cleanup so much easier and the bottoms never scorch. (Don’t skip the parchment and use greased foil; the bottoms brown too fast and you lose that soft base.)
Step 2: Sift together 1 cup flour, 1/2 cup cocoa powder, 1/2 tsp baking soda, and 1/4 tsp salt into a medium bowl, then set it aside. Sifting matters here — cocoa clumps badly and you’ll end up with bitter pockets if you just dump and stir. I learned that the hard way on batch one.
Step 3: Beat 3/4 cup softened butter with 1 1/2 cups sugar on medium speed for about 3 minutes until it goes pale and fluffy. The mixture will look almost too light for a chocolate cookie, almost cream-colored — that’s right. (Butter must be genuinely soft, not melted; melted butter makes flat cookies.)
Step 4: Add 2 eggs one at a time, mixing fully after each, then blend in 2 tsp vanilla. It’ll look slightly curdled for a second after each egg — don’t panic, it comes together. Keep going.
Step 5: Drop the mixer to low speed and slowly add the dry ingredients until a soft dough forms. The dough will be very dark, almost black, and stickier than you expect from a cookie dough. Resist adding more flour — this is correct. (Overmixing at this stage makes the cookies tough, so stop the moment the flour disappears.)
Step 6: Fold in 1 cup semi-sweet chocolate chips and 1/2 cup white chocolate chips with a spatula. Do this by hand, not with the mixer — it takes about 30 seconds and keeps the chips intact instead of broken up. Do you fold chips in by hand or let the mixer do it? Share below!
Step 7: If you have time, cover the bowl and refrigerate the dough for 30 minutes. I know it’s an extra wait, but the cookies spread less and the chocolate flavor deepens noticeably. Scoop rounded tablespoons onto your prepared sheets, leaving 2 inches between each one.
Step 8: Bake for 10 to 12 minutes until the edges look firm but the centers still appear slightly underdone. Pull them closer to 10 minutes for that fudgy brownie texture — they keep cooking on the hot pan. Let them rest on the pan for 5 full minutes before moving them to a wire rack.
Step 9: Pour a glass of ice-cold whole milk and serve the cookies while they’re still just barely warm. The center of a 10-minute cookie is almost molten at this stage — somewhere between a cookie and a brownie — and that’s exactly what you want.
Ways to Change It Up
Try this: Swap the white chocolate chips for peanut butter chips. It sounds like it shouldn’t work with all the cocoa, but it does — the salty, nutty contrast cuts through the dark chocolate in a really satisfying way.
Try this: Add 1/2 tsp of espresso powder to the dry ingredients. You won’t taste coffee, but the chocolate flavor goes noticeably deeper and more intense.
Try this: Press three or four flaky sea salt crystals onto the top of each dough ball before baking. The salt hits right as the chocolate melts on your tongue and it changes the whole experience.
Which would you go for? Drop it in the comments.
How to Serve It
Warm, straight off the cooling rack, with a tall glass of whole milk that’s been in the fridge all day. The temperature contrast is the point — don’t skip the cold milk.
Stack two on a small plate with a scoop of vanilla ice cream between them. The cookie softens fast against the ice cream and the whole thing turns into a sort of impromptu ice cream sandwich.
Crumble two cookies over a bowl of plain Greek yogurt with a drizzle of honey. My sister thought this needed more lemon — she wasn’t wrong, a little zest on top works.
What would you pair it with?
Storing It Without Ruining It
Room temperature, airtight container, with a single slice of sandwich bread tucked in. The bread keeps the cookies soft for up to 5 days — I don’t know why this works but it does and I will not question it.
For the fridge: honestly, I don’t refrigerate these. They get a little dense and cold and lose that soft center. Room temp is better.
Freezer works well though. Stack them between layers of parchment in a zip-top bag and freeze for up to 2 months. Pull one out and microwave it for 15 seconds — it comes back almost exactly right.
You can also freeze the raw dough balls on a baking sheet, transfer to a bag once solid, and bake straight from frozen at 350°F for about 13 to 14 minutes. I do this when I want two cookies on a Tuesday night without making a whole batch.
Have you ever saved leftovers like this? Tell me below!
Mistakes I Made So You Don’t Have To
I once added an extra 1/4 cup of flour because the dough looked too wet and I was convinced something had gone wrong. The cookies baked up cakey and dry, nothing like what they should have been. The wet, sticky dough is the whole reason they turn out fudgy.
I pulled a batch at 12 minutes because the centers still looked underdone and I got nervous. They were fine in the oven — and completely over-baked by the time they cooled. Set a timer, walk away, pull at 10.
I moved a batch straight from the pan to the cooling rack at two minutes because I was impatient, and four of them broke apart completely. They hadn’t set yet. The 5-minute rest on the pan is structural, not decorative. Did something like this happen to you?
A few things people actually ask me.
Can I use Dutch-process cocoa instead of natural unsweetened?
It depends on your oven and your brand, but Dutch-process cocoa is less acidic and reacts differently with baking soda. I tried this once and the cookies didn’t rise quite the same — they came out slightly denser and a little flatter. Natural unsweetened is what the recipe was built around. Stick with it if you can.
How long do these actually keep?
About 5 days at room temperature in an airtight container with a bread slice. And honestly, they’re better on day 2 than day 1 — the texture settles overnight into something even fudgier. But they rarely last past day 3 in my house.
My cookies spread into flat discs. What happened?
Butter was probably too warm, or you skipped the dough chill. I’ve made both of those errors. The 30-minute refrigerator rest is what keeps the dough tall when it hits the hot oven — without it, the butter melts before the structure sets and you get lace cookies instead of thick fudgy ones.
Can I make the dough ahead of time?
Yes. The dough keeps in the fridge for up to 48 hours, covered tightly. It actually gets better — the 30-minute chill the recipe calls for is just the minimum. I’ve baked dough that sat overnight and the cookies had noticeably more depth. Beyond 48 hours, the leavening starts to lose power.
Do I have to use whole milk for serving?
No rule says you have to use anything. But whole milk is cold, fatty, and thick in a way that 2% just isn’t. I tried oat milk once as a substitute — fine, but not the same experience. The fat in whole milk coats your mouth right after the chocolate. That’s the pairing.
Can I double the recipe?
Yes, and I do it regularly. Double everything straight across — no adjustments needed. The only thing to watch: baking time stays the same at 10 to 12 minutes, but if your oven runs hot with two doubled-up sheets inside, check at 9 minutes. Ovens get crowded and temperatures shift.
Which answer helped you most?
Okay, go make these.
These aren’t complicated. The ingredient list is short, the steps are straightforward, and the hardest part is genuinely just pulling them out of the oven before your instincts tell you to.
Ten minutes. Wobbly centers. Trust it.
Will you make this soon? Drop a comment and let me know how they turn out — especially if you tried the espresso powder version or the sea salt finish.
I’ve made worse cookies. A lot worse. These are the ones I keep coming back to on a regular Tuesday when I need something that tastes like it took more effort than it did.
Fun fact: Cocoa beans were used as currency by the Aztecs — a turkey cost about 100 beans. So technically, these cookies were once worth a small flock.
Happy cooking! —Marina Caldwell
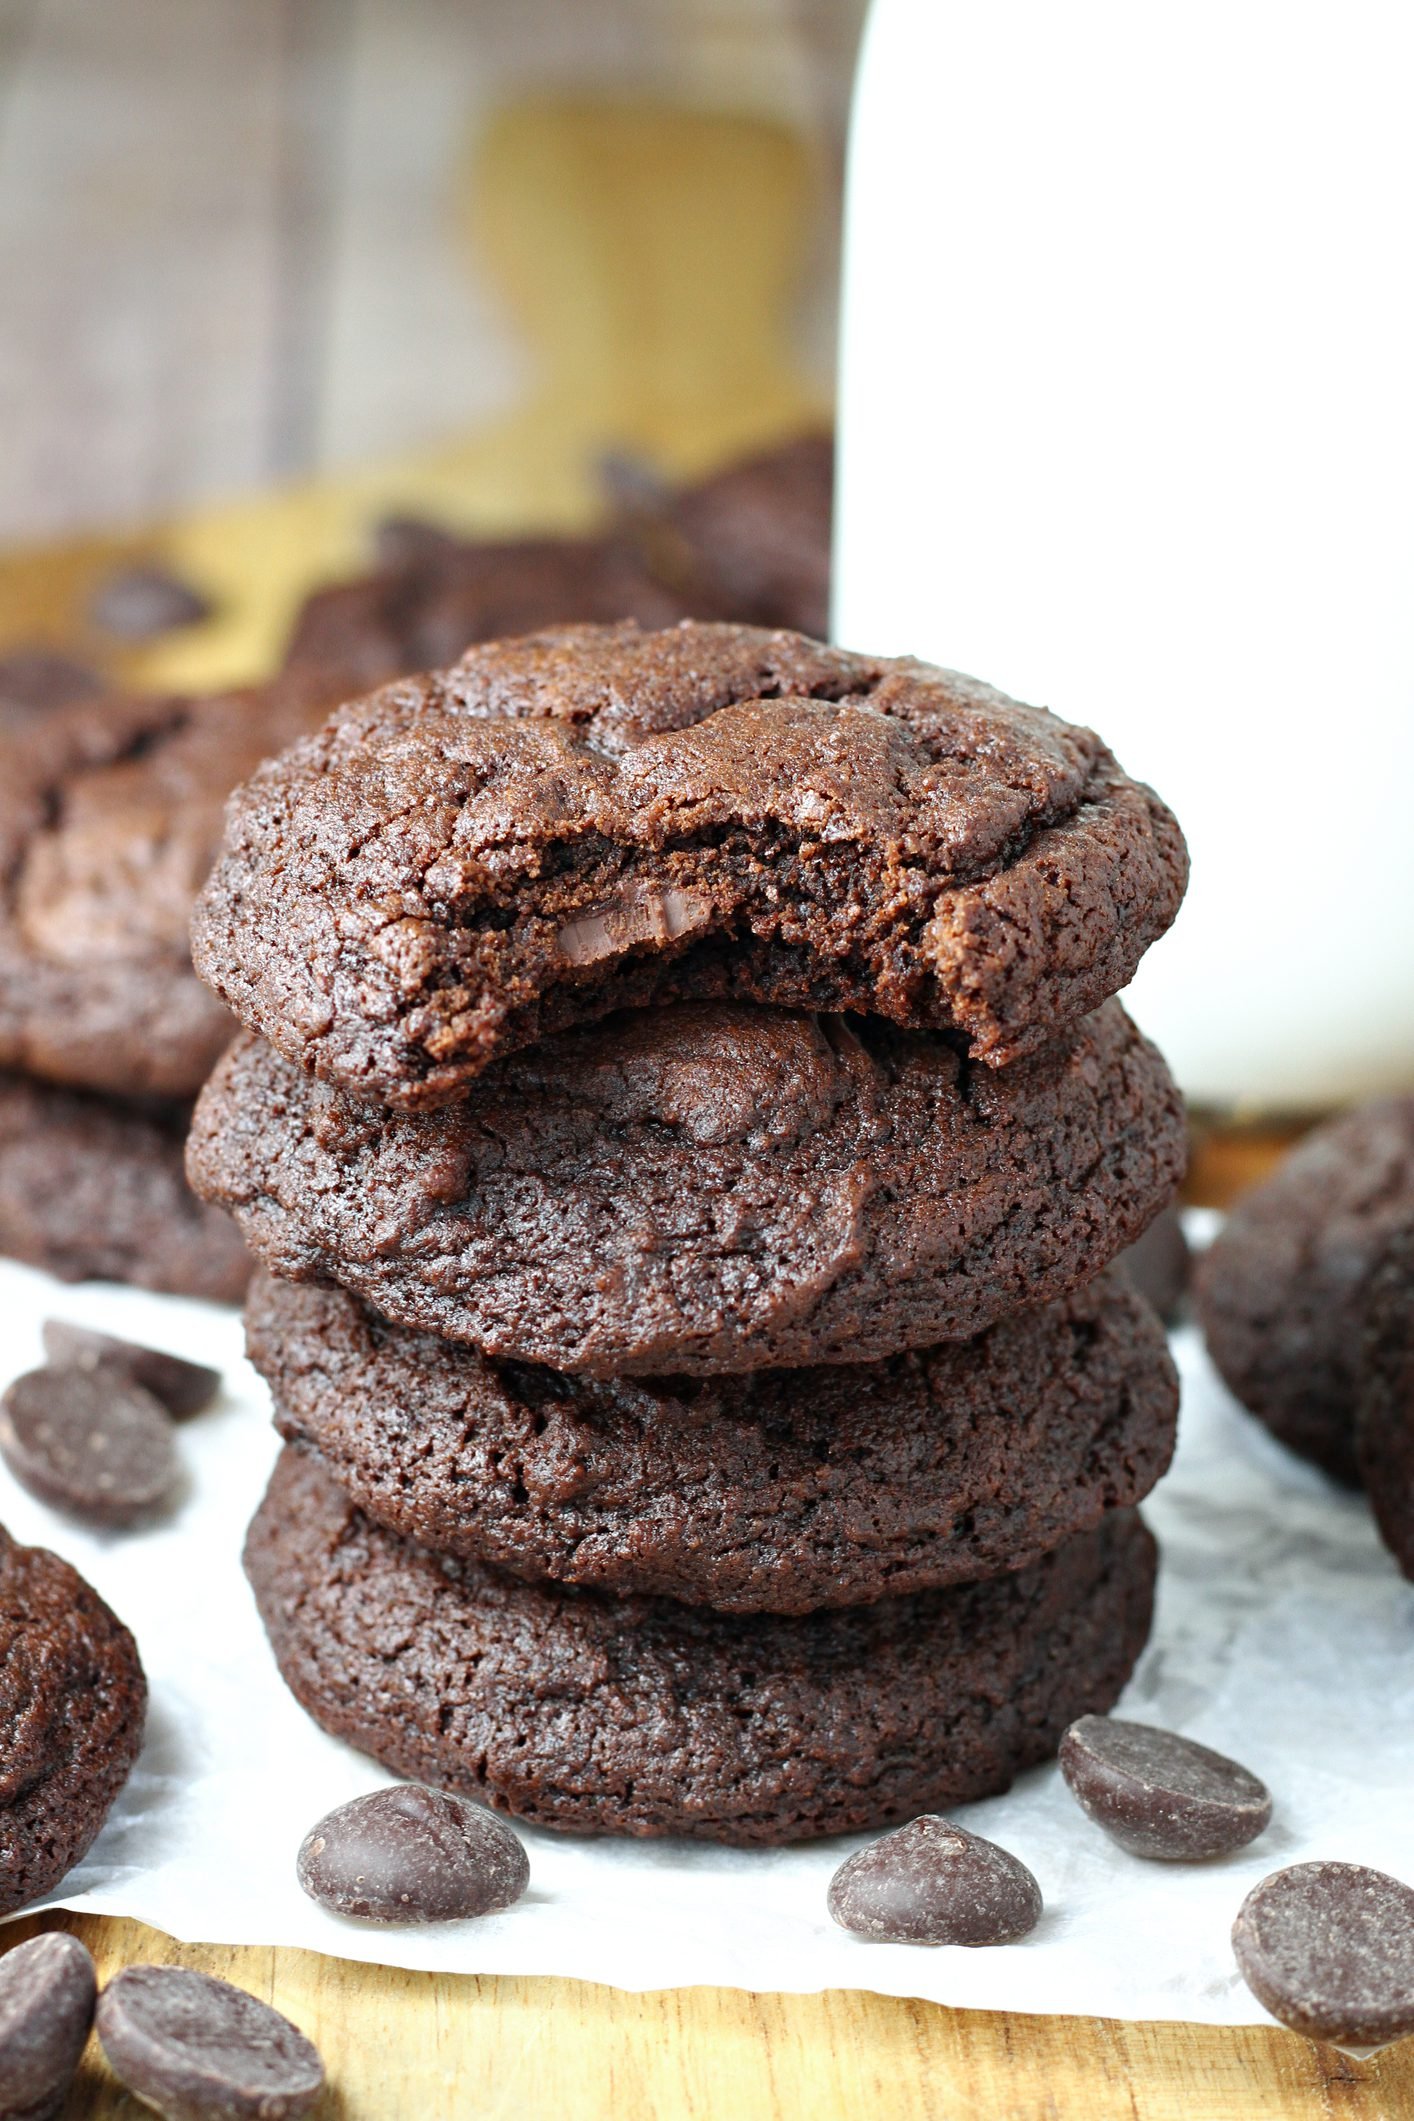
Irresistibly Rich Brownie Style Double Chocolate Cookies
Ingredients
- 1 cup all-purpose flour
- 1/2 cup unsweetened cocoa powder
- 1/2 tsp baking soda
- 1/4 tsp salt
- 3/4 cup butter, softened
- 1 1/2 cups granulated sugar
- 2 large eggs
- 2 tsp vanilla extract
- 1 cup semi-sweet chocolate chips
- 1/2 cup white chocolate chips
- 1 cup whole milk, chilled for serving
Instructions
- 1Heat oven to 350°F and line two baking sheets with parchment paper.
- 2In a medium bowl, sift together flour, cocoa powder, baking soda, and salt. Set aside.
- 3Using a hand or stand mixer, beat butter and sugar on medium speed until pale and fluffy, about 3 minutes.
- 4Add eggs one at a time, mixing fully after each addition, then blend in vanilla extract.
- 5Reduce mixer speed to low and slowly incorporate the dry ingredients until a soft dough forms.
- 6Using a spatula, gently fold in both semi-sweet and white chocolate chips.
- 7Scoop rounded tablespoons of dough onto prepared sheets, leaving 2 inches between each cookie.
- 8Bake 10-12 minutes until edges are firm but centers appear slightly underdone.
- 9Rest cookies on the pan for 5 minutes before moving to a wire cooling rack.
- 10Pour ice-cold milk and serve cookies warm for the ultimate dunking experience.
Notes
– For extra fudgy cookies, pull them out closer to 10 minutes as they continue setting while cooling. – Refrigerating the dough for 30 minutes before baking deepens the chocolate flavor and prevents spreading. – Store cookies in an airtight container with a slice of bread to keep them soft for up to 5 days.


