

My husband asked for this three times in one week.
I used exactly 1 tablespoon of red food coloring and the batter turned this deep, almost alarming shade of crimson — like something you’d see in a horror movie, not a dessert. The first time I made it, I forgot to let the cake cool before breaking it apart, and the whipped cream melted into a puddle before I even got it to the table.
Still ate it.
But the second time — that’s when I figured out the layers, the timing, the order of everything — and suddenly this went from “a nice idea” to something I actually want to tell people about.
What actually happens when you break the cake apart.
You bake the cake first, whole, then you break it into rough chunks, and something strange happens: the crumbles end up softer than slices.
They absorb the cream from below and the berry juice from above, and after even 10 minutes in the fridge the whole glass kind of melds together — not soggy, just settled. You wouldn’t get that from neat cubes.
I thought about cutting them into uniform pieces — actually no, I’m glad I didn’t. The rough edges are the whole point.
About the berries.
Two tablespoons of granulated sugar, all three berries, toss, wait five minutes.
My sister thought it needed more lemon — I tried a splash the third time and she was right, honestly, it does make the fruit taste more like itself. I’m adding it every time now.
Quick tip: Let the berries sit the full five minutes — don’t rush it — because that’s when the juice releases and you get that syrupy coating that soaks into the cake chunks below.
The cream has to be cold. Really cold.
I’ve whipped cream that wasn’t cold enough — the bowl was room temperature — and it took forever, and the peaks were soft and it slid off everything within about four minutes of assembling.
Cold bowl, cold cream, whip until stiff peaks hold their shape and don’t droop when you lift the beater. That’s the only version that works in a layered cup.
Have you ever had whipped cream collapse mid-layer? Because it’s more disheartening than it has any right to be.
It looked wrong. It wasn’t.
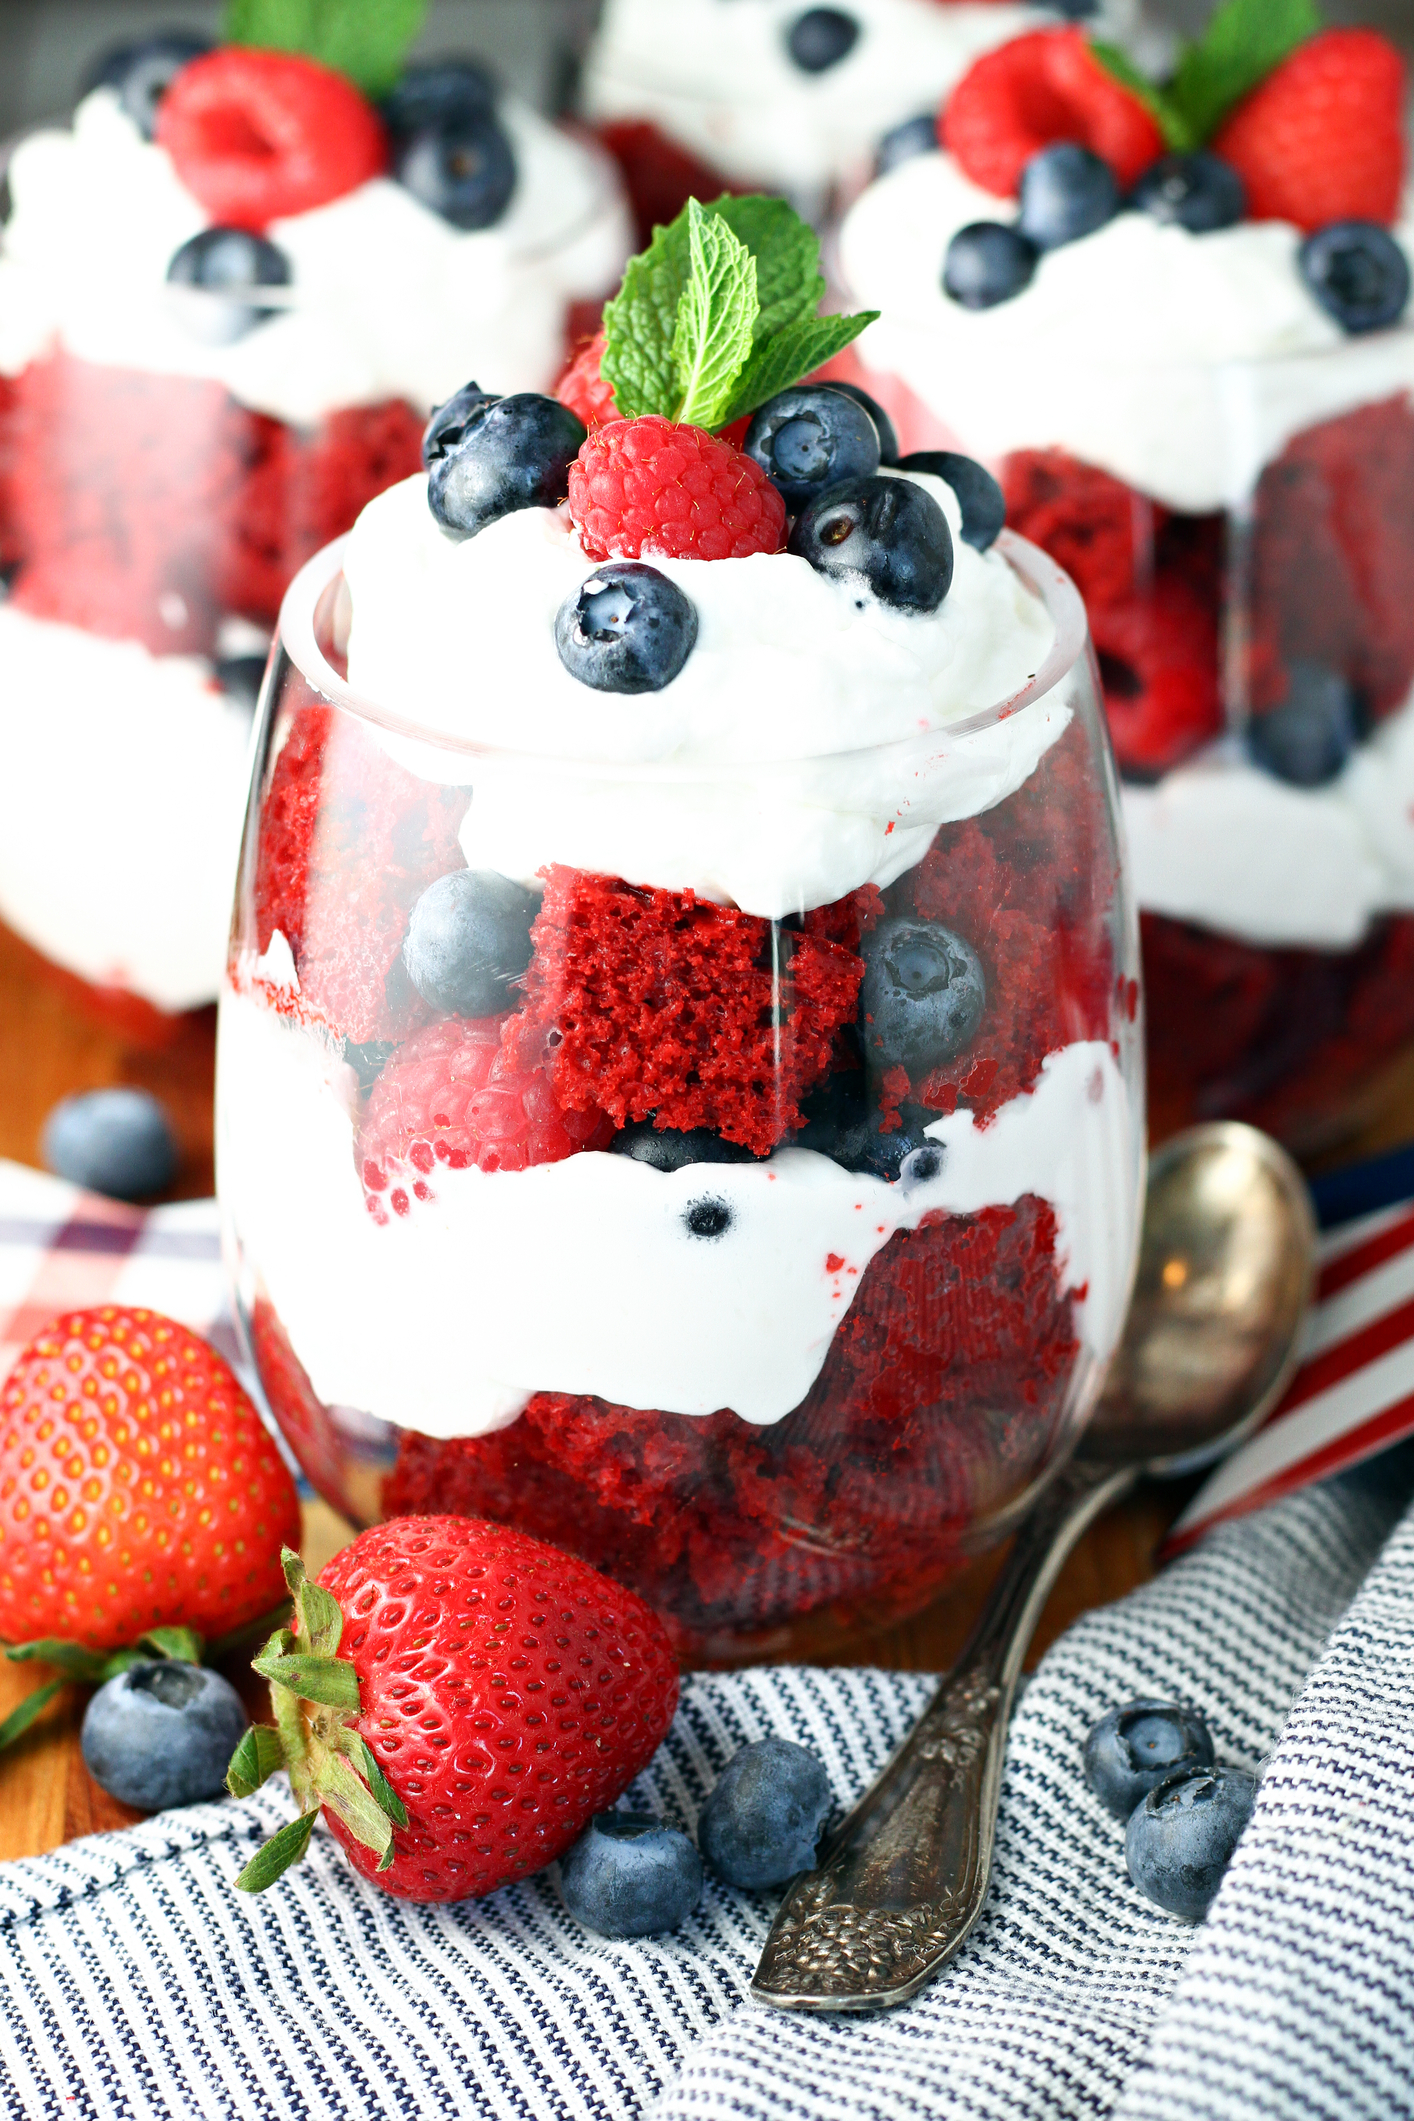
The red cake against the white cream against the dark blueberries — I wasn’t sure it would look like food.
It does. It looks like a thing you’d order somewhere, and it took maybe 45 minutes start to finish once the cake was already baked, which is the part I keep telling people when they assume it’s complicated.
Not complicated. Just layered, which is a different thing entirely.
A thing only someone who made it would know.
The glasses — I put mine in the freezer for 10 minutes before assembling — and the cream that touches the cold glass stays firmer longer, so you can actually see the layers from the outside instead of watching them smear.
Nobody told me that. I found it by accident when I ran out of counter space and stuck the glasses in there while I finished whipping the cream,
and I’ve done it on purpose every single time since.
—
How to Make Layered Berry Cream Cups With Crimson Velvet Cake
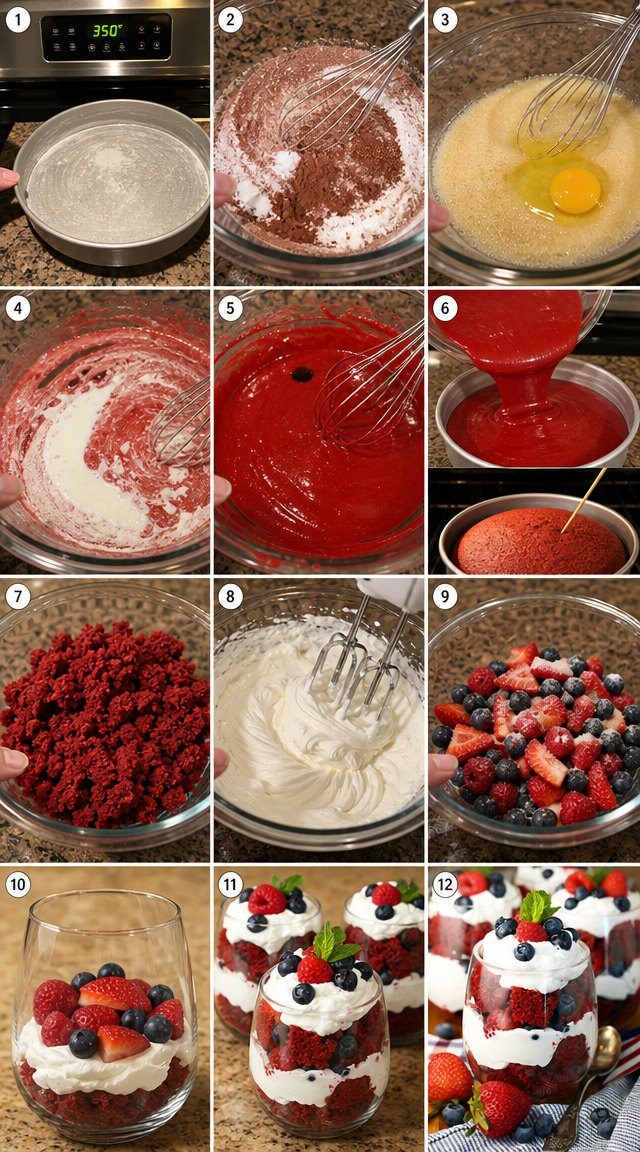
Step 1: Heat your oven to 350°F and grease and flour a 9-inch round cake pan. Don’t skip the flour — I’ve tried just greasing it and lost the bottom of the cake to the pan twice. Get both.
Step 2: Sift together 1 3/4 cups all-purpose flour, 1/2 teaspoon baking soda, 1/2 teaspoon salt, and 2 tablespoons cocoa powder into a large bowl. Sifting isn’t optional here — the cocoa clumps if you skip it, and you’ll get bitter little pockets in the finished cake.
Step 3: In a separate bowl, whisk together 1/2 cup vegetable oil and 1 cup sugar until smooth, then beat in 1 egg thoroughly. It should look glossy and a little thick at this point. (If it looks broken or curdled, your egg was too cold — let it sit out for 10 minutes next time.)
Step 4: Gradually fold the dry ingredients and 1/2 cup buttermilk into the wet mixture, alternating between the two and starting and ending with the flour blend. This is the kind of step where I always remind myself not to overmix — stop when it just comes together.
Step 5: Mix in 1/2 teaspoon vanilla extract, 1 tablespoon red food coloring, and 1 tablespoon white vinegar until the batter is an even, deep red color throughout. The vinegar reacts with the baking soda — that’s not a mistake, that’s chemistry doing its job.
Step 6: Pour the batter into the pan and bake for 28–30 minutes, until a clean toothpick comes out without wet batter clinging to it. Mine was done at 29 minutes in my oven, which runs slightly hot — start checking at 27.
Step 7: Let the cake cool completely before breaking it into rough, bite-sized chunks. I mean completely — not “mostly.” Warm cake plus whipped cream equals a mess I’ve already described above and don’t want to revisit.
Step 8: Beat 2 cups heavy whipping cream with 3 tablespoons powdered sugar and 1 teaspoon vanilla until you get stiff peaks that hold without drooping. I honestly love this part — it takes about 3 minutes with a hand mixer on high and smells incredible.
Step 9: Toss 1 cup sliced strawberries, 1 cup blueberries, and 1/2 cup raspberries with 2 tablespoons granulated sugar in a bowl. Rest for 5 full minutes. (Add a small splash of lemon juice here — it makes the berries taste brighter and I wish I’d known this from the start.)
Step 10: Start building: a base of cake crumbles, then whipped cream, then a spoonful of macerated berries with some of their juice. Repeat the layers until your glass is full. Are you a big-layer or small-layer person when it comes to cups like this? Share below!
Step 11: Finish with a generous crown of whipped cream and a colorful scatter of berries on top. Serve right away or cover and chill until you’re ready — they hold up in the fridge for a few hours without losing their shape if the cream was whipped properly.
Ways to Change It Up
Try this: Swap the fresh berries for a quick cherry compote — just pit some cherries, cook them with a tablespoon of sugar for about 8 minutes, let it cool, and layer it in. The tart cherry against the red cake is something else.
Try this: Add a layer of cream cheese whipped into the heavy cream — about 3 ounces softened, beaten in before you add the powdered sugar — for a tangier, denser cream that leans more cheesecake than whipped topping.
Try this: Use chocolate shavings between the layers instead of or alongside the berries for something that goes in a completely different direction — richer, darker, more of a dessert-for-dessert situation.
Which would you go for? Drop it in the comments.
How to Serve It
Serve these in clear glasses — tumblers, mason jars, even wine glasses — so the layers actually show. Half the reason people reach for these is the way they look from the outside.
They work well at a casual dinner as a pass-around dessert, but I’ve also made a big batch for a birthday and just set them out on a counter with small spoons and let people grab one when they wanted.
A light dusting of cocoa powder on top of the cream right before serving pulls the red velvet flavor back into the presentation without adding any sweetness. What would you pair it with?
—
Storing It Without Ruining It
If you’ve already assembled the cups, cover them tightly with plastic wrap and refrigerate for up to 6 hours. After that the cake crumbles start to get too soft and the layers lose their distinction — not inedible, just not what you made.
If you want to get ahead, store the components separately: cake crumbles in an airtight container at room temperature for up to 24 hours, whipped cream covered in the fridge for up to a day (re-whip briefly if it deflates), and berries in their macerating juice in the fridge overnight.
Freezing the assembled cups doesn’t work — the cream texture goes grainy after thawing and the berries weep everywhere. The unassembled cake chunks freeze fine for up to a month, though, if you want to prep way ahead.
Have you ever saved leftovers like this? Tell me below!
Mistakes I Made So You Don’t Have To
I once tried to speed-cool the cake in the freezer for 15 minutes instead of waiting for it to cool properly, and the outside got firm but the inside was still warm enough to melt the first layer of cream on contact. The whole first cup looked like soup.
I over-whipped the cream on my second batch — I walked away from the mixer for what felt like 30 seconds — and it went grainy and almost buttery. Over-whipped cream doesn’t recover. Start over, or use it for something else.
I also under-sugared the berries my first time, using just 1 teaspoon instead of the full 2 tablespoons, because I thought I was being health-conscious. The berries stayed tart and dry and didn’t release any juice. It threw off the whole cup. Did something like this happen to you?
Questions I Actually Get About This Recipe
Can I use a box mix for the red velvet cake part? Yes, and I’ve done it when I was short on time — it takes about 20 minutes less overall and the layered cup honestly hides the difference better than you’d think. But the from-scratch version has a slightly denser crumb that holds up better under the cream and berry juice.
How far ahead can I make these? Assembled, about 4–6 hours max in the fridge. Components separately, up to 24 hours. And honestly, assembling them 30 minutes before serving is the sweet spot — they’re cold but the layers haven’t merged yet.
Can I use frozen berries instead of fresh? It depends on how you use them — if you thaw them first and let them drain, they macerate fine and the flavor is there. But they release a lot more liquid than fresh, so your cups may get watery fast. Fresh is worth it here if you can get them.
Does the white vinegar actually matter? Yes. It reacts with the baking soda to help the cake rise, and it also reacts with the cocoa and food coloring to deepen the red color. I tried skipping it once. The cake was flatter and the color was duller. Put it in.
What size glasses work best? I use 10–12 ounce glasses and get about 6 servings from this recipe. Smaller glasses mean more layers but less of each — which actually looks really nice for a dinner party. But if you’re feeding people who want a real dessert, go bigger.
Can I make this without a hand mixer for the cream? You can whip cream by hand — I’ve done it — but it takes about 8–10 minutes of solid effort and your arm will know about it the next morning. A hand mixer gets you there in 3 minutes. Use one if you have one.
Which answer helped you most?
Go make it this weekend.
This is the kind of dessert that looks like you spent hours on it and actually takes under an hour if the cake is already baked.
Fun fact: Cocoa powder — even just 2 tablespoons — is enough to trigger the chemical reaction with red food coloring that gives red velvet its distinctive deep hue. Without it, the food coloring just looks flat and pink.
The layers, the color contrast, the way the berry juice slowly seeps down into the cake crumbles — it’s a dessert that gets better the longer it sits, up to a point.
My husband asked for it again last Tuesday. I made a half-batch on a Wednesday afternoon and it was gone by 8pm.
Will you make this soon? Drop a comment and let me know how yours turned out — especially if you tried the cherry compote version, because I want to hear about it.
Happy cooking! —Marina Caldwell
Layered Berry Cream Cups With Crimson Velvet Cake
Ingredients
- 1 3/4 cups all-purpose flour
- 1/2 teaspoon baking soda
- 1/2 teaspoon salt
- 2 tablespoons cocoa powder
- 1/2 cup vegetable oil
- 1 cup sugar
- 1 egg
- 1/2 cup buttermilk
- 1/2 teaspoon vanilla extract
- 1 tablespoon red food coloring
- 1 tablespoon white vinegar
- 2 cups heavy whipping cream
- 3 tablespoons powdered sugar
- 1 teaspoon vanilla extract
- 1 cup fresh strawberries, sliced
- 1 cup fresh blueberries
- 1/2 cup fresh raspberries
- 2 tablespoons granulated sugar
Instructions
- 1Heat oven to 350°F and prepare a greased, floured 9-inch round cake pan.
- 2Sift flour, baking soda, salt, and cocoa powder together into a large bowl.
- 3Whisk oil and sugar in a separate bowl until smooth, then beat in the egg thoroughly.
- 4Gradually fold the dry ingredients and buttermilk into the wet mixture, alternating between the two and beginning and ending with the flour blend.
- 5Mix in vanilla extract, red food coloring, and white vinegar until the batter is uniform in color.
- 6Transfer batter to the pan and bake 28-30 minutes, testing doneness with a clean toothpick.
- 7Allow cake to cool fully before breaking it apart into rough, bite-sized chunks.
- 8Beat heavy cream with powdered sugar and vanilla until firm, stiff peaks hold their shape.
- 9Combine all fresh berries with granulated sugar, tossing gently and resting 5 minutes to macerate.
- 10Begin building each serving glass with a base layer of cake crumbles followed by whipped cream and sugared berries.
- 11Continue layering until glasses are full, finishing with a generous cream crown and a colorful berry topping.
- 12Serve right away or chill covered until needed.
Notes
– For cleaner, more defined layers, chill your serving glasses in the freezer for 10 minutes before assembling. – The cake crumbles can be baked a day ahead and stored in an airtight container to save time. – A splash of lemon juice added to the berries during macerating brightens the fruit flavor significantly.


